Making textures with WadMaker Last edited 3 years ago2021-10-13 21:55:45 UTC
You are viewing an older revision of this wiki page. The current revision may be more detailed and up-to-date.
Click here to see the current revision of this page.
Using WadMaker to make Half-Life and Counter-Strike textures
WadMaker is a new tool for making Half-Life and Counter-Strike textures. It's designed to make creating and updating wad files easier and faster than with established tools like Wally. It can convert a directory full of images into a wad file with just a single action. Let's see how that works:1. Installing WadMaker
Start by downloading the latest version of WadMaker from here: WadMaker_SpriteMaker_1.2.zip. Then extract the zip file somewhere on your computer, for example toC:\HL\Tools (so you'll end up with a C:\HL\Tools\WadMaker_SpriteMaker_1.2 directory):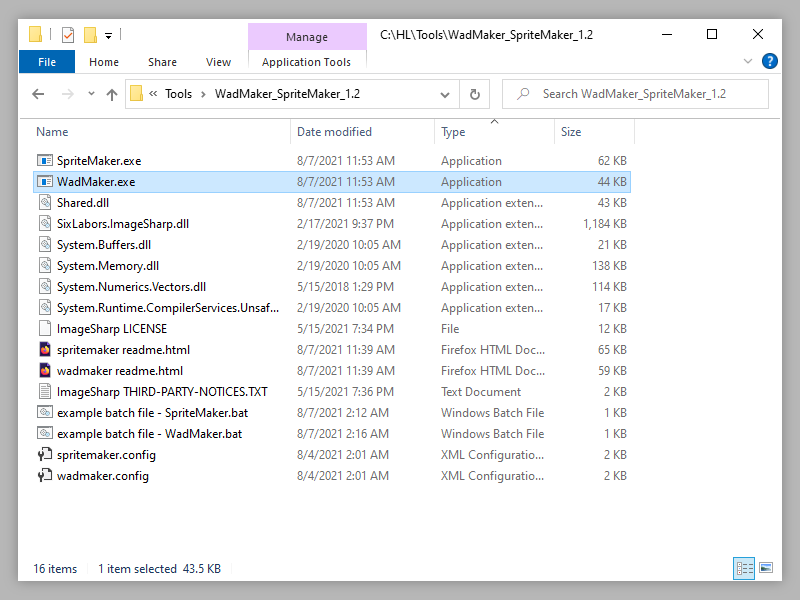
2. Creating a directory for your texture images
Next, create a directory for your texture image files. The name of the directory will be the name of your wad file. Then find some image files and put them in the directory you just created. WadMaker supports png, jpg, gif, bmp and tga, but also Photoshop and Krita files. If you're using Gimp, Aseprite or another program then you'll need to configure a conversion tool first (see the documentation). Here, I've created a directory namedC:\HL\Textures\chapter1 and added a couple of png and Krita files to it: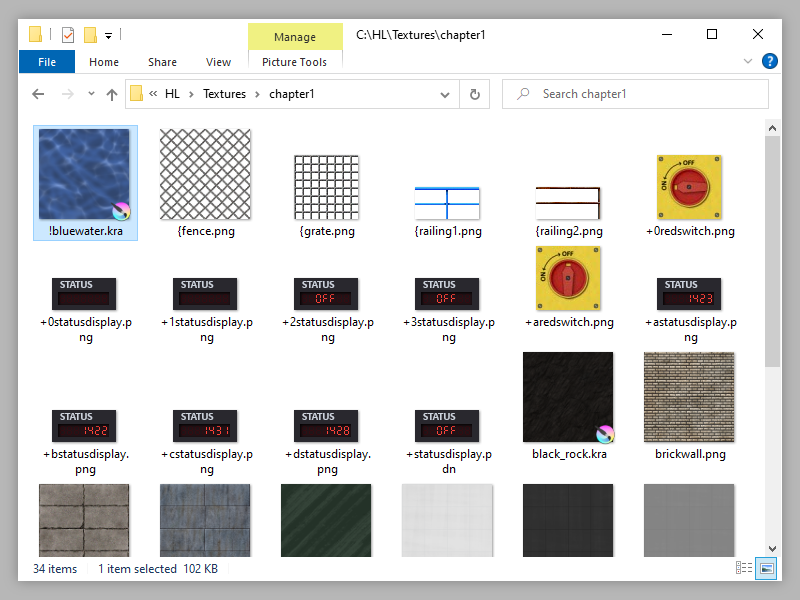
3. Creating a wad file
Now drag this directory on top ofWadMaker.exe: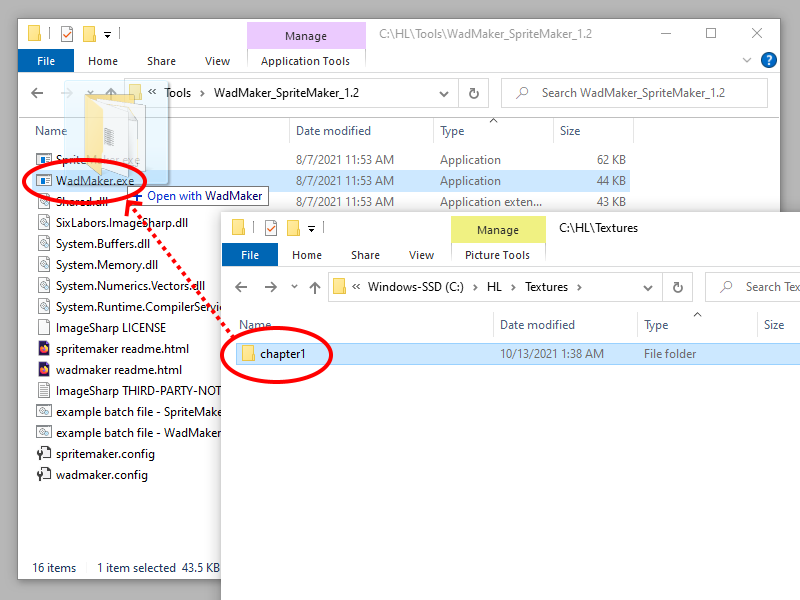
chapter1.wad file will appear next to the images directory:

4. Putting a wad file in the right location
Now copy the wad file to yourHalf-Life\valve or Half-Life\cstrike directory.It's also possible to let WadMaker do this for you. Create a batch file (or copy
example batch file - WadMaker.bat), change its name to update chapter1 wad.bat, open it with a basic text editor like Notepad, and add the following lines:
"C:\HL\Tools\WadMaker_SpriteMaker_1.2\WadMaker.exe" "C:\HL\Textures\chapter1" "C:\Program Files (x86)\Steam\steamapps\common\Half-Life\valve\chapter1.wad"

PAUSEPAUSE line causes the console window to stay open until you press a key, so you don't need to open the log file to see if anything went wrong.Now, instead of dragging the images directory on top of
WadMaker.exe and then copying the wad file manually, you can double-click this batch file, and it will automatically create or update chapter1.wad in your Half-Life\valve directory. If the wad file already exists then WadMaker is smart enough to only process added, modified or deleted images, so updating usually only takes a few seconds.
5. Adding a new wad file to J.A.C.K. or Hammer
Before you can use a new wad file, you'll have to add it to your level editor.In J.A.C.K., go to
Tools -> Options to open the configuration window. Select the Game Profiles tab, then select the game configuration that you want to modify, and then go to the Textures tab in the Configuration Settings section below. Press the Add Files... button, navigate to your chapter1.wad file and add it to the list. Then press the OK button: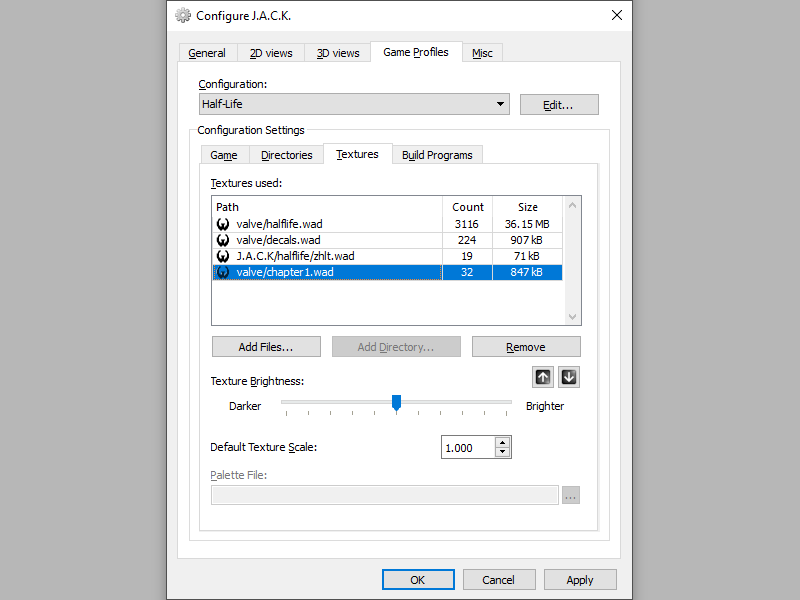
Tools -> Options, select the Textures tab, click the Add WAD button, add your chapter1.wad file to the list, then press the OK button.Unfortunately, Hammer and J.A.C.K. will not automatically refresh their textures when a wad file is updated, so you'll have to restart your editor each time you update a wad file.
6. Creating different texture types
Half-Life uses an 8-bit indexed format for its textures, so each texture has a limit of 256 colors. With other tools it's sometimes necessary to manually create or adjust palettes, but WadMaker knows how to create palettes for all texture types that Half-Life supports. It also accepts images with transparency, so you don't need to mark transparent areas with a blue color either.Let's take a look at each texture type:
6.1. Normal textures
The most common texture type, used for almost anything: walls, floors, ceilings, doors, and so on.This type does not support transparency by itself, but it can be used for glass and other translucent objects by applying it to brush entities that have their
Render Mode set to Texture. The overall transparency is controlled by the entity's FX Amount.It can also be used to simulate light beams and glowing lights, when combined with the
Additive Render Mode. In this mode, the value of each pixel will be 'added' to whatever is behind it. Black pixels won't add anything, so they're invisible, but the brighter a pixel is, the more 'brightness' it will add.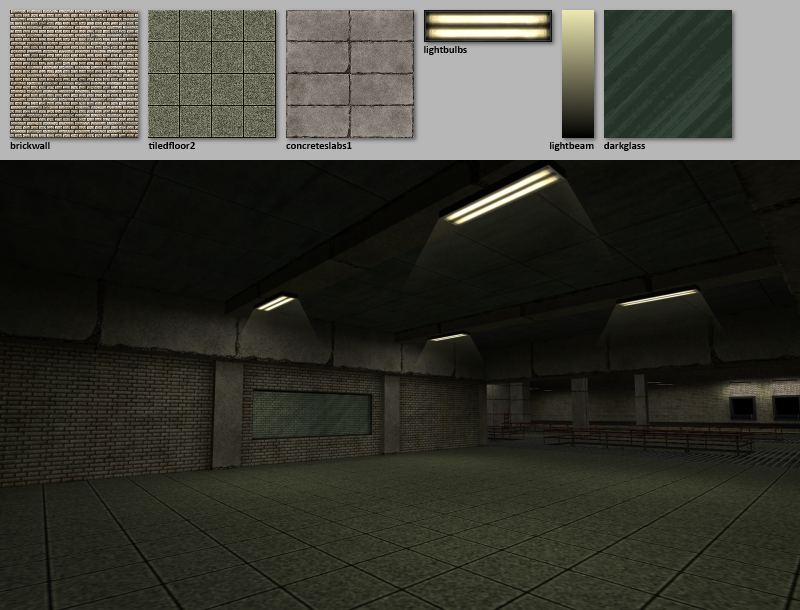
6.2. Transparent textures
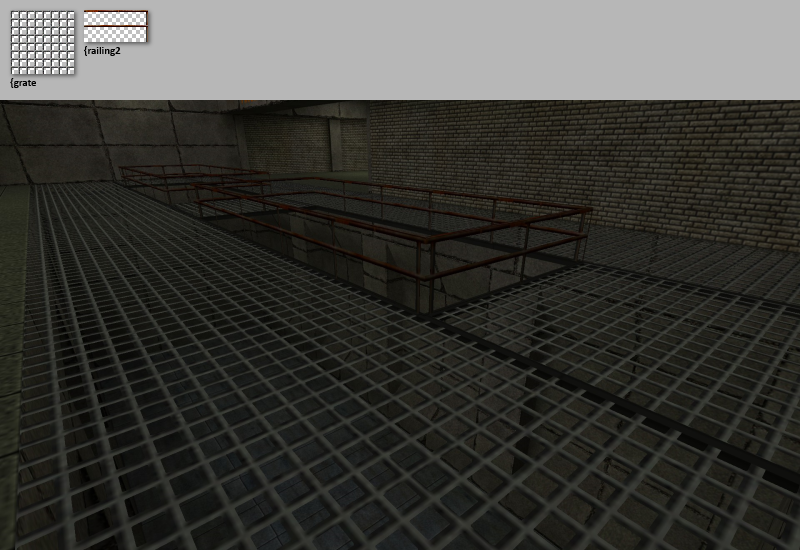
Textures whose name starts with a{ can contain transparent areas - the final color in the palette is reserved for transparent pixels. This texture type is commonly used for fences, gratings and ladders. Transparent textures only work as expected when applied to brush entities that have their Render Mode set to Solid and their FX Amount set to 255.Most tools require transparent parts to be marked with a specific blue color (RGB: 0 0 255), but WadMaker expects images with an alpha channel. By default, any pixel with an alpha value below 127 (any pixel that's more than 50% transparent) will become transparent.
6.3. Water textures
Textures whose name starts with a! will produce a wave effect when applied to a func_water entity. The 4th and 5th palette slots are used to control the water fog color and intensity. WadMaker will automatically set these colors based on the average color and brightness of the image. Dark textures are given a higher fog intensity, which results in a lower underwater view distance.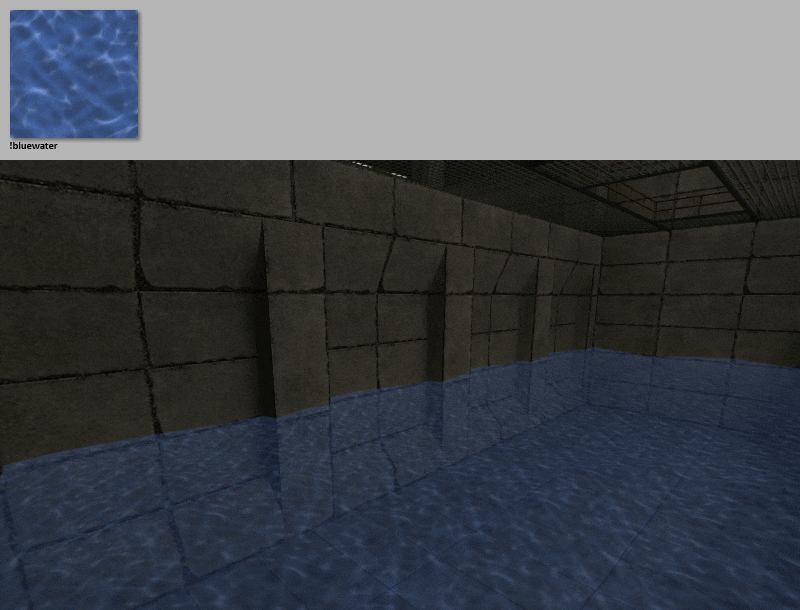
6.4. Scrolling textures
Textures whose name starts withscroll (lowercase!) will scroll when applied to a func_conveyor entity. This is obviously useful for creating conveyor belts, but combined with the Texture and Additive render modes they can also be used for waterfalls and other special effects.Scrolling textures always move towards the right side of the texture, so they'll need to be rotated in the editor to point them in a specific direction. Their scrolling speed is determined by the
func_conveyor's Conveyor Speed attribute.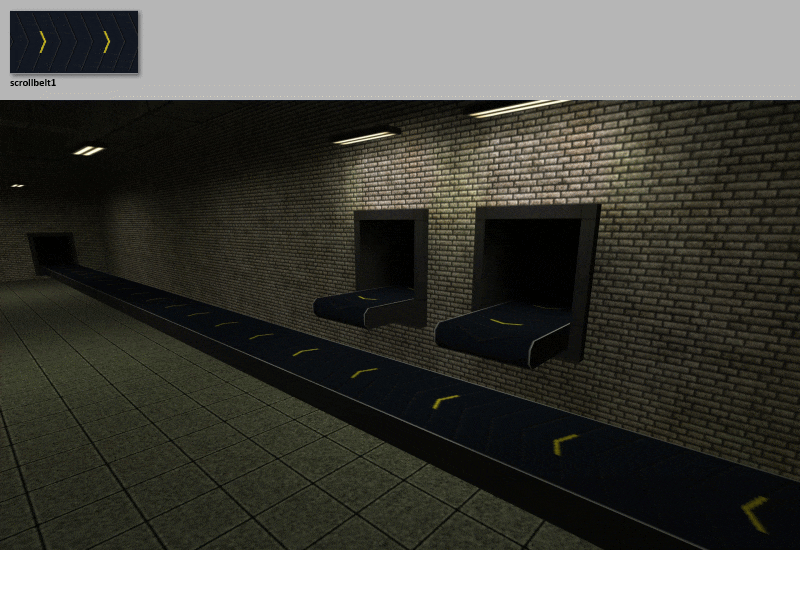
6.5. Animating and toggling textures
Sets of textures whose name starts with a+, followed by a digit (0 - 9) or letter (A - J), can be used for short animations (up to 10 frames). They can also be used to toggle between a numbered and a lettered texture (or sequence) when applied to an entity, such as func_button. Other than that, they're similar to normal textures.The first frame must start with either
+0 or +A, and there should be no 'gap' in the numbering of subsequent frames. Texture animations always play at 10 frames per second. If you need longer animations, or a different framerate, then oriented sprites are a good alternative.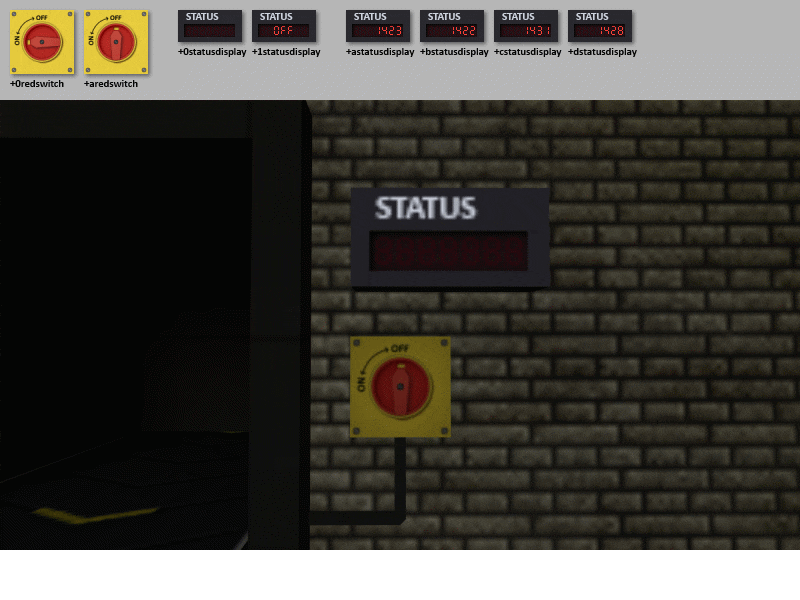
6.6. Decal textures
Only textures indecals.wad can be used as decals, so custom decals are normally only found in mods. If you want to use custom decal textures but you're not making a mod, then you can use oriented index-alpha sprites instead.Decals can have 256 levels of transparency, but only a single color. They're used for things like bullet holes, scorch marks, blood stains, painted signs, and so on. They can be placed with the decal tool (Shift + D) or by manually placing
infodecal entities. The scale and orientation of a decal depends on the texture settings of the surface its applied to.Most workflows involve the creation of a grayscale palette, where the final color is set to the decal's color. However, WadMaker expects images with an alpha channel, and will use the average color of the input image to set the decal color. Also, decal texture names typically start with a
{. This is not strictly required, but without it J.A.C.K. won't display decals correctly.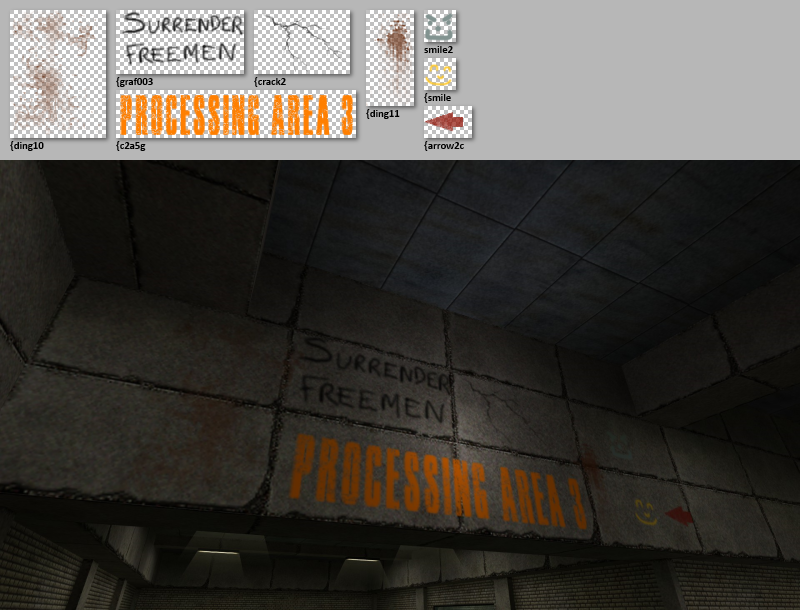
6.7. Random tiling textures
Sets of textures whose name starts with a-, followed by a digit (0 - 9), are tiled randomly. The game will randomly pick a variant for each face, so large surfaces will look less repetitive. However, this only works well in software mode. With hardware acceleration, different variants often do not line up correctly, creating ugly seams. The random selection also changes each time the map is (re)loaded. This type is best avoided nowadays.
6.8. Fullbright textures
Textures whose name starts with a~ were originally meant to contain fullbright pixels, but this never made it into the final game. Instead, a similar effect can be achieved with the Additive render mode.
6.9. Qpics
All of the above texture types are 'miptex' types: textures with 4 mipmap levels, whose width and height must be a multiple of 16. Qpics are a different kind: they do not contain mipmaps and can be of any size. Half-Life only used qpics for its menu and console background back in the WON days, but they're no longer used. WadMaker currently does not support qpics.6.10. Fonts
Wad files can also contain texture fonts, but like qpics, they are no longer used. WadMaker currently does not support texture fonts.7. Conclusion
7.1. Summary
To recap:- Create and modify texture images
- Drag the images directory onto WadMaker.exe
- Copy the resulting wad to your game directory (or use a batch file to automate this)
- Restart your level editor
- Continue mapping!
7.2. Credits
Thanks to:- Yuraj, for documenting the wad3 file format
- The303, for his tutorials and information about special texture types
- The folks at TWHL for their bugreports, feedback and various bits of information
- Categories
- Tutorials
- Goldsource Tutorials
- Textures
9 Comments
You must log in to post a comment. You can login or register a new account.
Also note that the maximum texture size is 512x512 (1024x256 and 2048x128 also work, so the actual limit is probably something like '262144 pixels').
If you're already past that then resize to multiples of 16.
Protip: use a calculator.