Tutorial: In the Beginning Part 6 Last edited 21 years ago2002-12-05 05:00:00 UTC
You are viewing an older revision of this wiki page. The current revision may be more detailed and up-to-date.
Click here to see the current revision of this page.
Download attachment
If you take a look at the entity list you will see that there are lots of 'monster' entities. Now that you have created a simple map you probably want to know how to get it to interact with the player (or in other words, put in something to blow away). While it can be fun running around looking at great scenery and impressive detail, it becomes boring after a while. So this tutorial is a really basic guide to placing monster entities.First up, we are going to look at how a monster_barney can make a map interesting. Use your entity tool to place a monster_barney in the second room. Leave all of his properties as default. Run the map, pick up the crowbar and go to Barney. First up try getting him to follow you into the other room with the Use key. If that isn't successful give him whack on the forehead with the crowbar. Now run back into the other room.
A couple of things you have probably noticed already: getting him to follow you was like pulling teeth and then once you had banged him on the head, he pulled out his gun but didn't chase you. Main reason for this is that poor old Barney didn't know where to go.
Info_node Placement
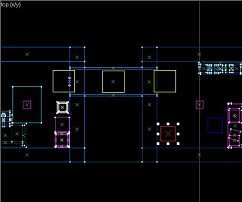 Info Nodes
If you compile the map now and talk to Barney with the Use key and move into the other room he should follow you down the corridor. If you hit him with the crowbar, he will draw his gun and come looking for you. [Note that info_nodes and path_corners are not interchangable: the former are used by all monsters that need to act on AI, and move dynamically, while the latter are used to specify movements - Barney will follow the path_corners until you bash him, and then he will rely on the info_nodes to hunt you down.]
Info_air_nodes work with flying monsters like the monster_alien_controller.
Path_corners
You can get Barney to follow path_corner entities as though he was checking security. Just place one at each end of the corridor (In their properties name them p1 and p2 and set their next stop targets. In this case p1 with a next stop of p2 and p2 with a next stop of p1). In Barney's properties, change his Target to p1. If you compile the map now and don't move, Barney will be walking up and down the corridor. If you approach him, he will stop following the path_corners. All monsters do this to some extent.Monster_scientists behave in pretty much the same way and you can make them follow path_corners or info_nodes.
Monster_human_grunts behave slightly differently. First of all you don't really interact with them, you try to kill them. So the main thing is to decide if you want them to chase after the player. If so, info_node placement is important (and reading the file included with the example map for this tutorial will save time). A good coverage of info_nodes (maximum 128 visible at any point) within a room will make it impossible for the player to hide. The grunts will attack until killed, or you get capped, whichever is first.
Monster Properties
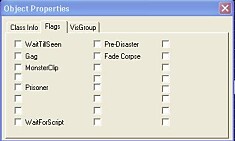 Flags
Flags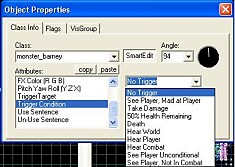 Properties
I have included a test room map to show how info nodes, Trigger Conditions and monstermaker entities work. Kill the first monster_houndeye and watch the fun start.
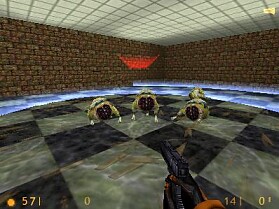 Houndeye Test Map
Now you're an "Expert mapper" like Atom, SlayerA and me! Well, better than me, but not quite as good as the other guys.

Try: Dimensions to help you make it look right.
Try: Environment to get the sky right.
Try: Dark Outdoor Maps to add the night feel..
Try: Compiling Introduction to make the most of your compile.
Try: How do I run an HL.bsp? to help you run the .bsp you have created.
Have fun, and remember that if you have questions or comments you can let us know through the forums.
Comments
You must log in to post a comment. You can login or register a new account.