Tutorial: In the Beginning Part 2 Last edited 5 years ago2019-04-22 05:56:59 UTC
You are viewing an older revision of this wiki page. The current revision may be more detailed and up-to-date.
Click here to see the current revision of this page.
So you managed to compile the map from Part 1 and find yourself standing in an awful pink room. If you didn't, and thought you would just jump to the next tutorial because it has to be the fault of Hammer (It wasn't me Mum....honest!) then I suggest you get aquainted with the Tutorial: Setup Guide: Hammer and Tutorial: Compiling Introduced before you read any further. The most commonly asked questions on the forums always have something to do with Setup or Compiling Problems.
Reopen that RMF file and let's go to work on it. First thing we need to do is change the grid size.To do this use your [ and ] keys to adjust the setting. You should find that the cube you created fits exactly in four of the grids.
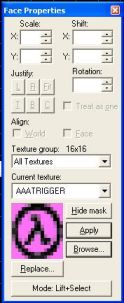
Now for a texture. Select your cube. Only got one wall? Click on the Ignore Group button. You can call up your texture application tool by pressing Shift + A or by clicking the button on the toolbar.You should be presented with the default aaatrigger. Select the Browse button and look for a texture you like. I have used crete3_wall01b. When you have found the texture you want just double click on it to select. It should appear just above the Replace button. Ok, playing with textures is a tutorial in it's own right, so for now just click Apply and your cube should be that texture.
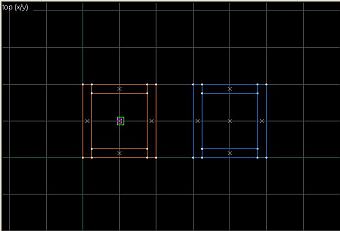
Now create a second room. Do this by cloning. First, select the existing room. Then, while pressing the Shift key, click and drag with the left mouse button. Place the second room 128 units away from the first room. Your top view should look like the one below.Now, we need to make a hole in each room so we can connect them together. If you have read the hints and tips at various other sites you will know that carving is a mortal sin. The idea is that you should construct each brush individually. This makes sense, especially when you are dealing with more intricate work. But today we are going to carve... just remember to carve sparingly later on, and only when you are making holes in solid blocks. Carving cylinders can lead to all sorts of problems.
First, create a brush that displaces the area that you want to carve. It's a good idea to make the brush big enough for the player to move through.
TIP: Take a look out our list of Half-life dimensions. Keep them handy. The minimum height of an overhead object in the standing position is 73 units and the minimum width is 33 units.
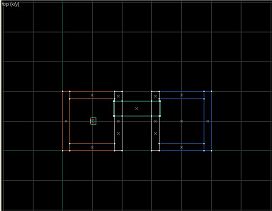
In this example I have created a brush that is 200w 64l 96h and placed it so that it is just above the floor brush and is slightly off center and just pierces each of the walls. Now, click the selected object to highlight it, and select Carve from the menu. This will cut out a hole from each wall, leaving the carving object in place. Click on the carving object again to select it and choose Make Hollow from the tools menu. You will be asked to provide a wall thickness. I have used 4 for this example because that will make the walls 4 units thick and still leave the corridor big enough to move through. [Note: don't use negative numbers for this as the parts of the corridor extending into the rooms will intersect the rooms' walls. You could optionally resize the carving block before hollowing so that it just touches the outside of each room, then holow to -32 or something].
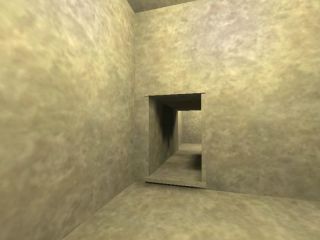
Great, now we have a hollow object connecting both the rooms but if you look at the corridor in Camera view, you won't be able to see through. To correct this just click on Ignore Group and highlight the end brush of the new corridor and delete it. Do the same with the redundant wall brush and the other wall brush and end. Be really careful when you're doing this - make sure that the brush you delete is the right one. Use all the views to avoid problems (this is where Undo Delete comes in handy).Notice how the carving has removed the wall brushes from the original cube group and created several other brushes. This is one of the reasons that carving can be problematic. A 'leak error' reported during compiling, more often than not, will be caused by moving a brush that has been affected by a carve. I make a habit of extending brushes into walls after carving, to help with inadvertent shifts of the main group.
Anyway that is it. You can compile and run the map. The second room will be dark unless the light was part of the original cube group. So while pressing the Shift key select the light and drag it across to the new room. Great. Try resizing and making the corridor just big enough to move through.Next we'll look at textures.
Part 3: Basic Texture Application
- Categories
- Tutorials
- Beginner Tutorials
- Goldsource Tutorials
Comments
You must log in to post a comment. You can login or register a new account.


