Tutorial: Basic Logic_Compares and Game_UIs Last edited 1 year ago2022-11-28 20:51:50 UTC
You are viewing an older revision of this wiki page. The current revision may be more detailed and up-to-date.
Click here to see the current revision of this page.
✔️ Download example file
Start by creating a testing room with an info_player_start, a light_environment, and a brush that will later be turned into a func_button. Have a little room to make testing objects.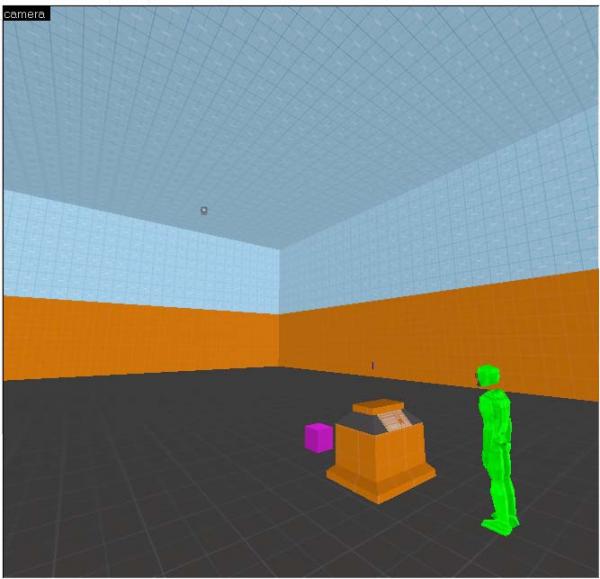 What a beautiful dev room!Now, place a game_ui somewhere within the map. The location is irrelevant, so long as you know where it is.
We will set the name of it to UI. Go to the flags and make sure only Freeze Player and Hide Weapon are checked. Before we get too heavily involved, we'll setup the button before we move on. Hop back over to your button brush and tie it to a func_button. In the flags make sure Dont Move, Toggle, and Use Activates are checked. Nothing else should be checked.
Now we need to set up the outputs to the button. Make sure they're like this: When you activate a game_ui, your four movement keys and two mouse keys are forwarded to the game_ui as outputs that you can trigger. These are the only 6 buttons that a game_ui can take advantage of. Once you deactivate the game_ui, your controls are returned to you.
Before we actually set up the game_ui and the logic_compares, we need to have something that each of the buttons can trigger. We are going to make two rotating cylinders and a laser to demonstrate how the controls work.
Make a cylinder and tie it to a func_rotating. Name it Rot_1 then set the Max Rotation Speed to 150. Also check the X Axis in the flags. Make another cylinder next to it and Name it Rot_2, set the Max Rotation Speed to 150, and then check the Y Axis and in the flags.
Now create an env_laser next to your cylinders and name it something original such as Laser. Type LaserTarget into the Target of Laser field and make sure Start On is unchecked in the flags. We can leave all other fields at default. Now make an info_target above your env_laser and name it LaserTarget. You should now have something that looks a little like this: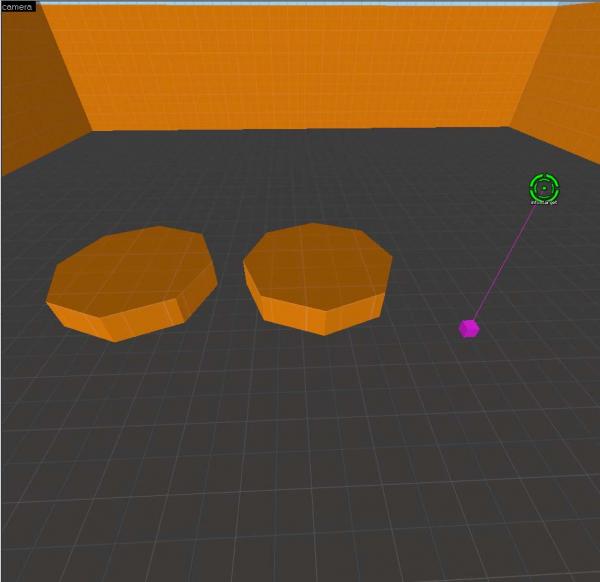
Go back to the Game_UI from earlier and head to the Outputs tab. Add to make it look like this: If you fail to see what the Output triggers mean. X Axis means that the UI is forwarding your Left and Right Movement keys . For default controls, this is A and D. The Y Axis output means that it's forwarding your your Forward and Backwards movement keys. For default controls, this is W and S . As you look down on your keyboard, think of it like your X and Y axis graphs in math. The X is the axis going from left and right while Y is the axis going up and down. AttackAxis means your primary fire button (left click). Although it is not used, AttackAxis2 means your secondary fire button (right click). Don't hesitate to mess with the other outputs in there as well.
In the target input, SetValueCompare means that as long as you hold one of the UI forwarded buttons, the UI sends a number to the logic_compare. It will send it either -1, 0, or 1. A value of 1 means that you are hitting either D or W, while a value of -1 means that you are hitting either an A or S. A value of 0 means that you are hitting nothing at all. Don't worry about it if you don't understand, it should make more sense to you in the next part.
Now to set up the logic compares, go to the various logic_compares and make the outputs look like this:
Compare_1: Compare_2:
 Compare_3:
 A logic_compares default settings compare what outputs are sent to it based off of the compare value 0 (On equal to). When you're holding down a button and it sends it a 1, it triggers the on greater than outputs. When you're holding down a button that sends it a -1, it triggers the on less than outputs.
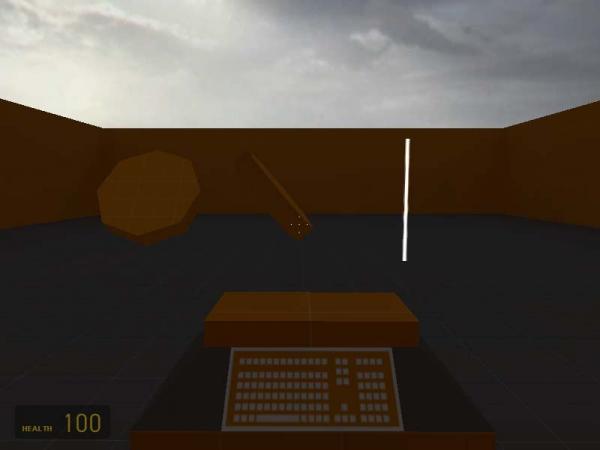 Thy will be done.. by keyboard and mouse.Now your forward and backwards movement keys will make the first cylinder rock back and forth. Your left and right movement keys will now make the second cylinder rock left and right. And now holding down your fire button will make turn the laser on.
Happy Mapping!
Game UIs and Logic Compares
Two of the most underused yet useful entities in Half-Life 2 are the Game_UI and the Logic_Compare. Although I can't think of one particular place in Half-Life 2 where either were used, they show promise to make some interesting single player and multiplayer entity setups that will provide a cool means of controlling other entity setups. I'll go ahead and note that these are very boring examples, but they will be combined for a much more awesome result in the next tutorial assuming I ever write it.What is a Game UI?
- A game_ui is an entity that forwards part of your controls to be triggers in the input/output system.
- It can be used to control various entity setups of your map with your primary/secondary fire mouse keys, and your movement keys.
What is a Logic_Compare?
- A logic_compare is an entity that triggers other entities based on satisfied conditions by comparing.
- It can be used to toggle entities on or off, open or closed, moving or not.
Getting Started
Setting these up are quite easy once you get the hang of them, you just have to understand the logic behind them.Start by creating a testing room with an info_player_start, a light_environment, and a brush that will later be turned into a func_button. Have a little room to make testing objects.
What a beautiful dev room!We will set the name of it to UI. Go to the flags and make sure only Freeze Player and Hide Weapon are checked. Before we get too heavily involved, we'll setup the button before we move on. Hop back over to your button brush and tie it to a func_button. In the flags make sure Dont Move, Toggle, and Use Activates are checked. Nothing else should be checked.
Now we need to set up the outputs to the button. Make sure they're like this:
Before we actually set up the game_ui and the logic_compares, we need to have something that each of the buttons can trigger. We are going to make two rotating cylinders and a laser to demonstrate how the controls work.
Make a cylinder and tie it to a func_rotating. Name it Rot_1 then set the Max Rotation Speed to 150. Also check the X Axis in the flags. Make another cylinder next to it and Name it Rot_2, set the Max Rotation Speed to 150, and then check the Y Axis and in the flags.
Now create an env_laser next to your cylinders and name it something original such as Laser. Type LaserTarget into the Target of Laser field and make sure Start On is unchecked in the flags. We can leave all other fields at default. Now make an info_target above your env_laser and name it LaserTarget. You should now have something that looks a little like this:
Setting up the Game_UI and the Logic_Compares
Create three logic_compares. Place one next to the first cylinder and name it Compare_1. Place another next to the second cylinder and name it Compare_2. Place the last one next to the laser and name it Compare_3.Go back to the Game_UI from earlier and head to the Outputs tab. Add to make it look like this:
In the target input, SetValueCompare means that as long as you hold one of the UI forwarded buttons, the UI sends a number to the logic_compare. It will send it either -1, 0, or 1. A value of 1 means that you are hitting either D or W, while a value of -1 means that you are hitting either an A or S. A value of 0 means that you are hitting nothing at all. Don't worry about it if you don't understand, it should make more sense to you in the next part.
Now to set up the logic compares, go to the various logic_compares and make the outputs look like this:
Compare_1:
Thy will be done.. by keyboard and mouse.Happy Mapping!
- Categories
- Tutorials
- Advanced Tutorials
- Source Tutorials
- Article Credits
-
 TheGrimReafer
–
Original author
TheGrimReafer
–
Original author
3 Comments

Don Punch
Commented 16 years ago2008-11-13 13:03:34 UTC
Comment #100806
Wouldn't these ent's be used in HL2 in the Crane scene?

TheGrimReafer
Commented 15 years ago2008-11-26 00:42:42 UTC
Comment #100807
I think the crane is a vehicle entity down near the airboat and jeep.

staam3333
Commented 6 years ago2018-02-01 22:33:14 UTC
Comment #100808
WELP I THINK I LEARNED SOMETHING NEW THAT I DONT UNDEERSTAND
You must log in to post a comment. You can login or register a new account.