Tutorial: Dark Outdoor Maps Last edited 5 years ago2019-04-21 13:58:15 UTC
You are viewing an older revision of this wiki page. The current revision may be more detailed and up-to-date.
Click here to see the current revision of this page.
Dark/Night Outdoor Maps
There have been a lot of questions recently on the forums about creating dark map environments.Before we go any further, make sure the brightness and contrast of your monitor are set to about average. I have found the best way to do this is to open Half-Life and wait till the initial screen appears. Turn your contrast and brightness all the way off, and then slowly increase the brightness until the grey wording appears. Then increase your contrast until the HL version (Orange HLv 46 1.1.1.0) in the bottom right hand corner is clear.
Here we will try to cover the easiest method of adding darkness to your map. With your outdoor area open in Hammer go to the tool bar and select Map and then Map properties... you should be presented with the Worldspawn Object Properties box below.
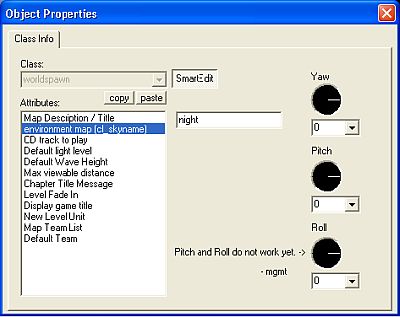 WorldSpawn Properties
night
space
black
dusk
You could use a day time sky texture, but it will look really odd, because the texture is not actually lit by the light_environment. It will be bright and visible regardless of the settings you change.
Changing the Default Light Level in the Worldspawn does not seem to do anything regardless of the figure entered.
Light_environment
Add a light_environment or a light_spot with FLAG Is Sky checked to your map. If you compile your map now, you will get something that looks like this: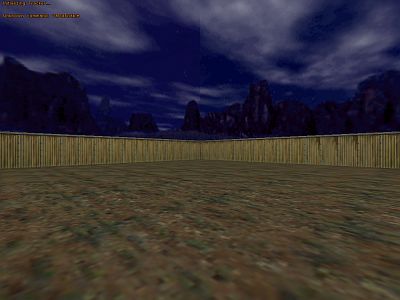 Doesn't look like night time
Open the properties for the light_environment and adjust the 4th number in the sequence to a lower figure. The example map is set to 2. If you change it to 0 it won't go black, it will actually appear like a medium lit map. The other three numbers in the sequence are Red, Green, Blue identifiers. Using the Pick Color option will change these figures, but will not change the 4th number.
 Set it lower...
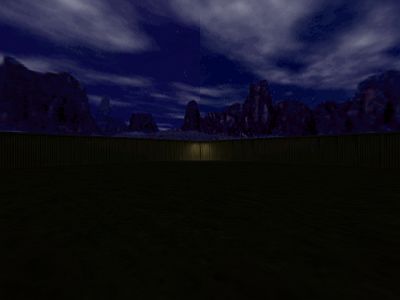 ....and you can see nothing!
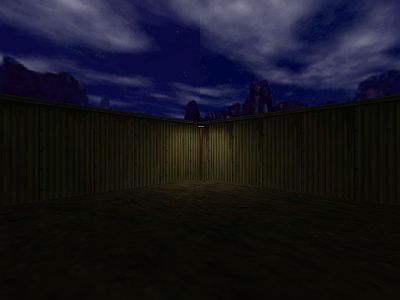 Now you can see an exciting corner!
There is a lot more you can do with the light_environment and skies, but this is just a really basic starter tutorial. For more information on environments check out Atom's tutorial, Environment.
- Categories
- Tutorials
- Intermediate Tutorials
- Goldsource Tutorials
2 Comments
JohnLocke
Commented 13 years ago2011-06-23 16:13:20 UTC
Comment #100567
This is a very simple and good tutorial.

Stojke
Commented 11 years ago2013-03-30 01:17:58 UTC
Comment #100568
Good stuff, good stuff.
You must log in to post a comment. You can login or register a new account.