Tutorial: In the Beginning Part 4 Last edited 3 years ago2021-08-12 01:27:29 UTC
You are viewing an older revision of this wiki page. The current revision may be more detailed and up-to-date.
Click here to see the current revision of this page.
In this tutorial we will look at the effects of lighting. Good lighting is great for atmosphere. It's also good to have a few dark places but not too many. [Continue with the map from part 3].
UPDATE: Before we go any further, when you compiled your map, did the light look as though there was a real light? By that I mean, did the map look as though there was a light where you placed it or did it look like the whole map was floodlit?. If it looked floodlit or really bright, then you might want to compile it again and look at the Error Log. It is normally saved in the same area as your .rmf file. Look for a line that indicates an Error. If there is a LEAK in your map, then the map will be floodlit or "Fullbright". If you do not fix the LEAK, then the rest of this tutorial is pointless, because you will not see the lighting as it is meant to be. The reason I waited this long to mention this, is that without a texture applied to the walls, it is hard to tell if the map is Fullbright or not. Another way to check for a LEAK is to bring up the console with the ~ key and type in pointfile. If there is a LEAK, the pointfile will be generated and it will tell you the number of points read. If it is 0 then congratulations: your map doesn't LEAK...yet.
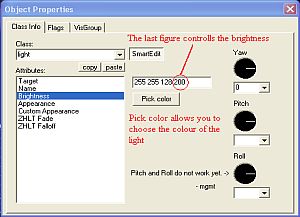
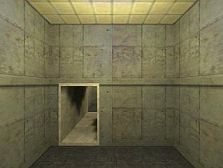
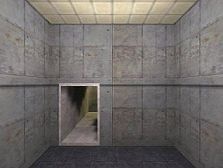
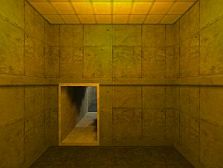
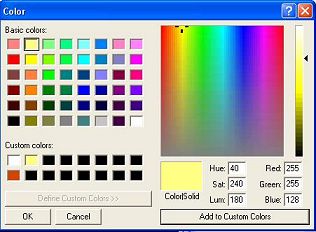
The Properties dialog (found by right-clicking the light entity) allows you to customize the brightness, colour, appearance (flickering, fading, etc), target, and name of the light.Also, in the Flags section, you have the option of indicating that the light should be Initially Dark. In this case you'd also have to supply a name for the light so it could be "triggered" to turn on.
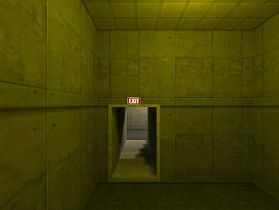
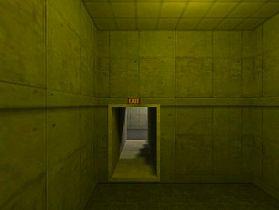
Placement of the lights has a varied effect. The lights in the figures above are 8 units below the ceiling. Adding a ceiling light fixture will enhance the effect.
Working with Light Textures
There are a lot of textures that can be used and the easiest way to find them is to open your texture browser and type + in the filter [or have a look in the file lights.rad in your WorldCraft folder]. Create a brush 64x80x4 units to apply your light texture to. In the example map I have used +0~fifts_lght01 (because the texture size is the same as the brush) and applied another texture to the border of the light. Place this brush in the centre of the room above the existing light. To add a little realism to the light you might want to change the light entity property Appearance to Flicker A. The Fluorescent Flicker setting actually turns the light off and on, transitioning the room between light and dark.Most light textures can be used in conjunction with func_ entities, by setting the Minimum Light Level in the entity properties to > 1. This gives the appearance of the texture being lit, but adds no light to the actual room. If you add a light texture to the borders of your light brush, they will also light up and sometimes this lessens the effect and reduces the shadow, giving the light an unnatural look.
NOTE: If you give the light a name to use with a trigger or switch, remember that the game engine can only cope with about 4 named lights or animated lights in the same visual area. More than that might produce weird effects and an error in some compiling programs. I am not sure how many unnamed lights the engine can cope with, but less is better. Did you see I said, "might produce"... well thats right, you might be lucky, LightForce reported that he managed to get lot's of named lights working, so you will have to experiment.[BR] The same applies with light_spot entities. And speaking of light_spot entities, Atom has a tutorial called Tutorial: Environment that deals with some of the effects you get using this entity. In this tutorial, the spare room has a light_spot entity with all its properties set to default with the exception of the Outer Fading Angle which has been set to 180.
UPDATE: There have been a lot of questions about lighting. As I said in the first paragraph, if your map does not compile properly or VIS and RAD do not finish, then your map will be lit "Fullbright" and any changes you have made to the lights properties will not show in the final map. Be sure to check for LEAK's as this is the most common cause.
Experiment and try new things. The secret to a good level is in the texturing and the lighting. Got any good suggestions? Post them in the forum.
- Categories
- Tutorials
- Beginner Tutorials
- Goldsource Tutorials
Comments
You must log in to post a comment. You can login or register a new account.

