Tutorial: Creating blend textures for Displacements Last edited 3 months ago2024-09-20 03:20:17 UTC
Introduction
✔️ Download example fileSee also: Tutorial: Displacements
If you've played around with displacements in Source, you've likely noticed a section in the displacement tab marked Paint Alpha. For those of you unfamiliar with the tool, it allows you to take a blend texture, such as nature/blendrockgrass004a and paint on a secondary texture to it by 'painting' it over a second layer's alpha channel. This can only be done on a displacement, and is usually used to add variation to an otherwise bland landscape, or make a smooth transition from one material to another.
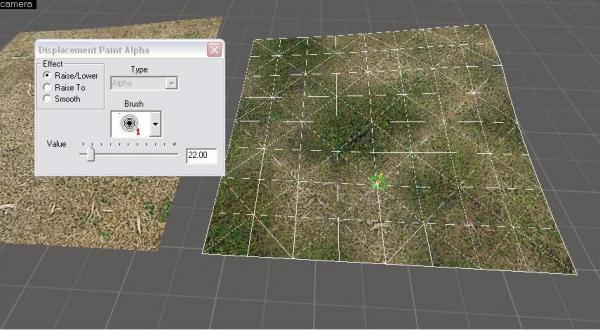 Painting alpha with a stock HL2 Blend texture
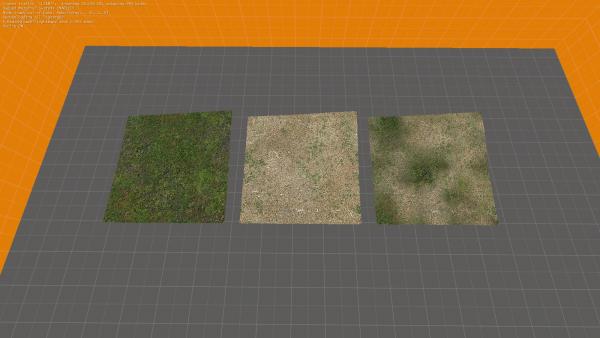 The same blend texture with no alpha, all alpha, and some poorly painted alpha.
Well actually, no.
Preparing your VTF files
First up, if you don't already have VTFEdit Reloaded, you can get it here. While it's not strictly required in order to make new materials, it streamlines the process and saves a lot of headaches. If you're using your own textures, make two now, and save them as a TGA or PNG; the base, and what you want it to blend into. There is no special process needed for this to work, as long as you keep in mind the dimensions must be powers of 2 and no larger than 4096x4096, the absolute engine limit. Otherwise, locate and extract the VTF files for the base materials you want to use. I will be using wood/woodfloor006a and nature/dirtfloor006a. (More on this later.)Use VTFedit Reloaded to export the two VTFs you are using into a workable file format (PNG or TGA are recommended) or ready the textures you made, and open them in your favorite image editing program. Edit the images together with the base texture in the top left corner, the "alpha" in the bottom right, and some opacity-based blending in the middle.
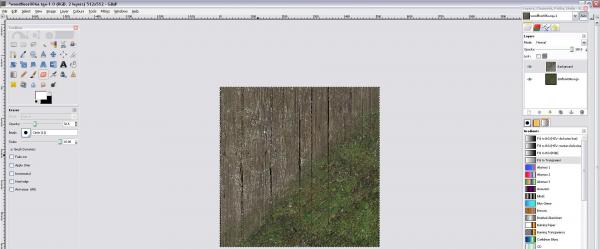 It doesn't have to look perfect, since you're the only person who will actually ever see this.
Import all three of your textures into VTFedit Reloaded and save them as VTFs.
(The _tooltexture file is optional, but recommended so you can see the blending options in Hammer.)
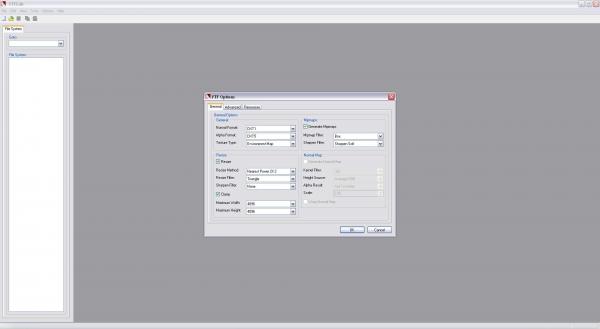 We don't need to change any of these values for the textures we're making.
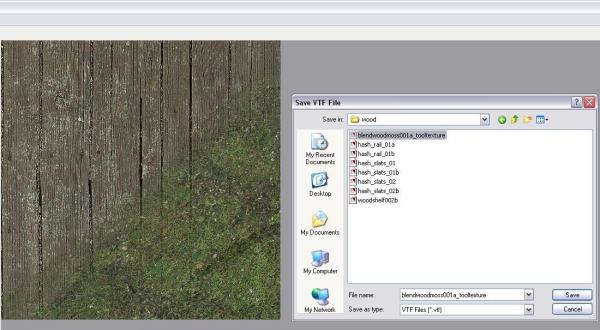 As when you made this texture, the VTF has to be save as the name of your blend texture with an _tooltexture suffix.
Creating a VMT file
Now that you've gotten the essential parts of the blend texture, it's time to make the VMT that turns them into a material. You can do most of this from VTFedit Reloaded, but some editing after you save it will be required.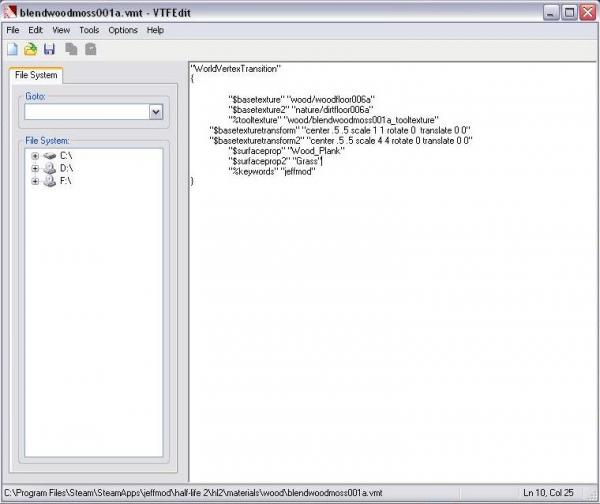 The values in your VMT should look something like this.
WorldVertexTransition
{
    $basetexture "wood/woodfloor006a"
    $surfaceprop wood

    $basetexture2 "nature/dirtfloor006a"
    $surfaceprop2 dirt

    "%tooltexture" "wood/blendwoodmoss001a_tooltexture"
    "%keywords" "tutorials"
}WorldVertexTransitionis the shader type, and also the most vital part of the material - without using this as the shader, the blend texture will not work.$basetextureis the texture you want your blend texture to default to, while$basetexture2is what you want it to blend with.%tooltextureis the tool texture you made, which will be used as a thumbnail in Hammer's material browser. This is optional, but Hammer will only show the$basetextureas a preview, which makes it hard to see the blend in the texture browser.- Unless you want your material to be plastic, you should also have at least one
"$surfaceprop"value, using the second if your other texture is a different surface type. - Finally,
%keywordssimply sets one or two key words you can enter into the material browser if you want to label it as being part of a specific texture set. I generally use my name as a reminder that it's a custom texture I made.
 Note how the use of two surfaceprop values allows the applied grass/moss to act like grass, while the wood still has wood decals and sounds.
Example usage techniques
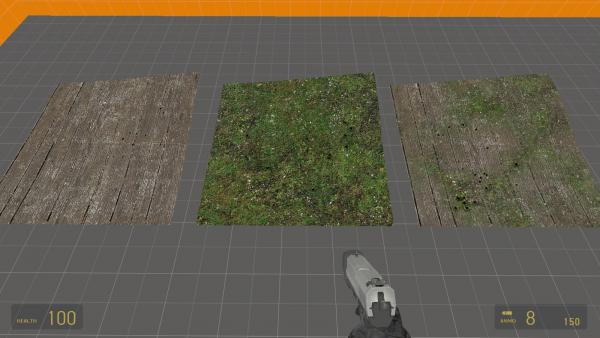
Now, you're probably wondering why I used a wood texture in this example. Allow me to show you what inspired me to experiment with making blend textures, and resulted in this tutorial: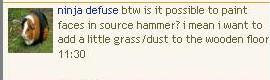 ninja defuse's question got me thinking of ways to do what he wanted, and helped me figure out how to do much the same thing in a map I was working on.
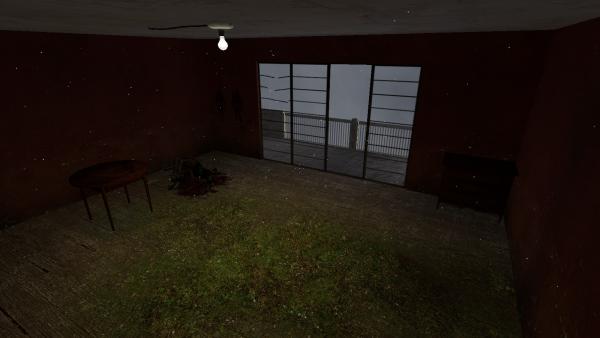 A very simple scene showing how blend textures can be used to help give a sense of abandonment and overgrowth.
Additional features of blend textures
Since 2009, all Source engine games can use the$blendmodulatetexture parameter, which essentially changes the smooth gradient-based alpha painting with a gradient using a mask defined with it as a form of stamping, so you can use a design instead of just a standard brush. The
$blendmodulatetexture parameter only reads in green and red channels, so you will want to use them as separate layers in your image with an alpha channel, and save it directly as a TGA instead of an image format that may result in losing/merging the layers. Valve uses a straight value of 99 in the red channel, and the green channel, used for the actual pattern, is biased towards $basetexture2.In CS:GO (and any other games that may use Source 2014 or newer), the blend functionality was extended to support up to 4 different textures using the
Lightmapped_4WayBlend texture. Creating 4 way blend textures follows a similar principle as 2 way blend textures, but is more complicated due to the additional features supported by the newer version of the engine. Check the links below for more details.
External links
- Categories
- Textures
- Tutorials
- Intermediate Tutorials
- Source Tutorials
- Article Credits
-
 Notewell
–
Original author
Notewell
–
Original author
-
 Penguinboy
–
Revision, additional links and info
Penguinboy
–
Revision, additional links and info
4 Comments

Captain Terror
Commented 12 years ago2012-04-02 06:52:47 UTC
Comment #101061
Great tutorial sir! I'll definitely be using this soon 

RabidMonkey
Commented 12 years ago2012-04-02 09:13:56 UTC
Comment #101062
Good overview for beginners to blend textures. Might want to expand upon the texture modulation/addendum as the modulate textures are really what sells the 'blend' effect between the two materials themselves rather than just using a linear blend which happens if you omit the modulation material.

Notewell
Commented 12 years ago2012-04-04 07:37:51 UTC
Comment #101063
Yeah, I should, and I probably will sometime, but that'll require further testing on my part. Need to figure out exactly how it works and get some experience with it, after all.

Starkey62
Commented 11 years ago2013-03-31 11:10:13 UTC
Comment #101064
Awesome tutorial!
You must log in to post a comment. You can login or register a new account.