Tutorial: Rescaling Prop Models Last edited 3 months ago2024-09-20 11:06:21 UTC
Okay, so first of all, you'll need Cannonfodder's Half-Life 2 MDL Decompiler and (optionally) StudioCompiler. This tutorial is written specifically about resizing the standard HL2 door prop. If you want a more general tutorial, try this one. It covers how to rescale a model for use in the 3D sky box, and you can also use it for other purposes. The standard door prop however has a few bugs, since it has 2 versions of the handle, and somehow the decompiler has a problem with model attachments, so when recompiling it shows them all at the same time (basically you've got two different handles overlapping each other, and there's also another bug, collisions; more on that later).
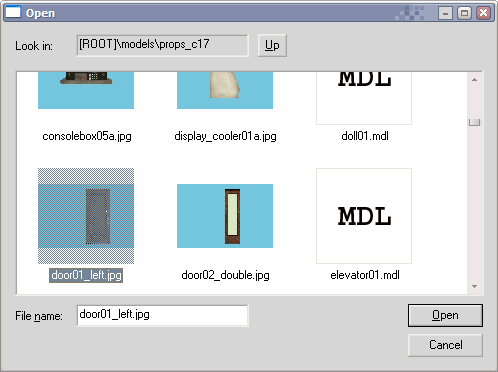
Once you've downloaded the decompiler, extract the .exe into your Valve/Steam/SteamApps/username/sourcesdk/bin folder (where username is your Steam account name), since the executable requires SDK .dll files to run.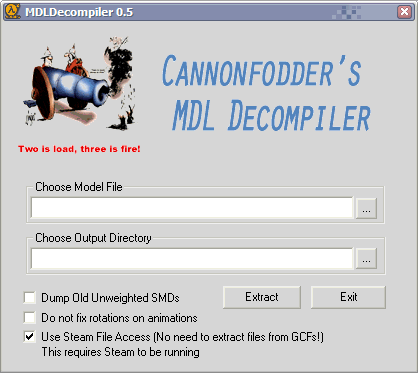 Open mdldecompiler.exe. Make sure "Use Steam File Access" is checked, and that Steam is running (unless you've unpacked your hl2 content .gcf file somewhere). Where it says "Choose Model File", press the "..." button on the right, open the "props_c17" folder, locate "door01_left.jpg" and double-click it.
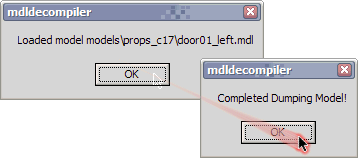
 Below, where it says Choose "Output Directory", specify a directory in which to place the decompiled model files. It really shouldn't matter where you choose to do so, but the usual place for this would be the sourcesdk_content/modname/modelsrc/modelname folder (where modname is the name of the mod, in this case hl2; and modelname should be a name for your new model. You'll probably have to make that last one yourself. Note that the decompiler can not create a directory for you, and if you specify a non-existant one, it will return an error). After you've decided where you want your models dumped, hit "Extract". You will receive two messages, click ok on both of them.
 Navigate to the dir you specified for the model dumping process, and locate the .qc file. Open it in Notepad, and modify this string:
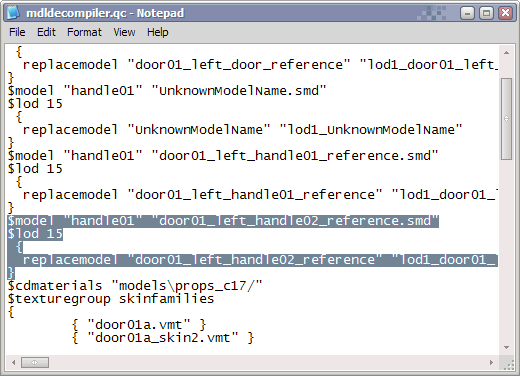
Immediately below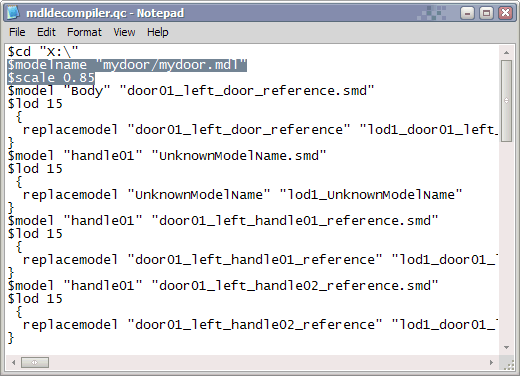 Also, delete the following lines:
 Now replace this line:
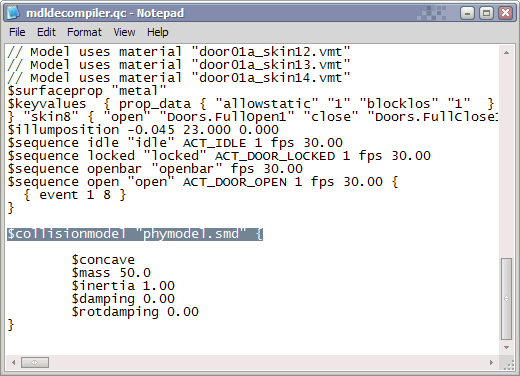 Now you are using the reference .smd file as a collision model (since the door has a very basic, non-complex shape), eliminating any collision bugs (like being able to walk through the door and bumping into the air next to it... or not being able to get through once the door is open, etc.). Save the .qc file.
Now, go to your sourcesdk/bin folder again, and make a shortcut to studiomdl.exe on your Desktop. Drag and drop the .qc file onto the shortcut, and it'll compile. If everything went well, your new door model should be here: hl2/models/mydoor/mydoor.mdl or whatever you called the folder and the model.
If you are experiencing trouble compiling with studiomdl.exe, try downloading Cannonfodder's StudioCompiler. When it's downloaded, install it into your sourcesdk/bin folder. When it's done installing, open up the said folder and run StudioCompiler.exe. Click on "Compile w/Existing QC" button. Then where it says "QC File (Drag 'n Drop or use Browse Button)" just do as it says, either drag and drop your .qc there or click the blue folder button on the right and navigate to the .qc manually. After that, click "Compile". Again, if you did things correctly, your new door model should be in your hl2/models/mydoor/ folder or whatever you decided to call it. Try out the model.
Note: You'll have to include the model with your map, when giving it to someone else to play. Bspzip is recommended, details of which are here.
Once you've downloaded the decompiler, extract the .exe into your Valve/Steam/SteamApps/username/sourcesdk/bin folder (where username is your Steam account name), since the executable requires SDK .dll files to run.
$modelname "props_c17/door01_left.mdl"$modelname "mydoor/mydoor.mdl"Immediately below
"$modelname "mydoor/mydoor.mdl""$scale 0.85$model "handle01" "door01_left_handle02_reference.smd"
$lod 15
{
replacemodel "door01_left_handle02_reference"
"lod1_door01_left_handle02_reference"
}$collisionmodel "phymodel.smd" {$collisionmodel "door01_left_door_reference.smd" {Now, go to your sourcesdk/bin folder again, and make a shortcut to studiomdl.exe on your Desktop. Drag and drop the .qc file onto the shortcut, and it'll compile. If everything went well, your new door model should be here: hl2/models/mydoor/mydoor.mdl or whatever you called the folder and the model.
If you are experiencing trouble compiling with studiomdl.exe, try downloading Cannonfodder's StudioCompiler. When it's downloaded, install it into your sourcesdk/bin folder. When it's done installing, open up the said folder and run StudioCompiler.exe. Click on "Compile w/Existing QC" button. Then where it says "QC File (Drag 'n Drop or use Browse Button)" just do as it says, either drag and drop your .qc there or click the blue folder button on the right and navigate to the .qc manually. After that, click "Compile". Again, if you did things correctly, your new door model should be in your hl2/models/mydoor/ folder or whatever you decided to call it. Try out the model.
Note: You'll have to include the model with your map, when giving it to someone else to play. Bspzip is recommended, details of which are here.
- Categories
- Tutorials
- Intermediate Tutorials
- Modelling
- Source Tutorials
- Article Credits
-
 Gman
–
Original author
Gman
–
Original author
Comments
You must log in to post a comment. You can login or register a new account.