VERC: WC Sphere Making Last edited 2 years ago2022-09-29 07:55:52 UTC
How to Make a Sphere in Worldcraft:
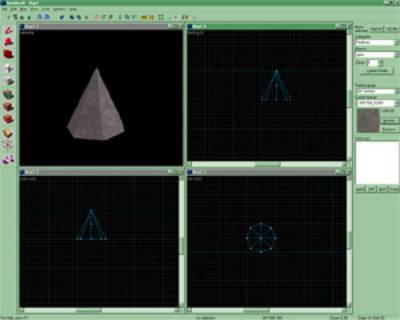
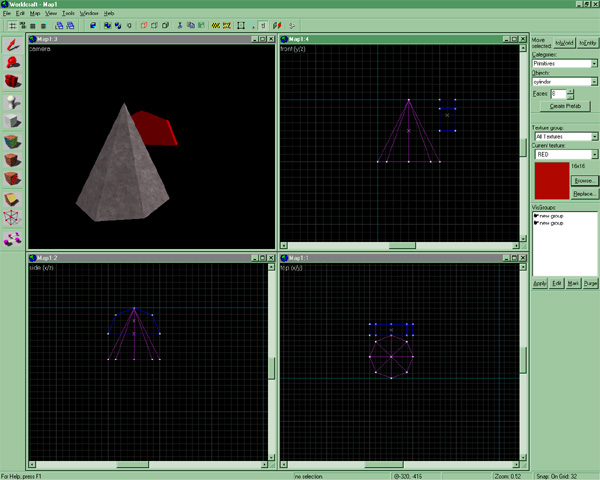
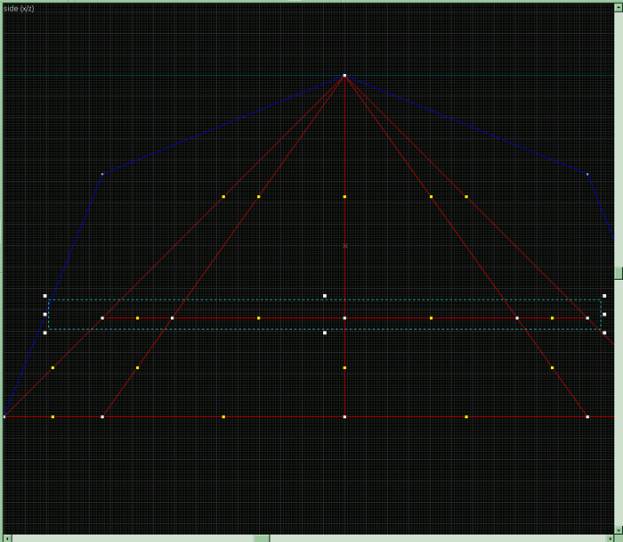
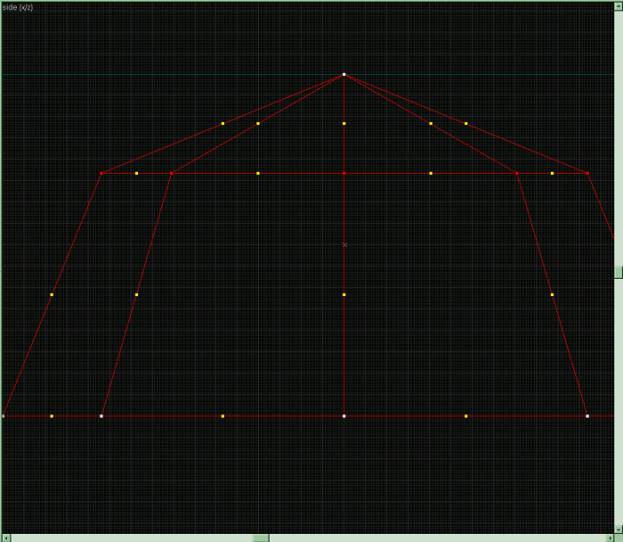
So you want to make a sphere, eh? Well there are several techniques to make one, but by far the easiest method in Worldcraft is called the “cone slicing” method. The basic principle of the cone slicing method is to take a cone, slice it into pieces and then scale the pieces up or down to give it a spherical shape.Lets get started. First you will need to fire up Worldcraft. To begin, select spike from the block tool make yourself a cone. It should have at least 8 sides if you want your sphere to look spherical, the more sides the more spherical it will look for a given size.Now you need to set up some template cylinders on the sides of the spheres to give you a guide of where to slice the cone. These template cylinders will not actually be in the final sphere, they are just there to guide you as you are messing with the cone. Since the cone will only be the top half of the sphere, you only really need half of the template cylinder.From now on, you will only need to deal in 1 2d window, the one that shows the profile of the template cylinder and the upright cone (y/z in this example). First resize your cone so that it is the height of the template cylinder.Now go into the 1 unit grid. Note that you should not use the 1 unit grid for 99% of mapping, only special situations such as making a sphere.
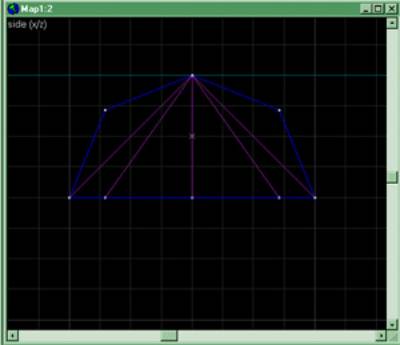
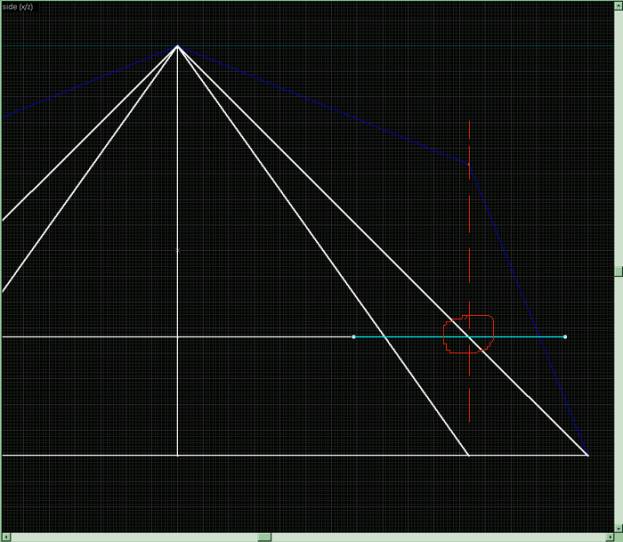
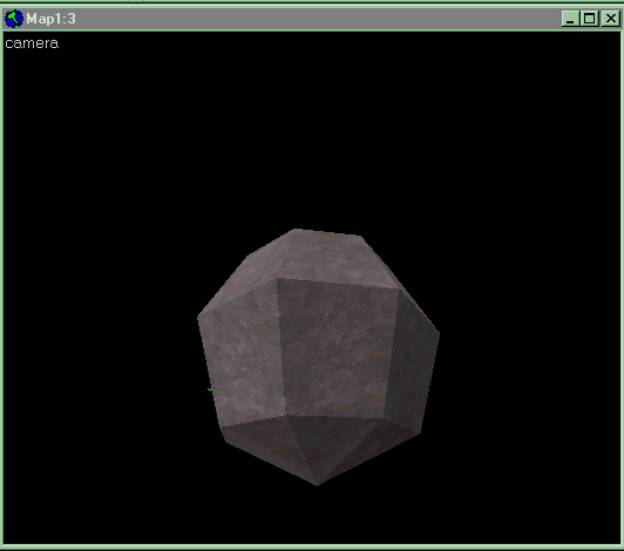
In the next step, you will determine WHERE to slice your cone and this is of critical importance. To find out where you should slice your cone, drop an imaginary line down from a point on your template cylinder and find where it intersects the cone. Use the clip tool to slice the cone horizontally at this location.Next, you will have to scale the pieces of the cone to match the form of the template. This is done using vertex manipulation. Now select all the ‘middle’ verticies of the two pieces of the cone. This is most easily done by making a bounding box around all of them. If you click on verticie by vertecie then you will only select the verticies for 1 piece instead of both.Now to move the verticies up! Now that all of your verticies are selected, grab the CENTER verticie and drag it up until the shape fits the template. Be sure to grab verticies that are literally on grid units when dragging all of the verticies or else everything will snap to grid in weird ways which will make all of your objects invalid. )-:now you have ½ of your sphere. All you have to do is turn it upside down and you’ll have your full sphere. Be sure to delete the template cylinder as well. The sphere made in this tutorial only uses 4 rows and 8 columns, so it’s kind of “blocky” looking, but its at least ok:Remember, the number of sides your initial cone has determines the number of columns the sphere will have, and the number of sides your template cylinder has determines the number of rows or “stacks” that your sphere will have.
Beware, if you resize your sphere and stretch it about, you may get invalid objects due to floating point errors so it is best to make your sphere the size you want it to be the first time instead of using a prefab sphere and resizing it. This is especially true with higher-poly spheres.
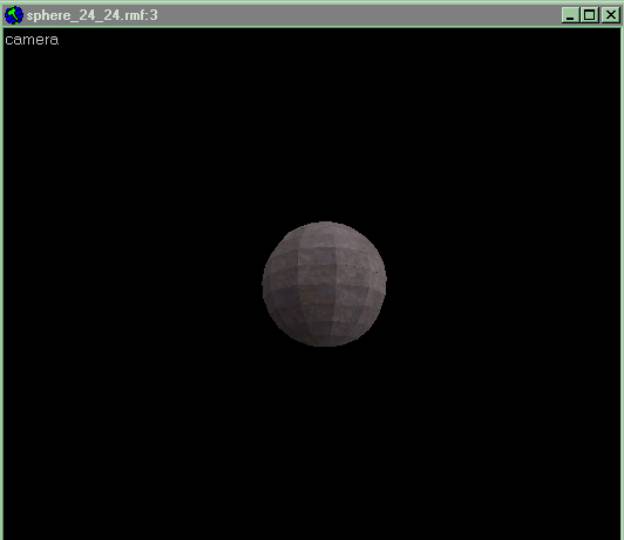
The following is a sphere I made with 12 stacks and 12 rows, you can see ho much better it looks:If you are going to be making different parts of the sphere into different entities then you might consider putting the ‘null’ texture on the inside faces of the sphere in conjunction with Merl’s modified ZHLT.
- Article Credits
- Nick "Mazemaster" Alger – Author
This article was originally published on Valve Editing Resource Collective (VERC).
The original URL of the article was http://collective.valve-erc.com/index.php?doc=1017297928-03230100.
The archived page is available here.
TWHL only publishes archived articles from defunct websites, or with permission.
For more information on TWHL's archiving efforts, please visit the
TWHL Archiving Project page.
Comments
You must log in to post a comment. You can login or register a new account.

