Tutorial: Displacements - Part 1 Last edited 18 years ago2006-09-28 04:00:00 UTC
You are viewing an older revision of this wiki page. The current revision may be more detailed and up-to-date.
Click here to see the current revision of this page.
Download attachment
One of the best improvements in the Source engine from the original Half-Life was the addition of displacements. Without displacements, HL2 wouldn't look half as good as it does. This five-part series of tutorials will explain how to use them, as well as tips and tricks on using them.What is a Displacement?
- A displacement is a four-sided plane which has been 'split' into a grid of triangles.
- The triangle grid is shown in your hammer 3D view with lines going horizontally, vertically, and diagonally across the plane. The points made by 2 or 3 crossing lines can be moved up and down - freely to the other points.
- Displacements are not entities. They are solid, as in you can walk on them.
- They don't seal your map (i.e. you still need to close your map to the void with a brush to avoid leaks), although if a displacement happens to be in the void, it wont cause a leak.
- They can only be seen from one side.
- You can only edit displacements in the 3D view (except for normal 2D size-adjustment)
What do you use displacements for?
Displacements are generally used for realistic looking terrain like the ground and cliffs, But they have other uses. Look at some of the coast levels in hl2 to see liberal use of displacements.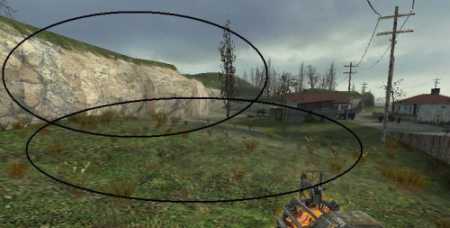 Displacements can be used as cliffs as well as ground
 Examples of displacements in HL2
How to make a displacement
Displacements are fairly easy to make, so here is a quick step-by-step guide to make a displacement.Step 1: Make a brush
Get out your brush tool and draw out your brush in the 2d views, and press enter. Put the top of the brush where you want your displacement to be (or in the case of cliffs, the side). Your brush should be a cube/block, as displacements must have 4 sides.
Step 2: Texture your brush
Select your brush, and click the texture application tool.
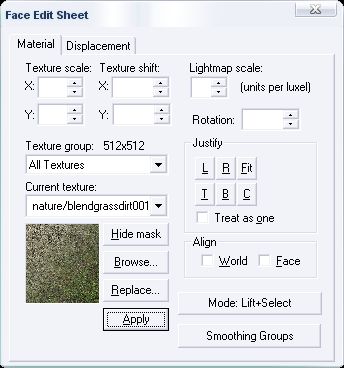 The Texture Application tool
Now, select the top face. Displacements can use normal textrures like everything else, but they have special textures made especially for them. They are 'blend' textures - to find them filter for 'blend' in the material browser. Pick one and apply it - I'll pick blendgrassdirt001a. Keep the texture application window open and your newly textured displacement plane selected.
NOTE: Texturing non-displaced surfaces with blend textures does work at the moment. Although Valve states when you load up a map with a blend texture on a non-displaced surface that they are 'removing this soon', there doesn't seem to be a timeframe set for when this will happen. As well as this, Valve have used blend textures on non-displaced surfaces in their own maps, so for the time being, you can assume it's ok to do.
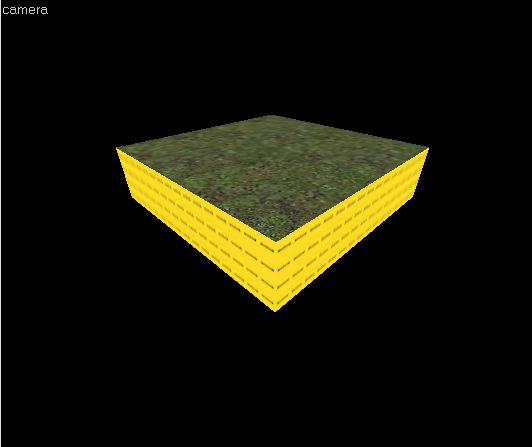 A brush with a blend texture, ready to go
In the texture application window, there is a displacement tab. Click it. This is your main window for displacement-ing.
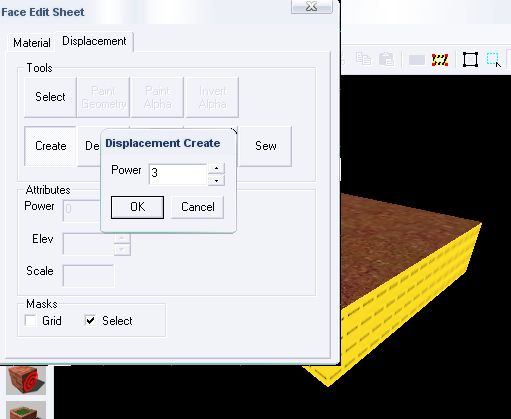 Creating a displacement
Click ok in the box and you will see two things happen:
1. Lines form on your top plane
2. The 5 NODRAW faces disappear!
Try looking at your displacement from the back in the 3d view. Its gone! As said before, displacements can only be seen from one side.
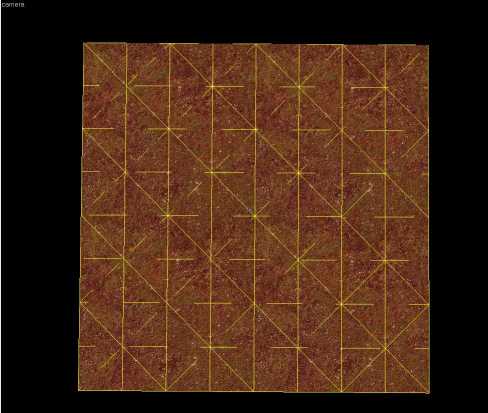 A top-down view of the newly created displacement
With the displacement window still open, select the 'Paint Geometry' button. The new window that opens up lets you raise and lower points in the displacements.
 Painting the geometry
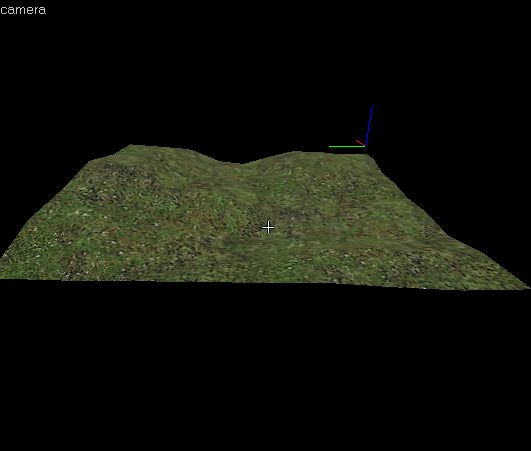 Curvy.
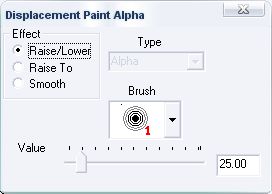 The Paint Alpha tool
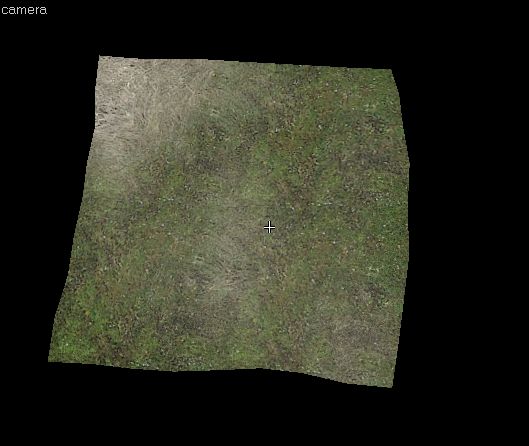 Blended...
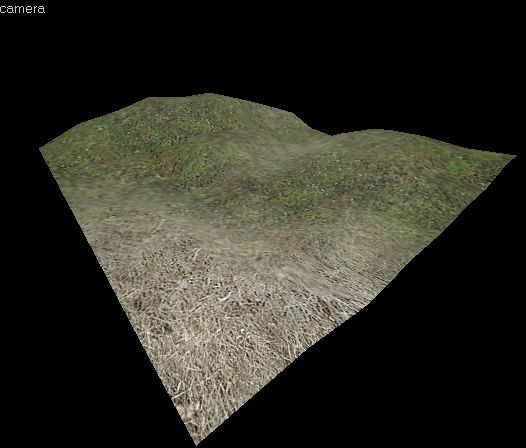 ...and served
There is no BSP in the example map, just a VMF. I will include a BSP at the end of Part 5 showing all the techniques shown in all five tutorials.
6 Comments
You must log in to post a comment. You can login or register a new account.
LeFtY
thank you very much
)