Tutorial: Equipping Weapons in CS Last edited 5 months ago2024-09-15 13:14:36 UTC
Stripping and Equipping Weapons in Counter-Strike
Resources Required: Up to date FGD, found here.
Introduction
The idea is, making a map that takes player weapons away, gives them weapons, or both. This doesn't really have any good applications for serious bomb defuse or hostage maps but are fun to mess around with on more fun/silly map types. The primary entities used for stripping and equipping in Counter-Strike are listed with brief descriptions below.game_player_equip: The entity used to equip the player with the weapons you require. For example, the player runs through a trigger, which runs the game_player_equip which "gives" the player ammo, Kevlar, grenades or a gun.player_weaponstrip: The player runs through a trigger, targeting this entity, removing all weapons/items currently in the player's possession.armoury_entity: Places a weapon on the ground that can be picked up by the player. Not all weapons are available in this entity but it is easy to use.info_map_parameters: An entity which allows you to set certain parameters within the map, such as weapon buying, and bomb blast radius etc. Quite a limited entity and only mentioned here as an example of different methods of achieving the same goal.There are a few other entities used in a more advanced tutorial below but these are the 3 basic entities involved outside of your basic triggers.
Making a Map Where Everyone Gets the Same Equipment
First things first, make your map, if you're just testing out the entity setup it can be a big open room. If not, please put some effort into it.game_player_equip is typically used for fy, aim, and knife maps. However, just because you want to give players certain weapons doesn't mean the map must be of the fy_ strain, you could be making an escape style map, where the CTs start in a jail, and are only equipped with a knife and Glock (or whatever takes your fancy). Perhaps a scout map set in a "forest", with two bases, separated by a canyon. The possibilities are endless.If you are equipping everyone on the map with the same weapons, all you need is a
game_player_equip in the map. Choose what you wish to equip in the entity, make sure the "use only" flag is NOT ticked, click apply, and it's all set. If you have the latest FGD installed then all the keyvalues will be very clearly labeled. Note that merely having a game_player_equip present on the map will cause all players to spawn with nothing (except for the bomb if there are bomb targets). This is true even if the "use only" flag is ticked. So if you have a game_player_equip on the map, make sure you give back the knife unless you specifically wanted to take it away.An example map might be an M3/Deagle map. You'll want to equip the M3, the Deagle, an appropriate amount of ammo for each gun, and the players knife unless you want to take it away from them. You could optionally equip other items like kevlar and grenades. To do this, set the following keyvalues in the
game_player_equip entity. For ease of making this table, the keyvalues used will be the actual keyvalues you see with smart edit turned off and only the keyvalues that need to be changed will be shown. As stated before, if you have the latest FGD, smart edit will have all the keyvalues you need with helpful labels. With an older FGD, you may have to add the keyvalues yourself with smart edit turned off.
| Property Name | Value |
|---|---|
| weapon_knife | 1 |
| weapon_deagle | 1 |
| weapon_m3 | 1 |
| ammo_50ae | 2 |
| ammo_buckshot | 4 |
| item_kevlar | 1 |
| weapon_hegrenade | 1 |
- Flags
- Use Only (unchecked)
Prevent Players from Buying
There are two ways to do this. One is to make a small cube out of a trigger texture out of reach of the players. Turn it into afunc_buyzone and now buyzones will no longer be created near spawn points. Leaving the buyzone unassigned will prevent this for both teams.The second option is to put an
info_map_parameters entity in your map and choose to prevent both teams from buying.I prefer using both these methods at once to both get rid of the buyzone icon in spawn and allow the message to players that they aren't allowed to buy to appear when they press the buy button or any other buy binds.
Congratulations, you now have a working m3/deagle map!
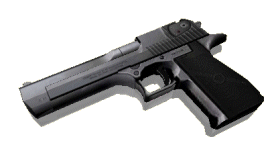 The Desert Eagle
The Locker/Gun Rack Effect
This has very limited use in CS, and in some cases anarmoury_entity will do just fine. But if you want a gun on the ground that isn't available in armoury_entity or really desire to have a weapon pickup that is propped up in a locker or on a gun rack, then this is the tutorial for you. The old tutorial had some errors, and even if you worked those out for yourself, it relied on a trigger_once and wasn't repeatable once picked up the first time. Well, with my "trigger once per round" setup utilizing a game_counter entity and a few others, we can make it fully functional and repeatable round after round.First, start off by making your locker, or gun rack, or maybe you just want the gun on the ground. It doesn't really matter. Make the door behave the way you want, or just leave it open, whatever floats your boat. This tutorial isn't about how to build lockers and doors.
Once you have your locker built, you're going to need 10 entities to get this to work and be repeatable, although the 2nd
multi_manager and offsite func_door used to reset the system on round start can be used to reset multiple systems on round start.First, you're going to need to create a point entity called
cycler_sprite. This is how you place a weapon model into the map. This will likely be the most frustrating part, as getting the model oriented the way you want it to is really difficult. It requires you to adjust the pitch, yaw, and roll settings to orient the weapon, and it seems to be a different position in the editor than it is in game. You're just going to have to play with it and learn through trial and error. So, anyway, for this example we're going to make this weapon an AK-47. You'll place the cycler_sprite where you want your weapon to appear to be and then give it these values. Like before, these tables will be written as if smart edit is turned off for ease of creating them, and only relevant keyvalues will be shown (as in, ones that need to be changed or at least made note of).cycler_sprite
| Property Name | Value |
|---|---|
| rendermode | 4 (Solid, no light) |
| renderamt | 255 |
| targetname | akmodel |
| angles | 0 0 0 (These numbers represent pitch, yaw, and roll and they can be anything depending on how you need the model positioned). |
| model | models/w_ak47.mdl (model will depend on what weapon you want to use). |
trigger_multiple entity. The player coming into contact with this trigger is what causes the weapon to be "picked up." Depending on your setup and how you want it to behave, this can be nearly as small as the gun itself or it could fill up the entire interior of the locker. Be sure to test and make sure it can't accidentally be triggered through a wall or by walking close but not close enough to it.trigger_multiple
| Property Name | Value |
|---|---|
| target | akcount (this will be the name of the game_counter). |
| delay | |
| wait | 1 |
- Flags
- No players, entity only (unchecked)
- Pushables (unchecked)
func_door) can be anywhere on the map, but for this example we'll put them right near the locker. If you're implementing this into a full fledged map, put them where you find they are best organized for your own personal preferences.Next, we'll be creating the point entity
game_counter. This entity counts up by 1 each time it is triggered. This is how we make the trigger_multiple only function once despite the fact that it resets after 1 second. The counter is set to start at 0 and fire it's target at 1, but is not set to reset the counter after firing. This means that once it hits 1, the trigger_multiple can trigger it repeatedly all day long but the counter will not fire a second time. "But I thought this was going to be repeatable every round!?" you might be asking. Yes, it will be, we'll be getting to that function soon.game_counter
| Property Name | Value |
|---|---|
| target | akmm (this will be the name of the first multi_manager). |
| delay | |
| targetname | akcount |
| frags | 0 (this is the initial value) |
| health | 1 (this is the limit value, when the counter hits this number, it triggers it's target). |
- Flags
- Remove on fire (unchecked)
- Reset on fire (unchecked)
multi_manager entity. This is what will be triggered when the game_counter hits 1 and it will trigger the game_player_equip as well as the first env_render entity. Remember that, other than the name of the multi_manager, you must come out of smart edit and add each keyvalue manually. The property name will be the name of the entities you want to target and the value column will contain the amount of time before each entity is triggered in seconds.multi_manager
| Property Name | Value |
|---|---|
| targetname | akmm |
| akg | .001 (this will be the name of the game_player_equip). |
| akd | .001 (this will be the name of the first env_render). |
- Flags
- multithreaded (unchecked)
game_player_equip which will be what actually equips the player with the AK-47 and ammo. It is triggered by the game_counter via the first multi_manager. For this situation, we are only giving the player an AK and 3 spare magazines (every gun comes loaded with a full magazine by default, so in this case, we are giving the player 3 mags for 90 rounds plus the 30 round mag that comes loaded in the gun for a total of 120 rounds). It is important to ensure the "use only" flag is checked to ensure only the player triggering the setup receives the AK.game_player_equip
| Property Name | Value |
|---|---|
| targetname | akg |
| weapon_ak47 | 1 |
| ammo_762nato | 3 |
- Flags
- Use Only (checked)
env_render point entity. It is triggered by the game_counter via the first multi_manager. This is what will make the cycler_sprite AK "disappear." It does this simply by changing the FX Amount from the maximum (255) to the minimum (1). There are 4 flags that allow you to ignore values that you don't care about. This is handy for this situation since we only care about changing the FX Amount. Without these flags, you would have to set the rest of the values to match the same values on the cycler_sprite AK so that they don't get changed.env_render
| Property Name | Value |
|---|---|
| renderamt | 1 |
| targetname | akd |
| target | akmodel |
- Flags
- No Renderfx (checked)
- No Renderamt (unchecked)
- No Rendermode (checked)
- No Rendercolor (checked)
We'll start the reset system by making a small brush and putting it in a place where it can't be seen or interacted with by the player. I refer to this as the "off site
func_door". You may be familiar with the use of func_door as a way to reset or activate things by round in Counter-Strike because it's one of the few entities that resets each round and has a target field for triggering things. At the start of each round the door resets and this causes it to fire it's target. The only thing you need to do is give this func_door a target, which in this case, will be our second multi_manager.func_door
| Property Name | Value |
|---|---|
| target | akmm2 (this will be the name of our second multi_manager). |
- Flags
- Start's open (unchecked)
- Don't link (unchecked)
- Passable (unchecked)
- Toggle (unchecked)
- Use Only (unchecked)
- Not in Deathmatch (unchecked)
multi_manager which will target the second env_render and the game_counter_set.multi_manager
| Property Name | Value |
|---|---|
| targetname | akmm2 |
| akr | .001 (this will be the name of the second env_render). |
| akset | .001 (this will be the name of the game_counter_set). |
- Flags
- multithreaded (unchecked)
env_render. This will make the cycler_sprite AK visible again at the start of the round. It is triggered by the func_door via the second multi_manager.env_render
| Property Name | Value |
|---|---|
| renderamt | 255 |
| targetname | akr |
| target | akmodel |
- Flags
- No Renderfx (checked)
- No Renderamt (unchecked)
- No Rendermode (checked)
- No Rendercolor (checked)
game_counter_set and it's purpose is to manually set the game_counter back to 0 on round start. It is triggered by the func_door via the second multi_manager.game_counter_set
| Property Name | Value |
|---|---|
| targetname | akset |
| target | akcount |
| frags | 0 (New Value) |
- Flags
- Remove On Fire (unchecked)
Stripping Weapons
To strip a player of their weapons, place aplayer_weaponstrip entity in your map. The only way this entity works is if you trigger it, so give it a name. It will only strip the weapons of the player that triggered it, which also means that triggering it via a trigger_auto or an offsite func_door won't do anything.. A simple example would be to name the player_weaponstrip "stripper". Then create a trigger brush and make it a trigger_multiple. Set the target to "stripper" and do whatever you want with the delay before trigger and delay before reset to get the effect you desire. Walking through the trigger_multiple will now strip the player walking through of their weapons. Be aware that this will also strip players of the bomb on a bomb defuse map, so do not use a player_weaponstrip entity on a bomb defuse map. Although a game_player_equip can be used to equip a bomb, it only seems to equip a "dummy bomb" that doesn't show up on the radar and can't be planted.Naming an entity "game_playerspawn" will cause it to be triggered by a player automatically when they spawn. This will also work with a
player_weaponstrip.
Other Uses
There are several things that you can do to make this entity set-up more interesting: you could make a Quake-like level using afunc_rotating in conjunction with some home-made textures (a picture of a CS gun of your choice on a {BLUE background for instance), and use env_render entities and multi_manager entities to trigger the disappearance of the func_rotating and to equip the player with the gun on the picture.You could have a metal detector or security scanner device type thingy that when walked through, sets off an alarm and strips the player of all their weapons. However, avoid leaving a player with no weapons, as this makes for a pretty tedious game of CS.

You could simply vend weapons/loadouts using a func_button. You could even set up multiple buttons with different loadouts and set up a system that strips your old loadout before equipping the new one. Which brings me to one more note...
Weapons can be stacked using
game_player_equip. If you so desired, you could give every player every single weapon at once. This is an important thing to remember in the event that you do not want players accidentally (or purposely) getting multiple primary or secondary weapons.Here is an example map with the gun locker and a few other setups using strip and equip entities.
The Armoury Entity
Thearmoury_entity allows you to put weapons on the ground to be picked up. Not all weapons are available for this entity, including pistols. Make sure you do not put this entity inside the ground or inside a player spawn. They usually have a decent amount of ammo but are not maxed out. You can change the quantity of weapons available in a single armoury_entity.
Weapon and Ammo Glossary
- weapon_usp (USP45)
- ammo_45acp
- weapon_glock18 (Glock 18)
- ammo_9mm
- weapon_deagle (Desert Eagle)
- ammo_50ae
- weapon_p228 (P228)
- ammo_357sig
- weapon_elite (Beretta Elites)
- ammo_9mm
- weapon_fiveseven (Five-Seven)
- ammo_57mm
- weapon_m3 (Benelli M3)
- ammo_buckshot
- weapon_xm1014 (Benelli XM1014)
- ammo_buckshot
- weapon_mp5navy (MP5/Navy)
- ammo_9mm
- weapon_tmp (TMP)
- ammo_9mm
- weapon_p90 (FN P90)
- ammo_57mm
- weapon_mac10 (Mac-10)
- ammo_45acp
- weapon_ump45 (UMP45)
- ammo_45acp
- weapon_ak47 (AK47)
- ammo_762nato
- weapon_sg552 (SG552)
- ammo_556nato
- weapon_m4a1 (M4A1)
- ammo_556nato
- weapon_aug (Aug)
- ammo_556nato
- weapon_scout (Scout)
- ammo_762nato
- weapon_awp (AWP)
- ammo_338magnum
- weapon_g3sg1 (G3/SG-1)
- ammo_762nato
- weapon_sg550 (SG550)
- ammo_556nato
- weapon_m249 (M249)
- ammo_556natobox
- item_kevlar (Kevlar)
- item_assaultsuit (Kevlar + Ballistic Helmet)
- weapon_flashbang (Flash Bang)
- weapon_hegrenade (High-Explosive Grenade)
- weapon_smokegrenade (Smoke Grenade)
- item_thighpack (Defuse Kit)
- weapon_c4 (C4 Plastique Bomb, don't use this, it doesn't spawn a "real" bomb)
- item_healthkit (give the player health in increments)
- 1 = 15hp
- 2 = 30hp
- 3 = 45hp
- 4 = 60hp
- 5 = 75hp
- 6 = 90hp
- 7 = 100hp
- item_battery (give the player kevlar armor in increments)
- 1 = 15pts
- 2 = 30pts
- 3 = 45pts
- 4 = 60pts
- 5 = 75pts
- 6 = 90pts
- 7 = 100pts
- item_longjump (HL Long Jump module, I don't know if this actually will work in CS, also, if it's like the longjump in HL, you won't be able to strip it)
- Article Credits
-
 Peace and LOve
–
Original author
Peace and LOve
–
Original author
-
 MistaX88
–
Significant rewrites and additions
MistaX88
–
Significant rewrites and additions
2 Comments
You must log in to post a comment. You can login or register a new account.
USE weapon_hegrenade
USE weapon_hegrenade