Tutorial: Re-texturing Models Last edited 21 years ago2003-09-18 04:00:00 UTC
You are viewing an older revision of this wiki page. The current revision may be more detailed and up-to-date.
Click here to see the current revision of this page.
Download attachment
Ever wanted to create a Mod but thought: "These monsters just don't look right for my mod. I wish they were a different colour."You also might have thought: "No, these clothes just aren't suitable at all."
Well, your problems are solved! And it's REALLY easy!
First, you'll need the Half-Life Model Viewer. You can find a direct link to HLMV here Links Page. Download HLMV, and install it. If you have unpacked your models, you can save time by associating their file type with HLMV and that will make them easier to browse.
You'll also need a graphics program. Paint Shop Pro and Adobe Photoshop are both very good graphics programs but, if you don't have them or are like me and have the slowest Internet connection ever, MS Paint (shudder!) will do just fine.
OK, find the offending model, in this case the hgrunt.mdl. Load it in HLMV. Select the texture tab at the bottom and scroll through the textures until you find one that you want to replace. Select Export and save it to an obvious location. In my case, I've saved them in a new skins folder on the desktop. Now, open up this texture with your graphics program (MS paint for me) and change everything that needs to be changed.
Once you are happy with the alterations (MAKE SURE YOU KEEP THE TEXTURE THE SAME SIZE!), go back to the model, find the texture which you altered (it will, of course, display the original texture) and select import. Locate your new texture and import it. View the model and it will have the new texture.
Now VERY IMPORTANT!: go back to the texture tab and select save model. Either save it in another place, or, rename it, or, save over the old model.
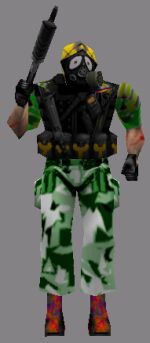
The example grunt model I have included has the following textures changed, the grunt's arms have been painted black (Don't ask), the gas mask guy has a grey helmet.
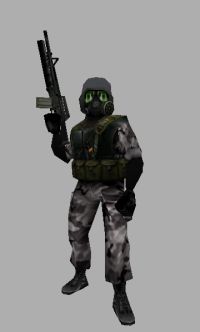 The Grunt
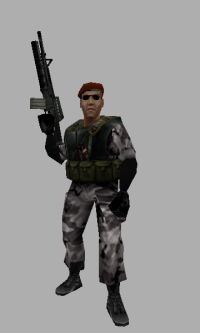 The Commander
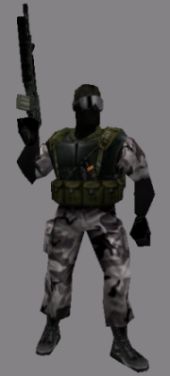 Ski Goggles
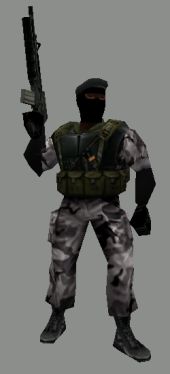 Balaclava Man
Just don't copy 'em over the old hgrunts if you prefer the old ones! If you prefer these, and save over the old ones, then when you want to go back to the old ones, just get the old ones out of the PAK file again.
[Three minutes after reading this tutorial I re-textured this grunt using Wally as the texture editor. Ok, so it's rubbish, but it worked and now the grunts are really easy to spot! What surprised me was that HL takes it's models and textures from the unpacked model file and not from the 0pak file when it launches. So the possibilities are endless. To share your re-textured models you will have to include the ones you have changed, and distribute them in a model folder so that those viewing your creations have access to them.
And as Vassy said, if you get sick of your new textures, just unpack the 0pak file into your model folder again, and you will have the old models back! - Andy]
 Weird Grunt
1 Comment

Captain Terror
Commented 16 years ago2008-06-01 05:07:13 UTC
Comment #100604
Excellent tutorial. Thank you = )
You must log in to post a comment. You can login or register a new account.