Tutorial: Vending Machine Last edited 6 months ago2024-09-15 13:18:04 UTC
How its done
It seems quite easy to make vending machines. Use the prefabs, right? WRONG! The prefabs are just blocks which do nothing. To make a working vending machine, you need to go through a very long process.First, create a block a bit larger than the player (Use info_player_start as reference). Make the grid as small as possible, and zoom in until the block fills the window. Apply a soda machine texture (GENERIC106 in the example). Now carve out the area with the buttons. Create 5 button-sized blocks and shove them on top of each other (In the gap, of course!). There will now be a block with 5 smaller blocks where the buttons should be. Align the textures on the 5 new blocks, and select one. Turn it into a func_button.
The properties should be:
Target: bev
Delay before reset: 3
Set the Flag to: Don't move.
I expect you're wondering what the "bev" is. You'll soon find out...Hollow the machine (Not the buttons) to a thickness of 2. Give the inside a dark texture. Now carve out the front (Above the dispenser hole) and place a func_breakable in the gap. It's texture should be the same as the front of the machine. Align the texture correctly, and go to its properties.
Set them to:
Material type: Glass (Should be the default)
Render mode: Texture
FX Amount: 200 (Only a little bit translucent)
Strength: 1 The Flag should be: Instant crowbar
Now carve out the dispenser hole. Inside the machine, place an env_beverage. Set its capacity to 100 (Good drink machines take a while to run out!) Its name should be "bev" (I told you that you'd soon find out!). The beverage type can be anything (I chose random, but I always get the same green can for some reason).
Place the can inside the machine, fairly low down, but still visible through the func_breakable (It looks good to see the can spawn inside the machine through the glass).
Now, create a floor for the machine to rest on, place a info_player_start above the floor, place a light above the info_player_start, and place a light (Change its colour to white) inside the machine. Also, to test the machine's protection against thieves, place a weapon_crowbar near the machine. Now compile and test the machine!
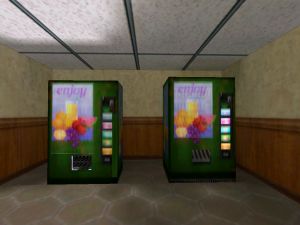 Vending Machine
Vassy.
Vending Machines II
The example above by Vassy, is the easiest way to get a working Vending Machine into your map. However I had a few enquiries about the machines that appeared in the Original Half-Life game. There was one that spilled it's contents when you broke the glass with the crowbar... How did they do that?For those of you not familiar with Prefab's and what they do, I am going to use one in this example.
An easy way to insert Prefabs is to use the Object Bar.
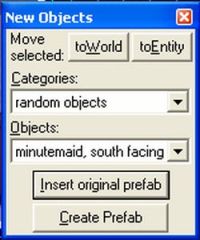 Object Bar
Open the RMF that you want to add the vending Machine to and select random objects from the drop down Categories: list and then the Prefab you require (in this case minutemaid, south facing) from the Objects: list. Now click on the Insert original prefab button. Hey Presto... there should be a brand new Minutemaid Vending Machine in your map.
Adjust the position of the machine so that it is where you want it to be in the final map.
Select the Vending Machine and you will notice that it is a group of two objects. Click Ungroup Selected Objects on the tool bar, and you should now have the base and the main part of the Machine as two seperate objects. I did this because it avoids problems when I Hollow the main machine.( If you don't do this you will still be able to Hollow the Machine, but it will give you a false brush, so you will end up with three objects.)
Select the top of the Vending Machine and click on Tools, Make Hollow or [Ctrl+H]. Select a wall thickness of 2 and click Ok. The top of your Vending Machine should now be a hollow box.
Making it Work
Before we go any further, it is a good idea to make sure that your Object Bar has the right properties for you to create a normal brush. In the Categories dropdown list select Primitives and in the Objects dropdown list select block.To make the machine functional we need to do a bit of Carving but before we do that, select the inside surfaces of the machine and assign the DRKMLT_BORD11 texture to them. This will make the inside of the machine dark and it looks better.
Create a brush the size of the "Enjoy logo" on the front of the machine and one for each of the buttons (approximately: 9w 5l 6h) and dispenser hole. Patience and care are required in creating Carving brushes to get the effect looking right.
 Vending Machine Carve
TIP: Never carve with entity brushes!
Select each button seperatley and assign them to the func_button entity. The buttons are 5 units deep into the machine, because they will move in approximately one unit in the chosen direction when pressed. The only properties you need to assign to each of them are:
Target: bev_2
Pitch Yaw Roll: You need to set the direction so that the button travels back into the machine when pushed.
Min Light Level: 1 (use this to make the buttons light up.)
There is no need in this example to check any of the Flags.
Now for the Glass Front to the machine. Select the brush you used to carve the front with and assign it to the func_breakable entity. Set the following Properties:
Target on Break : bev_spill
Material type : Glass
Gib model : models/glassgibs.mdl
Render Mode : Texture
FX Amount (1-255) : 200
ZHLT Lightflags : Opaque (blocks light) This stops the light from shining into the room.
Minimum Light level : 1
At this point add an env_beverage with the same properties as the example above but call it bev_2. You might like to add the internal light also.
The whole idea of making this machine was to make it spill out cans if you broke the glass. As an added bonus, we need to make those who vandalise our machine pay, so in the following set up we will also disable the env_beverage when the glass is broken, so they don't get anymore health points.
You can also be creative with the inside of your machine, making it look more like an... Urm, er... Vending Machine. Add an env_shooter to the machine and give it the following properties:
Name : bev_spill
Pitch Yaw Roll : Adjust to make the cans spill out of the machine
Number of gibs: 25 or you can add more if you want.
Delay between shots : 0.2
Gib velocity : 50
Course Variance : 0.45
Gib Life : 4
Model or Sprite name : models/can.mdl
Material sound : Metal
Also add an trigger_relay and assign these properties:
Name : bev_spill (The same as the Name of the env_shooter so that it is targeted when the glass breaks)
KillTarget : bev_2
Trigger State : off
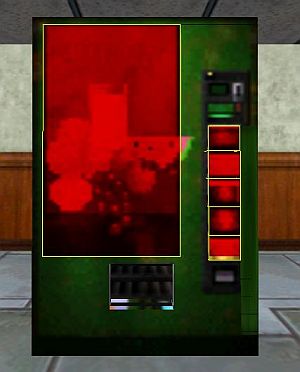
 Pre Glass Break
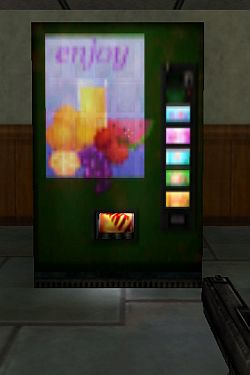
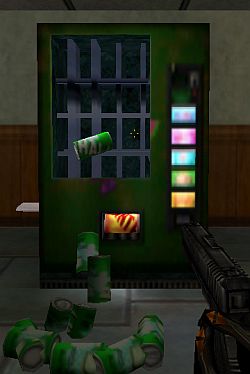 After Glass break
Try it out...
- Article Credits
-
 Vassy
–
Original author
Vassy
–
Original author
1 Comment
You must log in to post a comment. You can login or register a new account.
Can you do it in multiplayer ? I'm not sure env_beverage works in Counter-Strike for example... :/