Tutorial: Realistic Shadows Last edited 2 years ago2022-09-01 12:08:31 UTC
You are viewing an older revision of this wiki page. The current revision may be more detailed and up-to-date.
Click here to see the current revision of this page.
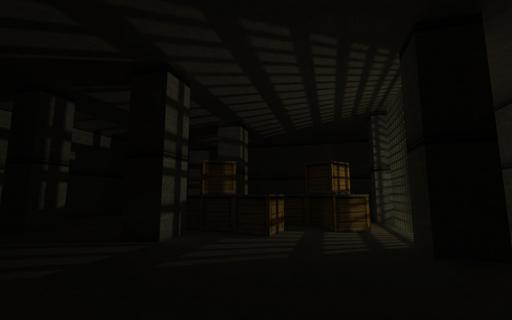
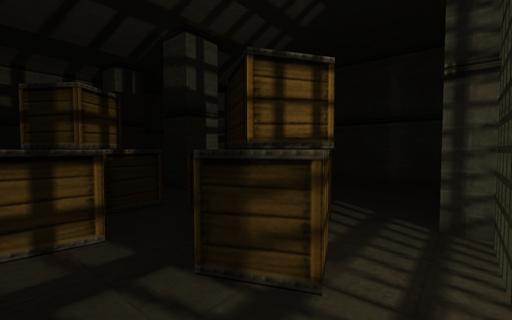
One of the things missing in Half-Life are precise and realistic shadows. But they are not less important than architecture or textures for the overall look and feel of the map. So bringing them to your map opens completely new possibilities, allowing you to create a much more interesting and dramatic atmosphere, which was previously impossible.
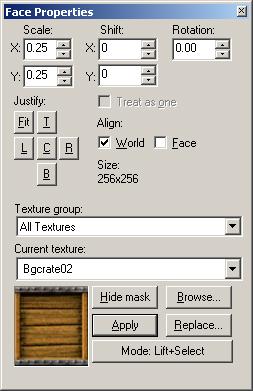
Now all that's left to do is to accordingly lower the scale in VHE. So 64x64 scaled four times to 256x256 should be equally lowered four times too to 0.25.
Keep in mind that strongly lowering the scale of textures causes issues with some dynamic lighting features. For instance if a texture is scaled down four times on a face, then the light emitted from the flashlight, weapon projectiles (RPG rocket, crossbow bolt, etc.), and any explosions becomes four times smaller on that surface.
That's probably all you need to know. Good luck!
How it works?
The technique used for shadows itself in the Half-Life engine is perfectly correct and realistic. However Valve decreased its quality greatly to save memory because the engine simply can't handle it. Every surface in the game has a lightmap on which the light is projected and its resolution was made smaller, making the shadows less sharp. But I found a little trick to overcome this and make the lightmap resolution bigger, thus making the shadows much more precise. But you must keep in mind that it consumes a lot of resources, so you can't use too much of it in your maps. However some optimization can be done which will improve the performance greatly.The technique
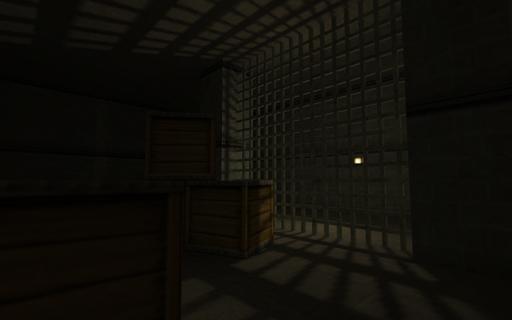
The technique is very simple and quick because all the work is done with textures. If you don't know how to make custom textures, have a look at this tutorial first. All you need to do is take the original texture, scale it up a few times with any advanced image editor and then scale it down equally in VHE. Lowering the scale in VHE makes the lightmap in-game bigger, thus making the shadows more precise. In the example it's scaled four times and as you can see it looks good enough. Even though there is a lightmap size limit you're probably never going to reach it because four times is really enough for a good effect and anything bigger will use up extreme amounts of memory. Also, keep in mind that a texture scaled down two times to 0.5 costs four times more w_polies and a texture scaled down four times to 0.25 costs sixteen times more w_polies. Also keep in mind that you can't go over the default 512x512 texture size limit. If you really need to then you should split the image across multiple textures, or you can simply scale it two times instead of four, but the preciseness of the shadows will be decreased.Example
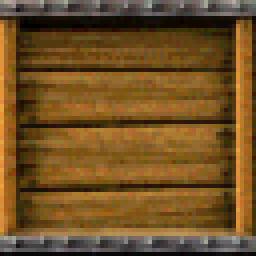
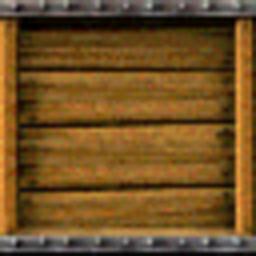
Let's say we have this 64x64 crate texture.Open it in any image editor and scale it up four times. So a 64x64 texture scaled four times will become 256x256. Keep in mind that your image editor should smooth the texture when resizing, becuse a pixelated texture will still look poor in-game, even when scaled down.Optimization
I recommend you optimize as much as possible, especially if it's going to be a multiplayer map. The good thing about this technique is that it only applies to certain textures so you can control which surfaces have the precise shadows. For example if you have a room and a shadow being casted only on only one of the walls, you can apply this technique to that wall only and leave the rest of the room with normal scale textures. Also if you have a grate with a light shining through it then you can optimize it too and save a few hundred polies. Simply texture the grate made of brushes with BEVEL texture to make it invisible and to remove all the clipping information from it. This way it will only block light. And for the visible textured part use func_wall with transparent texture of grate of the same dimensions. If done correctly you could go from a few thousand polies to a few hundred.Tips
While it works with all types of light, you should use light_spot if you want to achieve a result similar to my example.Keep in mind that strongly lowering the scale of textures causes issues with some dynamic lighting features. For instance if a texture is scaled down four times on a face, then the light emitted from the flashlight, weapon projectiles (RPG rocket, crossbow bolt, etc.), and any explosions becomes four times smaller on that surface.
That's probably all you need to know. Good luck!
- Categories
- Tutorials
- Advanced Tutorials
- Goldsource Tutorials
- Mapping
16 Comments
You must log in to post a comment. You can login or register a new account.



But great tutorial! I'll be sure to use the technique a lot.
"About more detailed shadows to lower the rad: -chop and -texchop. Decreases parameter-chop in half and more, with-texchop must be at least twice. Can be used to mitigate the edges of shadows-bounce # - number of reflections of light. I think I will be complemented mappers ... "