Tutorial: Hint Brushes Last edited 5 years ago2019-04-22 05:19:17 UTC
You are viewing an older revision of this wiki page. The current revision may be more detailed and up-to-date.
Click here to see the current revision of this page.
Ok, so you hear people talking about them and you don't get it.
This tutorial is a based on testing most of the theories that are promoted on other Web sites. The results may surprise you.
This tutorial is not for new mappers. It is designed to give ideas to mappers who want to improve their skills.
Make sure you have the latest compiling tools. At this writing they were ZHLT 253 custom build 1.7 otherwise known as ZHLT.
Improper use of HINT brushes WILL increase r_speeds. I hope to dispel some of the myths, and get you thinking at the same time.
What is a HINT brush?
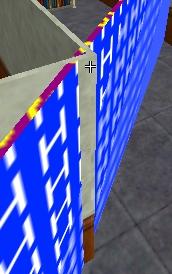
A HINT brush is a normal brush textured with the SKIP texture. And then a single face is chosen for the application of the HINT texutre.Merl the author of what we commonly refer to as ZHLT 253 Custom Build 1.7 posted a comment at Collective recently saying that it doesn't really matter which side of the brush the HINT texture is applied to as long as it is one of the main facing faces. By that I think he means either the large face of the brush from the players perspective, or the opposite large face. I tested this, and couldn't disprove it... almost.
The Test
I built a small test map, included in the file as hint1.rmf. A simple corridor with two initial branches and a "T" junction at the far end. I added a couple of identical bookcases in the first branch and two couches, desks and chairs in the "T" junction. I also made the light fittings complex Spikes. The whole idea was to drive the r_speeds up, so I could prove that HINT brushes could lower them.
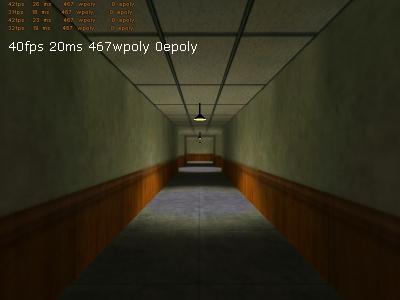
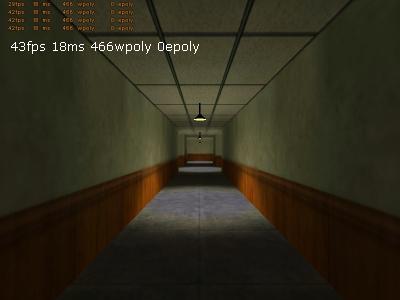
But rather than start work with a poorly constructed rmf, I took the readings of Hint1 and then modified it.
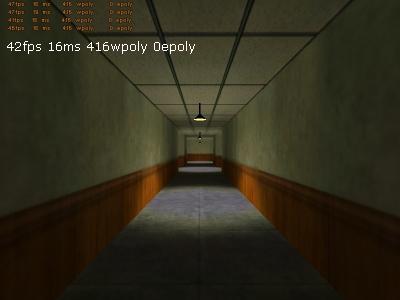
Compile Time: 6 minutesIf you don't understand these, have a read of Tutorial: R_Speeds.
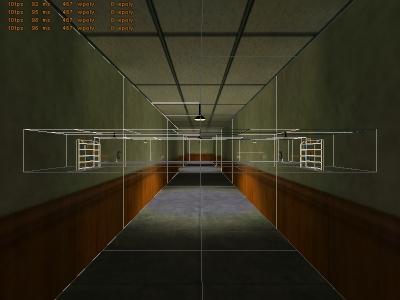
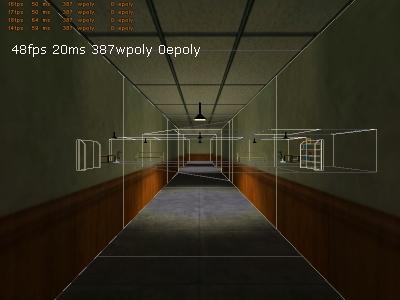
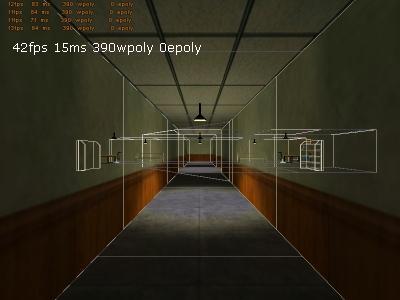
So Hint1 gave me a base to work with, I also took a screenshot using gl_wireframe 2 so we could see which brushes were being drawn, and which had dissapeared.Remember that when using gl_wireframe 2 you must be viewing your map in OpenGL and that all func_brushes will be drawn.
Reducing the speeds by basic map modification
I was in a bit of a hurry, so I turned all the brushes that touched the floor, walls and ceiling into func_wall's. Normally I would experiment with raising the desks and book cases 1 unit off the floor to achieve the same effect. This is purely an asthetic thing... You have to test it and see what it looks like. But func_wall does the trick and essentially stops the brushes that touch the floor, walls and ceiling from cutting that texture into more faces rendered with texture.
I grouped all the func brushes together, which means I was being lazy and selected all the things I wanted as func_wall and assigned them to that entity. This isn't a good mapping technique because as a group, they are visible across the map. Try to add your func brushes individually.
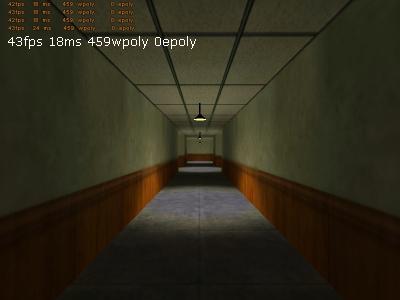
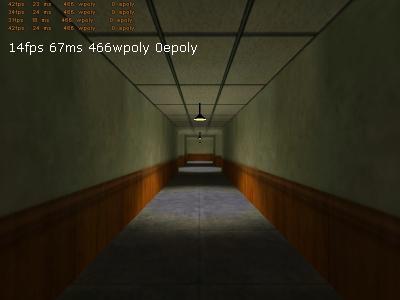
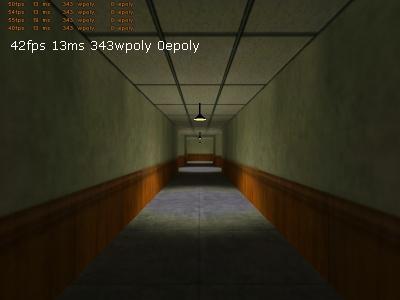
hint2.rmf is the addition of func_wall's. So whats the savings?:
Compile Time: 40 SecondsA massive 8wpoly drop, seems hardly worth it... but check out the drop in compile time... No there is a worthwhile saving.
Adding a HINT brush.
I have added single HINT brush 1 unit wide, to hint3.rmf, to cover the opening of the first corridor branch on the left hand side. I textured the internal face of this brush with HINT texture. So the face that is exposed to the main corridor has SKIP texture on it. The HINT brush just touches the walls, ceiling and floor, but does not cut into them
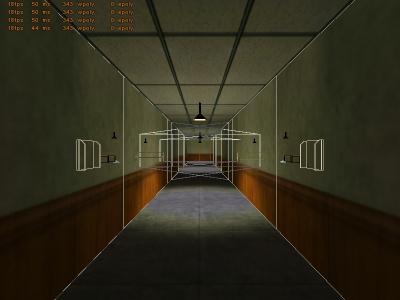
Compile Time: 42 SecondsSo the interesting thing to note here is that the wpoly count increases by 7 almost matching the reduction gained by func_brush trickery... Why?
Simple, HINT brushes, although not rendered by the engine as a textured brush, have an effect on the division of the existing rendered textures by adding to the potentially visible surfaces. If you have a look at the wireframe shot in hint3.bsp, you will see where the HINT brush is. Keep this in mind when you are viewing other peoples work and wonder how they kept the speeds down.
I also decided to check out Merl's theory that it doesn't matter which side the HINT texture is on. So, the next rmf had the HINT texture on the corridor side of the brush. No change in speed is noticed.
Remember that we had set this brush up so that it was just touching the walls, floors and ceiling.
What if we make it protrude 1 unit into the walls, floors and ceiling, effectively cutting into them...What happens then?
Compile Time: 47 secondsIn this RMF I made the brush cut into the walls, floor and ceiling. There are a few theories about that the brush does not have to actually cut into the wall. The above shot is of hint5 (Not included in the download), and it seems that by cutting the walls, floor and ceiling I haven't actually increased the speed. But I haven't lowered them either. But it did increase the compile time.
Cutting Corners
Passing the HINT brush through the corner of the area closest to the player seems to be the most written about brush on the web. When you build your HINT brush like this it works as intended and let's the game engine know that the area beyond the HINT brush should not be rendered until the required.hint6.rmf is an example of this where the brush cut's through the corner but only touches the walls, ceiling and floor. The HINT texture is on the external face.
Compile Time: 38 SecondsNow we are talking reduction! We have lowered our wpoly count by 78. Doesn't seem much, but if your maps r_speeds are 900, then you are starting to get close to the magic software number of 800.
Also, if you look at the screenshot above you will see from the gl_wireframe shot, that the brushes that were drawn in the original left hand branch have dissapeared (with the exception of the func_brushes). What has happened is that the engine is not rendering the textured brushes behind the HINT brush.
So just to move things about a bit, I made another RMF with an internal HINT texture face.... The wpoly count went up by 3, and I hear you say's "but Merl said"... yeah you're right. It shouldn't matter and as far as I am concerned it doesn't. We are trying to drop the wpoly count by reducing the amount of visible textured faces rendered by the game engine. A reduction or addition of 10wpoly isn't critical and might be explained by the position I took the screen shot from.
Compile Time: 47 SecondsThe next idea I had was to make the brush cut into the walls, floor and ceilings by 1 unit. I want you to track back along the compile times and get an understanding of what is going on here. It is taking slightly longer to CSG and RAD compile. The map is presenting some more faces for compiling, but at the same time it is actually reducing them as well.
42fps 15ms 390wpoly 0epoly COMPILE TIME 49 Seconds It seems that the brush must cut through the corner to gain the most from it. hint9.rmf is an example of the brush just touching the outer edge of the corner.
Compile Time: 42 SecondsLet's go HINT brush mad!
The final map includes all the corridors being sealed with corner cutting HINT brushes. This gives us an overall wpoly saving of 110 after our initial reduction gained by turning brushes that touch other faces into func_brushes.
110 can be the difference between a map that will run in Software mode without the Short Surfaces Error, and one that won't.
Compile Time: 56 SecondsHave a look at the wireframe shot. The func brushes are clearly visible, but the branches from the corridor are not. If the corridors held a series of complex brushes, then the saving would be greater.
Horizontal HINT Brushes?
The brush does not have to exist solely in the vertical plane. You can place horizontal brushes above the players head to stop brushes being rendered behind walls that don't touch the ceiling. Experiment.... and remember that what you think the player see's and what the engine see's are two different things.
An easy example of this is to build a wall with an 8 unit gap at the top. Place your player on one side and a lot of brushes (Bookcase) on the other. You might think that the bookcase won't be rendered because the player can't see it. Even if the player jumps, he will not see it. But the engine thinks differently. It will render anything that it thinks the player might see, not what the player can actually see.
In Summary
Be careful with HINT brushes, the results may not be what you expect.HINT brushes are there to help you let the engine know what brushes you want rendered, and which ones you don't. They are not there to fix up crappy design or maps that are beyond the engines limits.
Good map design and building is easier than placing brushes at a later date just to find out you don't get the savings you wanted.
Don't build huge grid filling maps with the idea that HINT brushes will fix it all later. They might not and you might have to start again.
Plan, Build and Test.....
This isn't all there is to HINT brushes. The aim was to get the idea across so you could experiment.
- Categories
- Tutorials
- Advanced Tutorials
- Goldsource Tutorials
4 Comments
You must log in to post a comment. You can login or register a new account.

http://www.siteduzero.com/tutoriel-3-13244-optimisation-b-diminuer-les-r_speeds.html
It's in french, but aniway, the screensshots are VERY nice, and may help you to understand better...
"It's in french, but aniway..."
But anYway...
http://translate.google.com/translate?hl=en&sl=fr&tl=en&u=http%3A%2F%2Fwww.siteduzero.com%2Ftutoriel-3-13244-optimi%20%20sation-b-diminuer-les-r_speeds.html