Tutorial: Radar locations in Counter-Strike: Source Last edited 5 months ago2024-09-20 03:14:50 UTC
As we all know, a believable setting for a map is extremely important. Even if you've created a 31st century spaceship made entirely from transparent goo technology, it should ideally still come across as a believable location.
Something Counter-Strike does to assist with making a map feel more like a real location is allow level designers like us to give seperate areas in the map place names or "nav locations." These are the little names which appear below the radar, next to a teammate's voice comm or chat message and most fun of all - what bots will shout about.
Setting these locations up isn't especially difficult once you get your head around it, but it can be quite time consuming so go and make yourself a cup of coffee, grab a bun and get prepared to put in some effort.
Firstly, like cubemaps and bot navigation meshes, this part of the mapping process is done in the game engine. Start a private server, load up your map and activate
It is important to note here that this tutorial assumes you already have a navigation mesh generated for your map. (
Once in the game, make sure you have spawned and then proceed to type the following into the console:
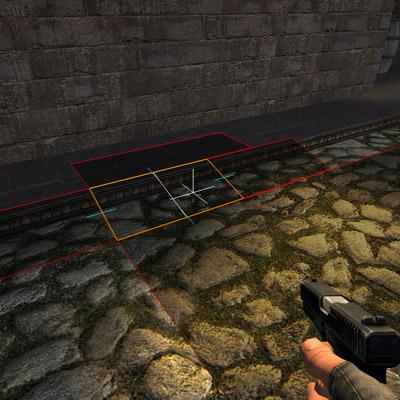
Anyway, move to your first location. Lets use CT spawn as an example.
Bring up the console and enter
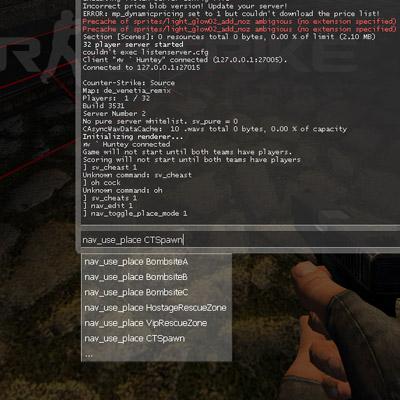
Now it's time to name your location. Use this console command: `nav_use_place [location]` where [location] is the place name. For this example, the command I entered was
To move onto your next zone, simply repeat the process from the
Once you're satisfied that every place which needs a name has one, enter
To recap, the console commands to use, in order, are:
Something Counter-Strike does to assist with making a map feel more like a real location is allow level designers like us to give seperate areas in the map place names or "nav locations." These are the little names which appear below the radar, next to a teammate's voice comm or chat message and most fun of all - what bots will shout about.
Setting these locations up isn't especially difficult once you get your head around it, but it can be quite time consuming so go and make yourself a cup of coffee, grab a bun and get prepared to put in some effort.
Firstly, like cubemaps and bot navigation meshes, this part of the mapping process is done in the game engine. Start a private server, load up your map and activate
sv_cheats 1. It is important to note here that this tutorial assumes you already have a navigation mesh generated for your map. (
nav_generate in the console.) To save yourself some time later, if you've noticed while playing with bots that they dont use some parts of the map, go to these locations, look at the floor and type nav_mark_walkable and then remake your navigation mesh.Once in the game, make sure you have spawned and then proceed to type the following into the console:
nav_edit 1Anyway, move to your first location. Lets use CT spawn as an example.
Bring up the console and enter
nav_toggle_place_mode 1. This command will take you into the nav location editor. Now it's time to name your location. Use this console command: `nav_use_place [location]` where [location] is the place name. For this example, the command I entered was
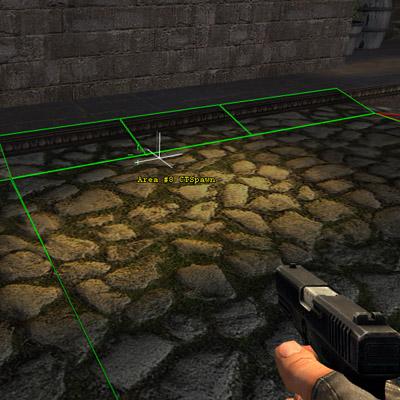
nav_use_place CTSpawn.
Here's a complete list of possible place names. Sorry to say you can't make up your own.
- Airplane
- Alley
- Apartment
- Apartments
- Atrium
- Attic
- Back
- BackAlley
- BackDoor
- BackHall
- BackRoom
- BackWay
- BackYard
- Balcony
- Basement
- Bathroom
- Bedroom
- BigOffice
- BombsiteA
- BombsiteB
- BombsiteC
- Bridge
- Bunker
- ComputerRoom
- ConferenceRoom
- Courtyard
- Crates
- Crawlspace
- CTSpawn
- Deck
- Den
- DoubleDoors
- Downstairs
- Ducts
- Dumpster
- Elevator
- Entrance
- Entryway
- FamilyRoom
- FarSide
- Foyer
- Front
- FrontDoor
- FrontHall
- FrontRoom
- FrontYard
- Garage
- Gate
- GateHouse
- GuardHouse
- HostageRescueZone
- House
- Inside
- Kitchen
- Ladder
- LittleOffice
- LivingRoom
- LoadingDock
- Lobby
- Loft
- LongHall
- MainHall
- Market
- MeetingRoom
- Middle
- Mines
- Office
- Outside
- Overpass
- Patio
- Porch
- ProjectorRoom
- Ramp
- Rear
- Roof
- SecurityDoors
- Sewers
- Side
- SideAlley
- SideDoor
- SideHall
- SideRoom
- SideYard
- Stairs
- Stairwell
- StorageRoom
- Tower
- Truck
- TSpawn
- Tunnel
- Underground
- Underpass
- Upstairs
- Vault
- VendingMachines
- Village
- VipRescueZone
- Wall
- Water
- Window
- Windows
- WineCellar
nav_toggle_place_painting 1 into the console. The square should turn green. Without typing anything else, move the the cursor to a different square. It will also change. In this painting mode, every square you look at will be designated simply by looking at it, allowing easy designation of even large areas.
To leave paint mode, simply enter nav_toggle_place_painting 0.To move onto your next zone, simply repeat the process from the
nav_use_place stage.Once you're satisfied that every place which needs a name has one, enter
nav_save into the console and you're done. Test by starting a new server and running around.To recap, the console commands to use, in order, are:
sv_cheats 1
nav_edit 1
nav_toggle_place_mode
nav_use_place [location]
nav_toggle_place_painting
nav_save- Categories
- Tutorials
- Intermediate Tutorials
- Mapping
- Source Tutorials
- Article Credits
-
 Archie
–
Original author
12 Comments
You must log in to post a comment. You can login or register a new account.


I can't see anything wrong with it!
^^
Sv_cheast
And not just use a Brush-based Ent ?
you even included the par to make your bots less stupid. Bravo Hunter
And not just use a Brush-based Ent ?"
dude, just calm down, it ain't that hard...
i mean come on, it's very easy to use, not to mention how awesome it is to have a ingame editor. (kinda like with crysis's editor, sandbox 2)
if you find it too inconvenient to type in all the commands, just bind the commands, like i did, i bound delete to "nav_delete" so i can easily delete parts.
btw, nice tut, even though i already knew how to do this.