Tutorial: Using Sprites Last edited 6 years ago2018-06-26 09:03:02 UTC
You are viewing an older revision of this wiki page. The current revision may be more detailed and up-to-date.
Click here to see the current revision of this page.
✔️ Download example map
Although sprites date back to the most primitive of first-person shooters (in fact, they WERE first-person shooters), they still play a very important role in game maps.
These are some of the more common effects that appear throughout Half-Life, and it's interesting to see how they're made. All you really need is a room and some object that steam can appear to be spewing out of - I used a classic floor-to-ceiling pipe with a break in the bottom. Then you need the key entity -
First place one
The whole steam effect is heavily customisable. Editing the FX Amount, for example, allows you to change the translucency of the sprites. Leave the Render Mode as Additive though, or it might not look right. I've also placed an
Although not always noticable, glow effects around lamps add depth to your levels, and they aren't difficult to set up. There are in fact two entities that can be used to create the effect -
I've placed two little nozzle-like things near the pipe. Pressing the button that is on the opposite wall will activate an explosion sprite over both nozzles. The sprite on the right is using Additive, and the left one is using Glow without Constant Glow set. You can see that Additive mode is more suited to this purpose. It also demonstrates the one case in which is is okay to use orientation-specific sprites - perhaps if the explosion occurred behind a window or something it would be even better - providing the player can't get to the sprite before the sequence is over.
You will notice that the Play Once flag is set on for these two sprites, which stops them from looping. They also have names (explo), which is the target of the switch. I've set the switch's reset delay to a value higher than the length of time that the sprites play for to prevent any problems.
You might want to try out the other Render Mode and Render FX settings. Some of them are designed to be used with solids (and models), rather than sprites, but you can see what they do anyway.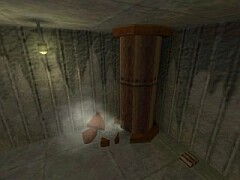 Steamy.
Although sprites date back to the most primitive of first-person shooters (in fact, they WERE first-person shooters), they still play a very important role in game maps.
Introducing Sprites
Firstly, it's important to realize that sprites are 2D images. They can either be single-frame, non-animated images, such as for glow effects, or they can be fully-animated sequences, like with explosions. The beauty of sprites is that because they are 2D, there is no real limit to their complexity. In Quake 2, for example, the explosions are 3D - that's obvious, because they are slow and chunky-looking. In Half-Life, all the explosions are sprite-based, which makes them look far more realistic. There are problems though - because sprites are 2D, they can obviously only be displayed one way round. In Half-Life, the sprites will always face the player, no matter which direction the player is looking. This is why it isn't easy to get the positioning of sprites right - make a mushroom-cloud type explosion occur too near the player, and it might appear to follow him. It might even appear to be exploding along the ground.Steam effects
See also: env_spriteThese are some of the more common effects that appear throughout Half-Life, and it's interesting to see how they're made. All you really need is a room and some object that steam can appear to be spewing out of - I used a classic floor-to-ceiling pipe with a break in the bottom. Then you need the key entity -
env_sprite. The thing about this effect is that it doesn't use just one sprite. Although Half-Life contains several animated steam sprites, they all have that 2D problem I mentioned - they will appear to follow the player if the player is allowed to see the sprite from more than one angle. That's alright for a distant one-off burst, but we want a nice, cloudy steam to look nice from all angles. So what we're going to do is take a far less lightly looking sprite, xsmoke1.spr, and duplicate it. If this is done successfully, then it appears to the player to be one stream of 3D steam.First place one
env_sprite entity on the map and set it up. Set its Render Mode to Additive, FX Amount to 50, Frame Rate to something like 25, Sprite Name to sprites/xsmoke1.spr and scale to 0.5. Put this entity right into the gap that you have created in the pipe. Now shift-drag it away from the original sprite in the direction you want the steam to appear to move to duplicate it. Getting the distance between the sprites right is a bit tricky - just run the map and alter it a few times to get it right. With each duplication, put the scale of the sprite up a bit (increments of 0.5 up to about 2 is fine), and lower the framerate a bit (down to about 10 or so). The reason for the framerate change is mainly that it makes the steam look as though it slows down as it leaves the pipe, but it also prevents the player from noticing that the sprites are all the same, because they move at different speeds. Play around with the distance, framerate and scale until the steam looks realistic. Try splaying the larger sprites out a bit to make it look like the steam disperses as it gets further away. You will also need to set the Start On flag on, so that the steam starts up automatically.The whole steam effect is heavily customisable. Editing the FX Amount, for example, allows you to change the translucency of the sprites. Leave the Render Mode as Additive though, or it might not look right. I've also placed an
ambient_generic just above the break to add some sound, and I've put some debris around the hole (notice that the debris is all bound to func_wall. This is to stop it breaking up the world geometry to make it look better and run faster).
Glow effects
See also: env_glowAlthough not always noticable, glow effects around lamps add depth to your levels, and they aren't difficult to set up. There are in fact two entities that can be used to create the effect -
env_glow and env_sprite. env_glow is specifically designed for glow effects, and it is therefore a little easier to set up. However, env_sprite entities are more powerful (mainly because they allow animation), so you may want to use those. I've created two hanging lamps in the tutorial map. The one on the right (from the player start position) is using env_glow with its default settings, and the one on the left is using env_sprite, with a different glow sprite, although they look very similar. Both lamps also have light entities just underneath (or you can use the texture called 'yellow' for the bulb, which is a texture light). To set either effect up you only need to change the Render FX to Constant Glow and Render Mode to Glow.
Additive vs. Glow
The way Render Mode and Render FX control the sprite's appearance is quite interesting (and complicated). The two Render Modes we have used in this tutorial are Additive and Glow. The former does as it suggests - adds the sprite's colours to whatever is behind it (in a slightly more advanced way). Glow is a bit different. While Additive sprites allow you to see whatever parts of the sprite are not obscured by geometry, Glow sprites will overlay anything in front of them, so that the whole sprite is always visible, as long as the player can see the centre of the sprite. This is obviously why Glow Render Modes are only really suited to things like lights. Another difference is that Glow sprites resize themselves as the player approaches. This creates quite an interesting effect, but it is cancelled out by the Constant Glow setting of Render FX, if you prefer that.I've placed two little nozzle-like things near the pipe. Pressing the button that is on the opposite wall will activate an explosion sprite over both nozzles. The sprite on the right is using Additive, and the left one is using Glow without Constant Glow set. You can see that Additive mode is more suited to this purpose. It also demonstrates the one case in which is is okay to use orientation-specific sprites - perhaps if the explosion occurred behind a window or something it would be even better - providing the player can't get to the sprite before the sequence is over.
You will notice that the Play Once flag is set on for these two sprites, which stops them from looping. They also have names (explo), which is the target of the switch. I've set the switch's reset delay to a value higher than the length of time that the sprites play for to prevent any problems.
You might want to try out the other Render Mode and Render FX settings. Some of them are designed to be used with solids (and models), rather than sprites, but you can see what they do anyway.
- Categories
- Tutorials
- Intermediate Tutorials
- Goldsource Tutorials
1 Comment
You must log in to post a comment. You can login or register a new account.
THERE ARE 5 type of sprites (when you creat them with sprite explorer) :
- Type 0: vp parallel upright => sprite that will have the same aspect, but if you get above the prite, it will still look plane (Fire effect is the best with them).
- Type 1: facing upright => ??? I dunno, sry
- Type 2: vp parallel => sprite that will have the same aspect, whenever you staring it at
- Type 3: oriented => fixed sprite (See the TV in cs_bikini ? That's it).
- Type 4: vp parallel oriented => => ??? dunno too, sry

Different entity that allows you to render sprites :cycler_sprite : is better with model. Blocks player
env_sprite : the normal entity
env_beam : laser entity (scientist coffee is an env_beam with 2 info_targets).
env_glow : for glowing lights, but NOT ONLY !!! That's the perfect entity for a fixed sprite (like the TV of cs_bikini, again :p). You can disabled "smartedit", and add "framerate", "angles" and "scale" (they are not default, but it work !!!