Vlatitude: Advanced Lighting Last edited 2 years ago2022-09-29 07:55:57 UTC
This is a continuation of my Introduction to Lighting Tutorial. Here I'm going to cover how to change the color and brightness of texture based lights, lighting outdoor areas, the light_spot entity, and making a "halo" around lights. Now let's get started.

 This is a different type of spotlight than is made by using a light entity and and info_null entity. Basically it's like a light entity, but then it's not. If pointing straight down, it looks like half of a light entity. It's like the light_environment entity too because you can change the pitch and angle. You can also change the radius of the light. To the left is a screenshot of a spot_light entity with a default radius and pitch pointing down (-90).
Editing the texture lights
It's pretty easy to change the amount and color that a texture gives off. The color and amount of light given off by a texture is defined by the file lights.rad in you WorldCraft directory. Just open up the lights.rad file in Wordpad or your favorite text editor. You'll be presented with a list that looks something like this: +0~GENERIC65 255 255 255 750. +0~GENERIC65 is the name of the file, the next three numbers are the color (in RGB values) of the light and the last number is the intensity. You can even define your own textures that give off light or remove any that Valve defined. Just add in the name of the texture to the lights.rad file and then define it's color and intensity. Here, I'll give an example. Let's say the texture's name is Light_1 and we want it to be white and have a medium brightness. We'd go into the lights.rad file and type in Light_1 255 255 255 500. Now when you place the texture Light_1 in your level, it'll emit light!Lighting an outdoor area
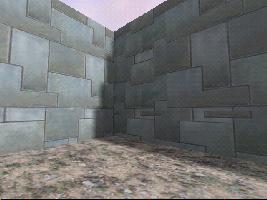
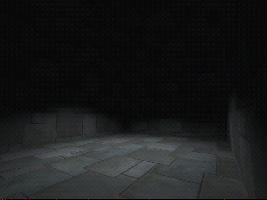
To light an outdoor area you place a light_environment entity near the sky. You change the color and brightness just like you do a normal light. Now here's how you make it look like a sun. You change the angle to change the angle of the light and the pitch in changes, well the pitch of it. -90 (default) is straight down, 90 is straight up and 0 is completely horizontal. Any value between -90 and 90 is legal. Below are a few screenshots of the light_environment effect.The light_spot entity
Adding halos around lights
This is a really neat effect. It puts halos or coronas around lights. If you've played Unreal then you know what I'm talking about. Coronas were used heavily in Unreal. To make one of these you place an env_glow entity where you want the halo to be (generally just above the light entity). Now that's the easy part because there are quite a few things we have to change before we get it to work. Set renderfx to constant glow and set rendermode to glow. Renderamt defines the translucency of the glow. The higher the number, the more visible the glow. 150 is a good number to start with. Rendercolor should be set to the color of the light and for model use sprites/flare1.spr. That's it!- Article Credits
- Brian – Author
This article was originally published on 69th Vlatitude.
The original URL of the article was http://www.vlatitude.com/tutorials.php?tutID=6.
The archived page is available here.
TWHL only publishes archived articles from defunct websites, or with permission.
For more information on TWHL's archiving efforts, please visit the
TWHL Archiving Project page.
Comments
You must log in to post a comment. You can login or register a new account.