Vlatitude: An Introduction to Lighting Last edited 2 years ago2022-09-29 07:56:00 UTC
Redirected from Vlatitude_Archive:_An_Introduction_to_Lighting
This is going to be an introduction to adding lighting effects to your level. I'll later post an advanced lighting tutorial. First let's make some assumptions. I assume you know how to: Place an entity in a level, edit an entity's properties, and tie an entity to a brush. This tutorial is going to cover entity based lights, textures that give off light, making a spotlight, and how to have a switch turn a light on and off. Let's start off first with something new, textures that give off light.
 Now onto adding a light switch.
Now that you have your switch made, tie it to the func_button entity. Now go into your light's properties and give it a name. Then go into the switch's properties and give the target the same name as your light. Now you have a light switch! We can modify this more though. In the sound attribute you can select the sound you want your switch to make. Now go play your map and press the switch. Noticed how the switch moved? Well we can stop that by going into the flags tab of the switch. Make sure don't move is checked. Also make sure toggle is checked. You can also check sparks. This makes the switch spark. If you check touch activates then when the player walks up to the switch it'll activate. If you want your light to be off when the level starts then go into the light's properties under the flags tab and check initially dark. Well that wraps it up for this tutorial. If you have an comments, questions, or suggestions feel free to email me.
Textures that give off light
Textures that give off light are amazingly cool. They look much more realistic than entity based lights, and it's pretty easy to make them. All you do is place the texture on the face of a brush and you're done! You don't need to change any of the properties of it either. The default by Valve works fine. In my advanced lighting tutorial I'll show how to change the intensity and color of this type of lighting.Above, there's a picture of three of the textures that give off light. There are many more and I'll post a list of them soon. Update: The list can be found here.Entity-based lighting
Entity based lighting goes back to Quake and the like. Entity based lighting is probably what most level designers have used before. Making entity based lighting is just as easy as making lighting by using textures that give off light. All you do is click on the entity button in Worldcraft and select light and then place your entity. Now you have a light, but it's pretty damned boring. Select the light entity and go into it's properties. If you look at the brightness attribute you see four sets of numbers. The first three are the color (in RGB values) and the last number is the brightness. An easier way of changed the color than by typing in values for RGB is to click on the pick color button. Let's make our light red. In the appearance attribute you can change how the light looks. Normal is just a normal regular light that doesn't blink or anything. Fluorescent flicker looks like a broken light that's blinking on and off. For now we'll just leave it at normal. Now save the level, compile and run it and check out your light.So here's our red light with a brightness set to 200 (the default). As you can see the default brightness is pretty bright. I start off by trying 100 and then messing around with the number until I get it to my liking. Here's another thing I like to do. When I make a light blink like it's broken, I like to have it spark. To do that you put a env_spark entity where you want the spark to come from. Next up we'll create a spotlight.Making a Spotlight
Making a spotlight is another easy thing to do. First place a light entity where you want the light to come from. Second place an info_null entity where you want the light to shine on. Now give the info_null entity a name and give the light entity a target of the name of the info_null entity. See I told you this was easy. Now onto adding a light switch.
Switching on lights
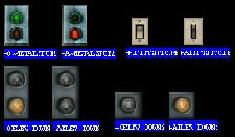
Adding a light switch is also easy. First make a brush and put it on a wall. On the front of it put a light switch texture. What's neat about some of the switch textures is that when you use it, it switches to the other switch texture. Here I'll give an example. In the picture above if you go up to the switch and press the use key, the light will switch form green to red or vice versa if you started with the texture with the red light.Here are just a few of the textures that look good as switches. There are many more textures that can be used as switches. Actually ANY texture can be used as a switch since as switch is a brush tied to the func_button entity.Now that you have your switch made, tie it to the func_button entity. Now go into your light's properties and give it a name. Then go into the switch's properties and give the target the same name as your light. Now you have a light switch! We can modify this more though. In the sound attribute you can select the sound you want your switch to make. Now go play your map and press the switch. Noticed how the switch moved? Well we can stop that by going into the flags tab of the switch. Make sure don't move is checked. Also make sure toggle is checked. You can also check sparks. This makes the switch spark. If you check touch activates then when the player walks up to the switch it'll activate. If you want your light to be off when the level starts then go into the light's properties under the flags tab and check initially dark. Well that wraps it up for this tutorial. If you have an comments, questions, or suggestions feel free to email me.
- Categories
- Archived Articles
- Vlatitude Archive
- Tutorials
- Mapping
- Goldsource Tutorials
- Images Required
- Article Credits
- Brian – Author
This article was originally published on 69th Vlatitude.
The original URL of the article was http://www.vlatitude.com/tutorials.php?tutID=5.
The archived page is available here.
TWHL only publishes archived articles from defunct websites, or with permission.
For more information on TWHL's archiving efforts, please visit the
TWHL Archiving Project page.
3 Comments
MrGibs
Commented 4 years ago2020-09-16 05:20:35 UTC
Comment #102914
The link to the list of light-giving textures doesn't work. Also an image is missing.
Midlou
Commented 4 years ago2020-11-16 20:30:21 UTC
Comment #103042
Found the original list of light-giving textures: http://web.archive.org/web/20090420084027/http://www.vlatitude.com/resources/texture_lights.php
Oskar Potatis
Commented 5 months ago2024-09-03 14:46:07 UTC
Comment #106359
The link to the list works now. We hadn't archived that page yet, so I did.
You must log in to post a comment. You can login or register a new account.


