Tutorial: Editing Compiled BSPs With newbspguy: The Basics Last edited 5 months ago2024-09-10 23:33:18 UTC
This tutorial will show you the basics of using newbspguy to edit already compiled BSP files. We will use UnrealKaraulov's fork of wootguy's bspguy due to the many added features, and the decoupling from a strictly Sven Co-op focused workflow of the original. We also assume that you have some experience in mapping the usual way, as there are differences when editing with this program, as noted later.
In the past, it was easier to just decompile a BSP back to .MAP, and start building up from there, because the typical modding workflow assumes you start from a map in an editor. However, there are several drawbacks to this method: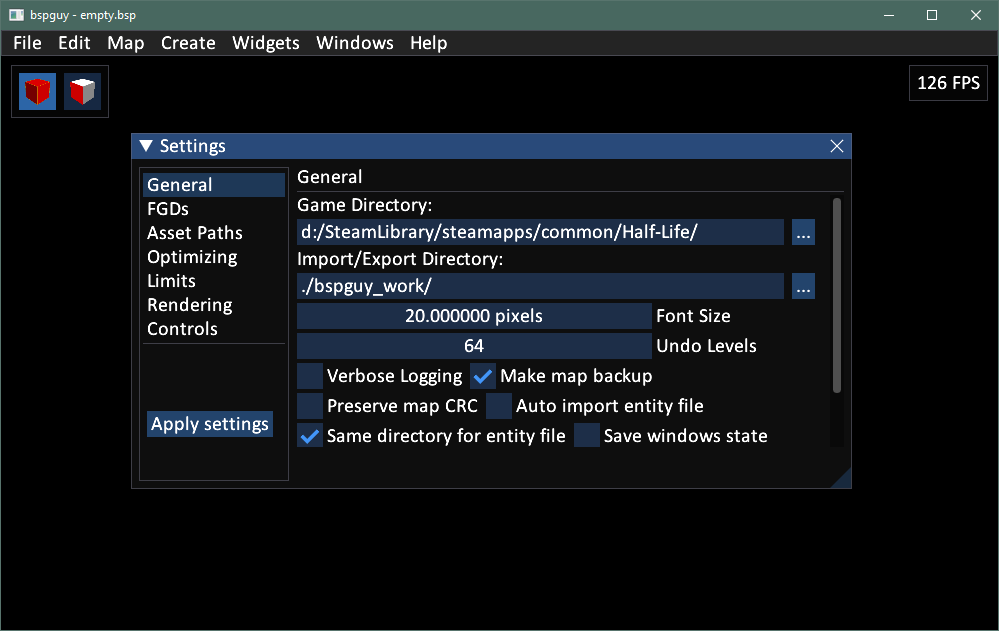 General settings
 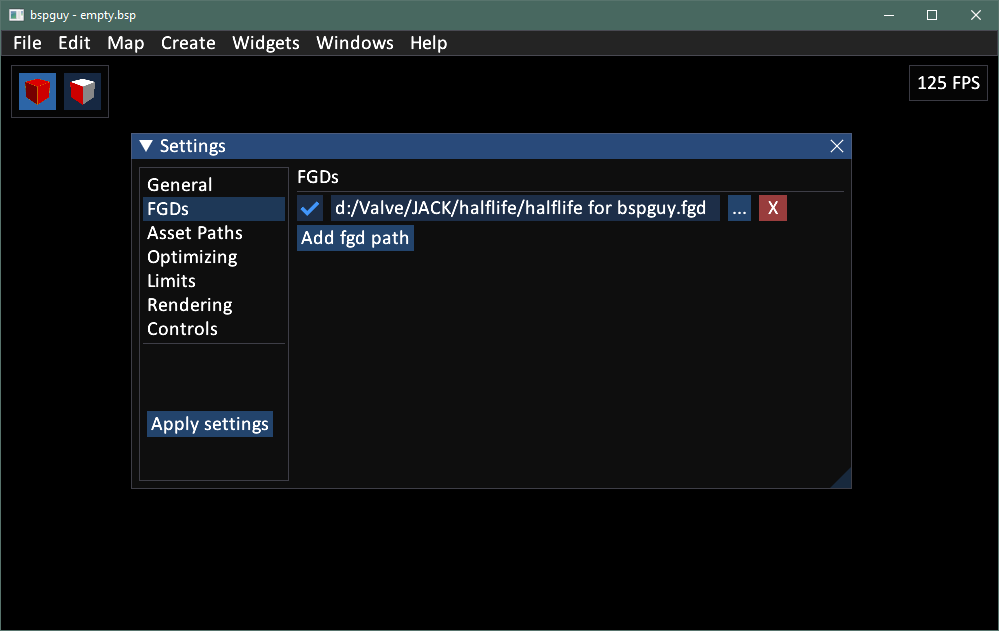 FGDs
FGDs 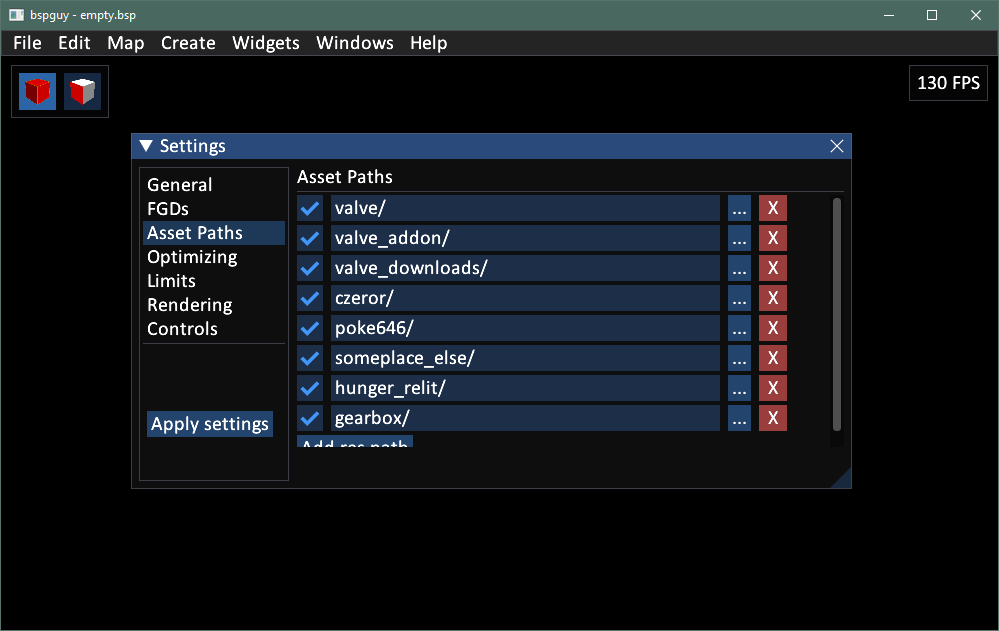 Asset paths


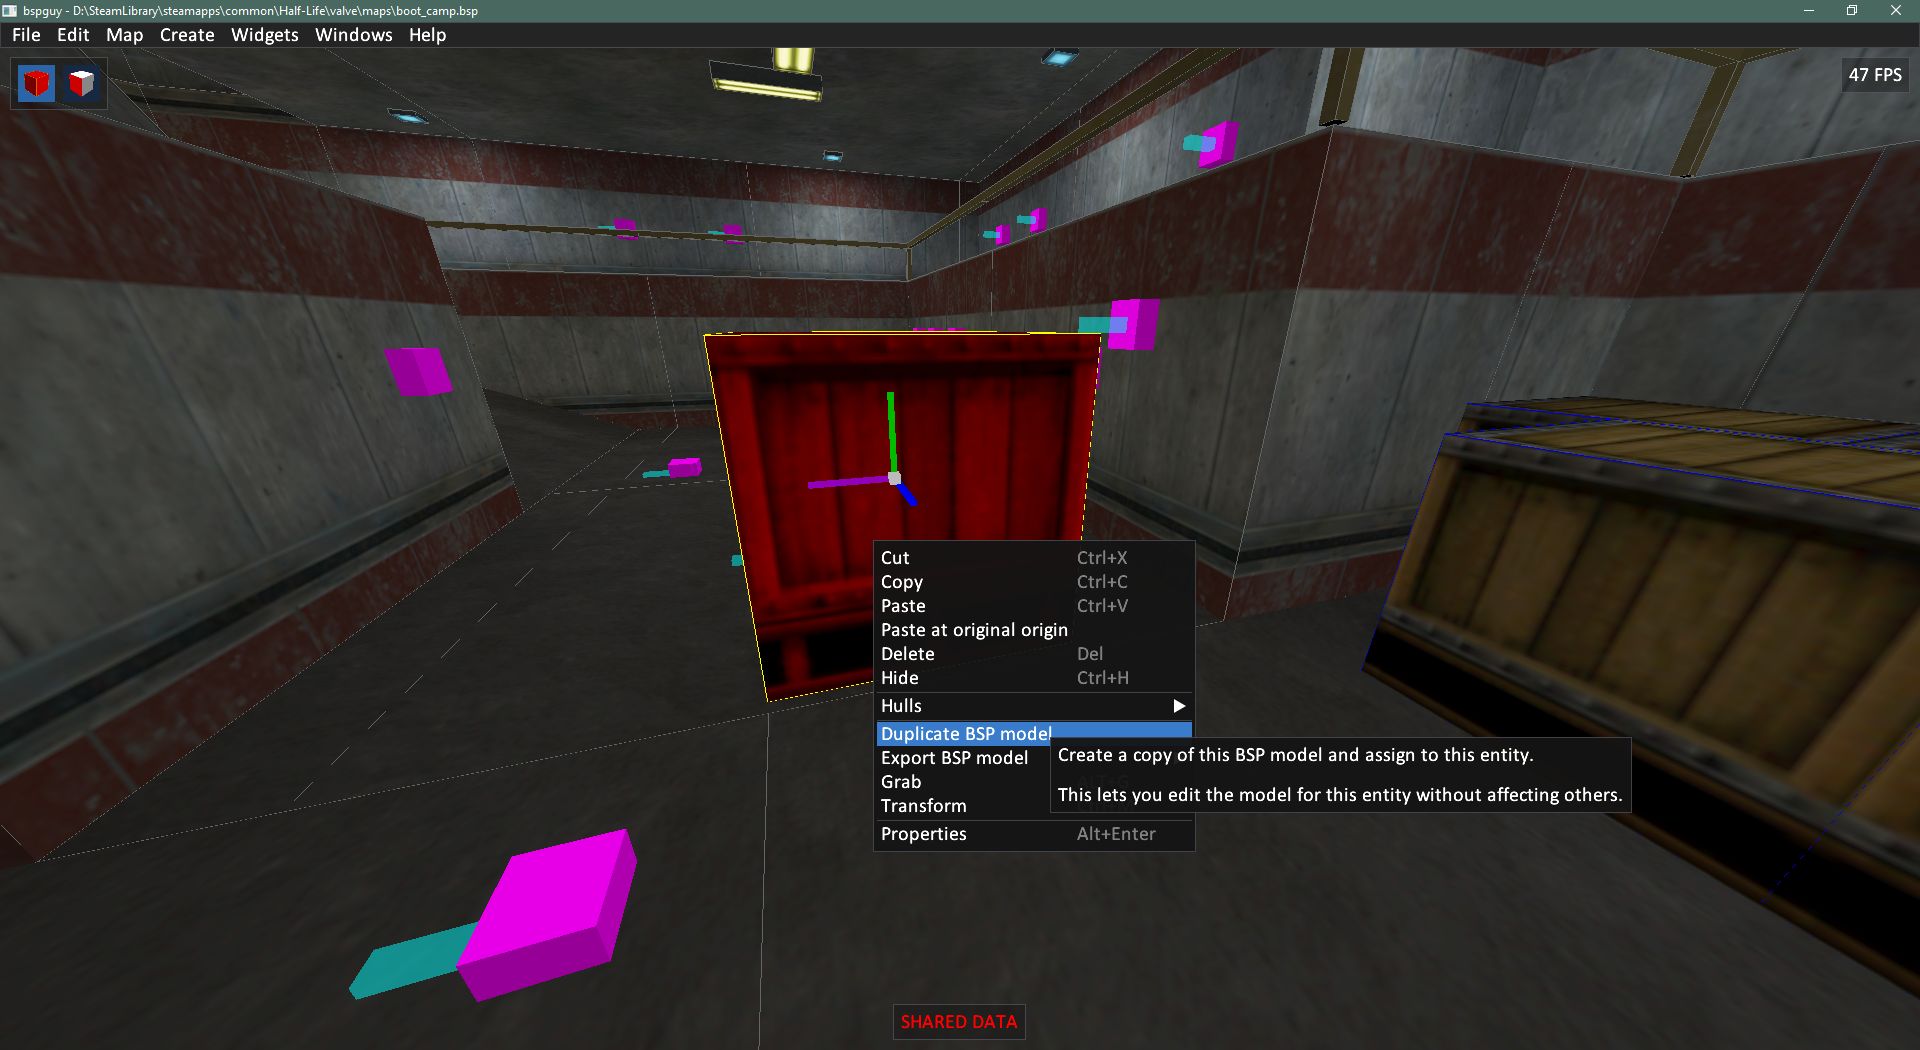
Duplicated solid entities inherit the original's model. It's the same effect as using
To remedy this, you can duplicate the BSP model of solid entities. Duplicating a BSP model adds towards the BSP model count, so don't go wild on it.
This is also useful if the duplicated entity is in a different lighting condition from the original. You can then apply a different lightmap from the original BSP model. However do note that lightmap editing feature can be unstable.


Now the issue of turning the solid entity at an angle... The hard way would be to jump into the vertex editing mode and moving the vertices into position, with a lot of math if you want to keep the scale. A simpler way would be to turn the brush into a
* CAVEAT: Most brush entities have its origin at (0 0 0). You need to follow the instructions below to change the origin of rotation.
If you don't have one, make a copy and edit the FGDs with a text editor. The offending bits are the "in-editor help texts" usually at the end of a class or attribute entry.
In rare cases, there could be a mismatch between the texture entry in the BSP and the texture entry in the WAD it references. This error can't be fixed with newbspguy, but usually the game engine will load the texture just fine in game.
If the Raw edit tab shows the proper keyvalues yet you still have problems with the entities, then try:
Preface
The workflow of editing already-compiled maps is totally different from making a map from scratch.In the past, it was easier to just decompile a BSP back to .MAP, and start building up from there, because the typical modding workflow assumes you start from a map in an editor. However, there are several drawbacks to this method:
- Decompilation is a messy process. Due to how the BSP data is structured, the entire level is chopped up across planes, which goes all over the place irrespective of the original brush shape. Decompilers faithfully follow the planes structure, resulting in brushes that likewise go all over the place. Many of them would also be invalid solids and need to be recreated.
- You lose all texture lighting data. 9 times out of 10 a custom map would be using custom texlights entries that are different, or absent, from the stock valve.rad. Your option is to recreate texlights by estimation and guesswork, which won't give you 100% of the original texlight values.
- You lose all clipping data, because no decompiler as of time of writing is able to recreate "Clip" brushes from the clipnode trees since clipnode trees are not technically part of the level geometry.
Pros, Cons, and Caveats
The advantages of editing BSPs in place are:- Lightmaps are preserved.
- No messing with messy and invalid decompiled brushwork.
- No need to recreate clip brushes.
- Trivial brush entity duplication, that normally doesn't add to BSP model count.
- You cannot edit world brushes whatsoever.
- You cannot do crazy texture scaling since it's tied to the lightmap size.
- You cannot edit clip nodes.
- There's no easy way to add complex brushwork. You need to rely on models.
func_detailis not a thing in compiled BSPs; they're transformed into normal brushes during compilation. You need to usefunc_wallorfunc_illusionary.clipbrushes are also not a thing; they're transformed during compilation into clip nodes which you cannot edit. You can however use the default BSP solid models the program creates to artificially add collision. Do note that this adds to the BSP model count and clipnode count so be conservative.originbrushes are not a thing; the BSP models already has its own origin on creation, which you can move.
Setting up newbspguy
- Download the latest release of newbspguy.
- Extract newbspguy into a folder.
- Run the program.
- Open File > Settings.
- Under General, click Reset All Settings.
- Under General, check Make map backup.
- Under General > Game directory, set to location of your Half-Life installation.
- Under FGDs, add the FGD of your target mod.
- Under Asset paths, add relative paths in the following format:
<mod folder>/. There should be at least these entries:valve/<the target mod>/(if that isn't valve)
- Click "Apply settings". Close the options window.
General settings FGDs Asset paths
Editing maps
Provided you've set up the correct FGD and asset path(s), you are now set to edit the maps for your target mod. Here are some tasks that you should be able to master:Moving entities
- Select an entity.
- Moving the entity can be done in three ways:
- Grab the axis handles and drag into position.
- Edit the
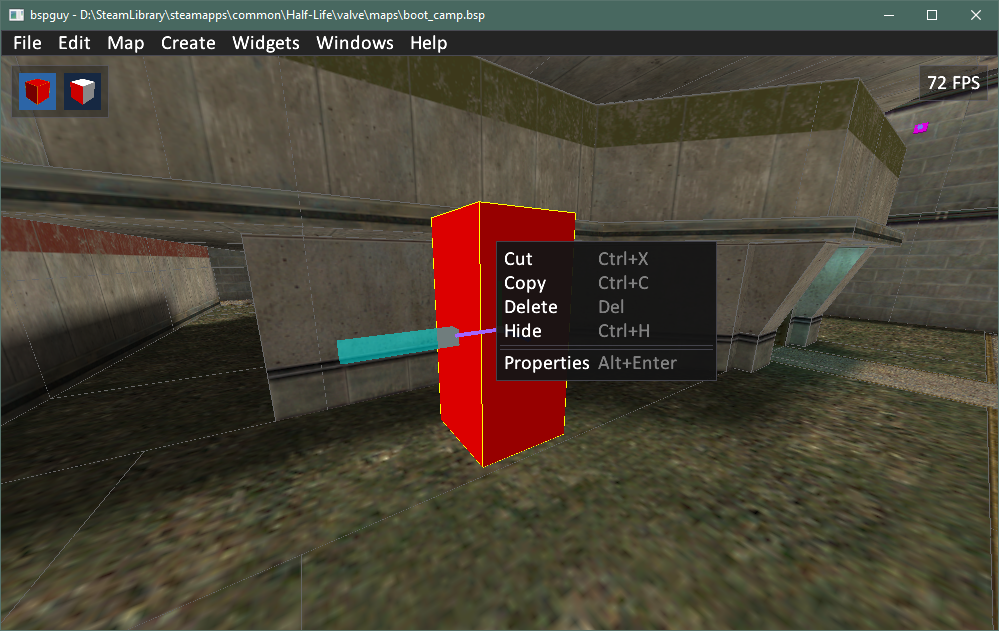
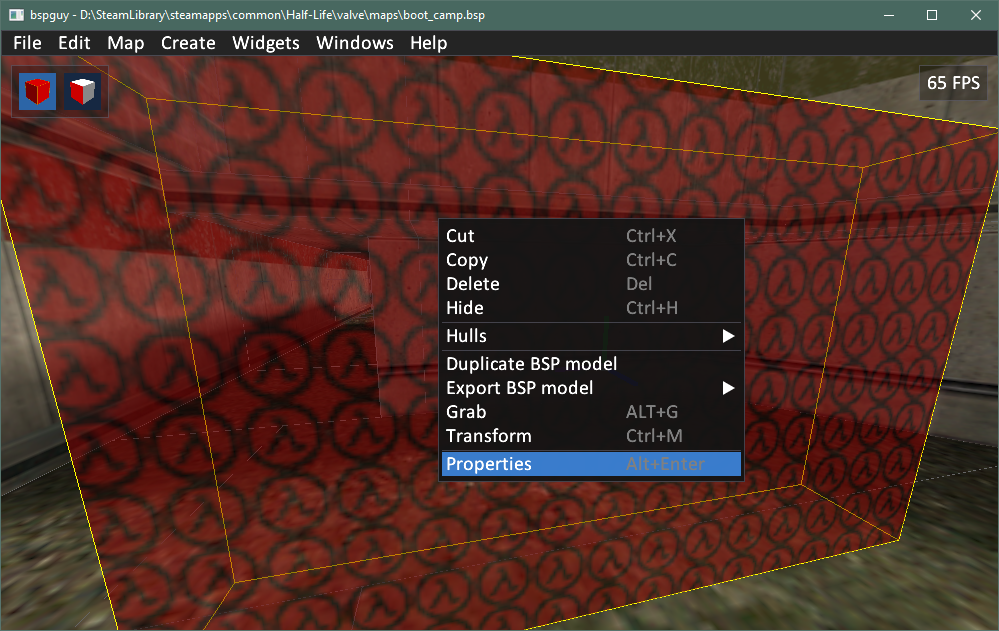
originproperty directly (e.g. for sub-unit positioning) - Grab the entity by right click > Grab. The entity will move with you as you move around the map. Ungrab by right click > Ungrab.
- To edit the angles, edit the associated
angles/angle+pitchproperties.
Adding point entities
- Create > Entity.
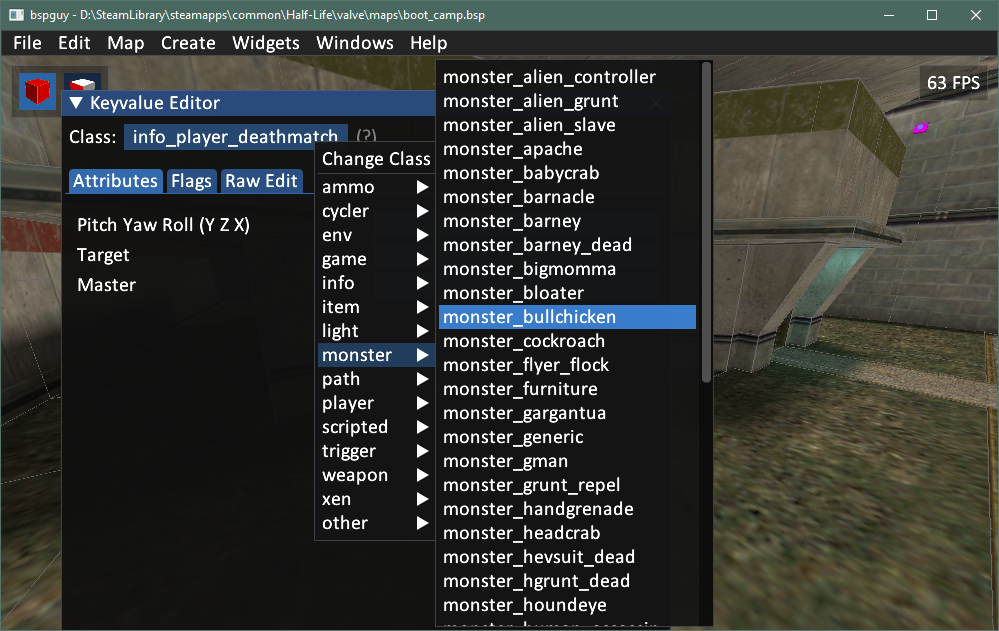
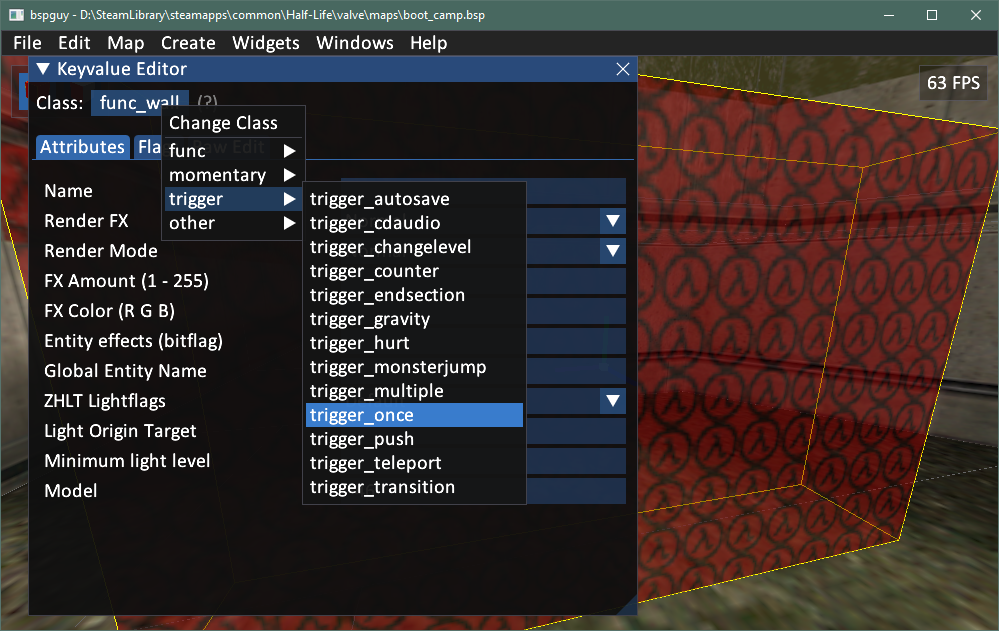
- Right-click on the new entity > Properties.
- Click on class, and in the dropdown menu, select the target entity.
- Edit the entity as you would in Hammer/JACK.
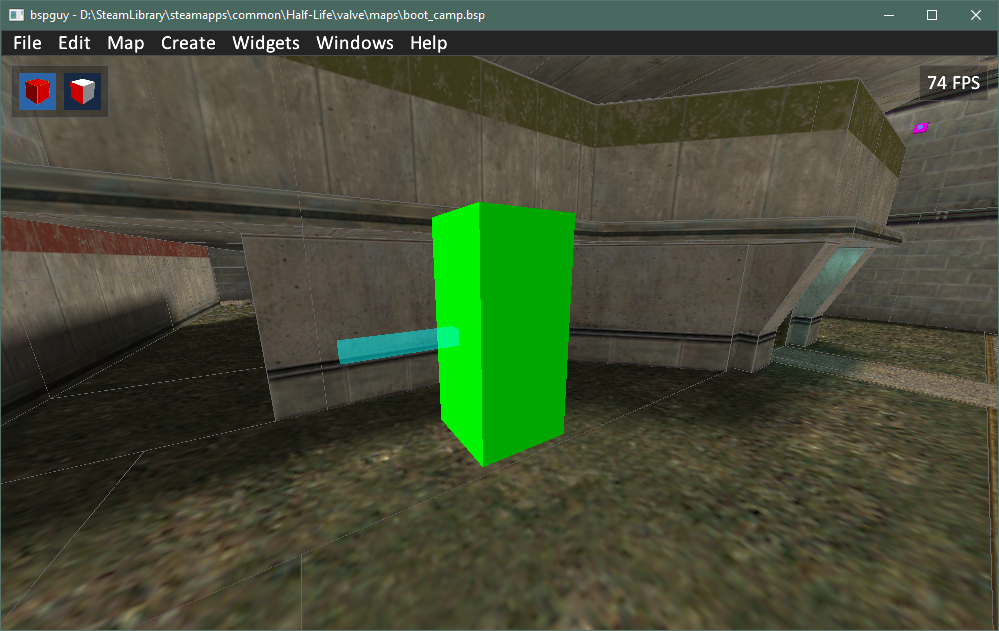
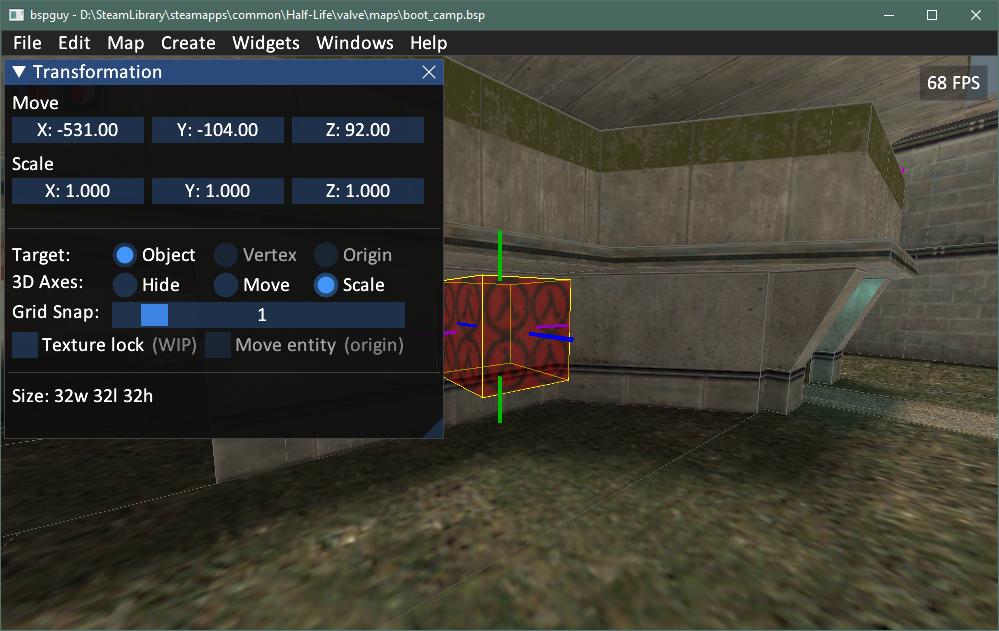
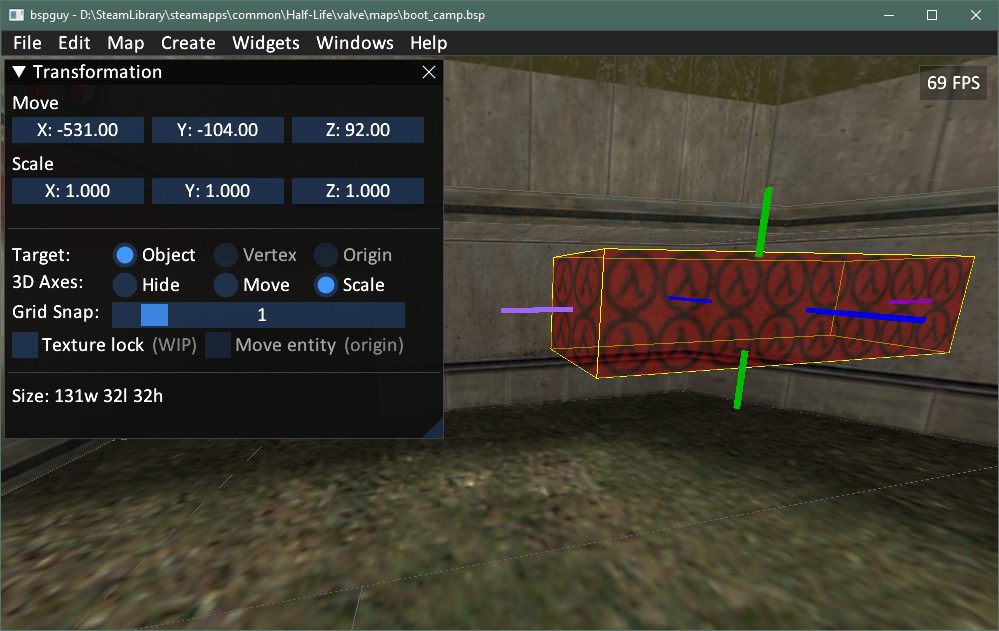
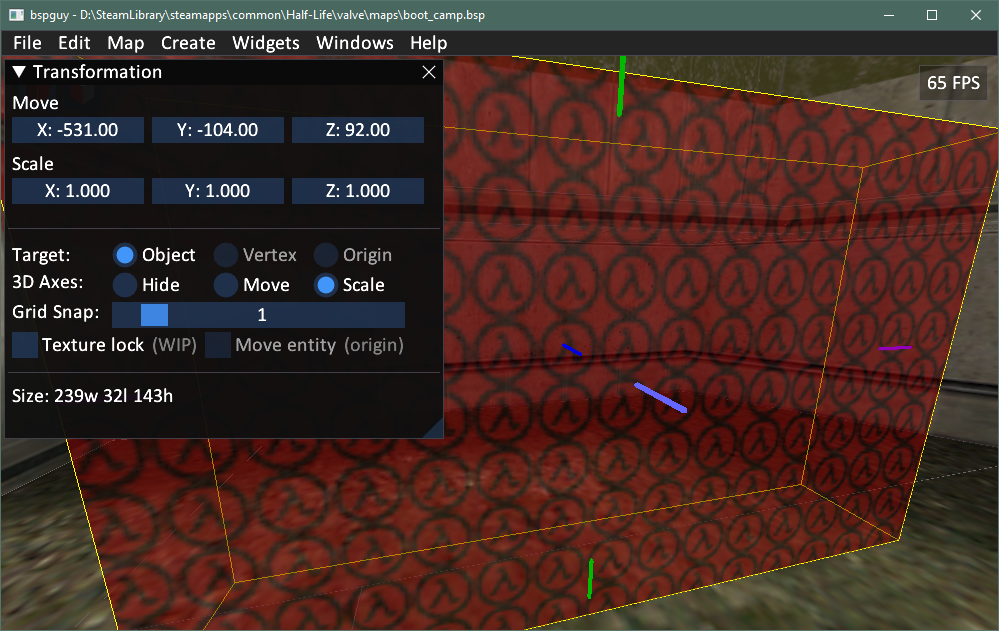
Adding and sizing solid entities
- Create > BSP Solid Model
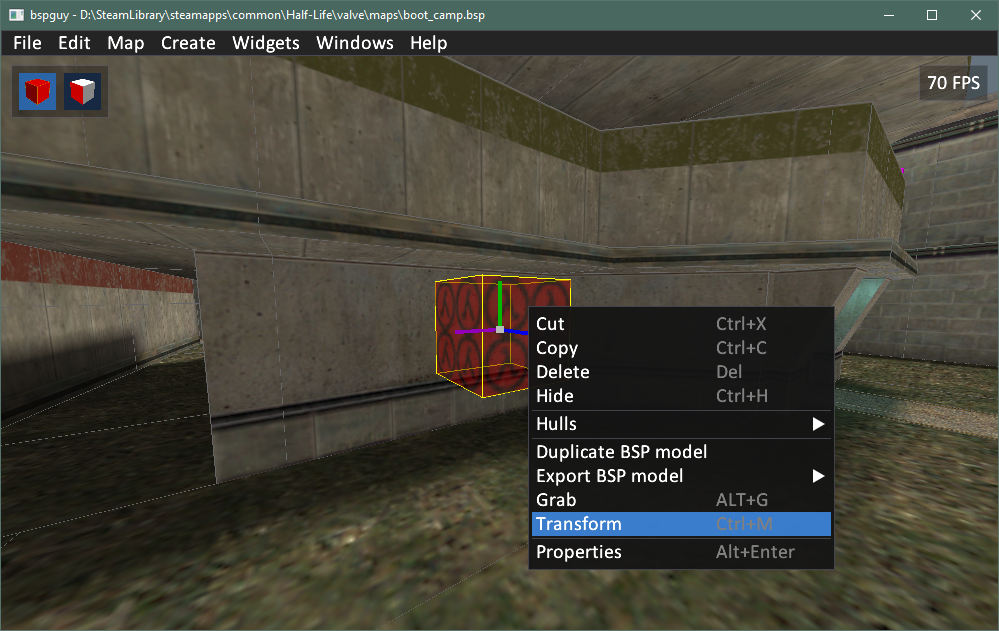
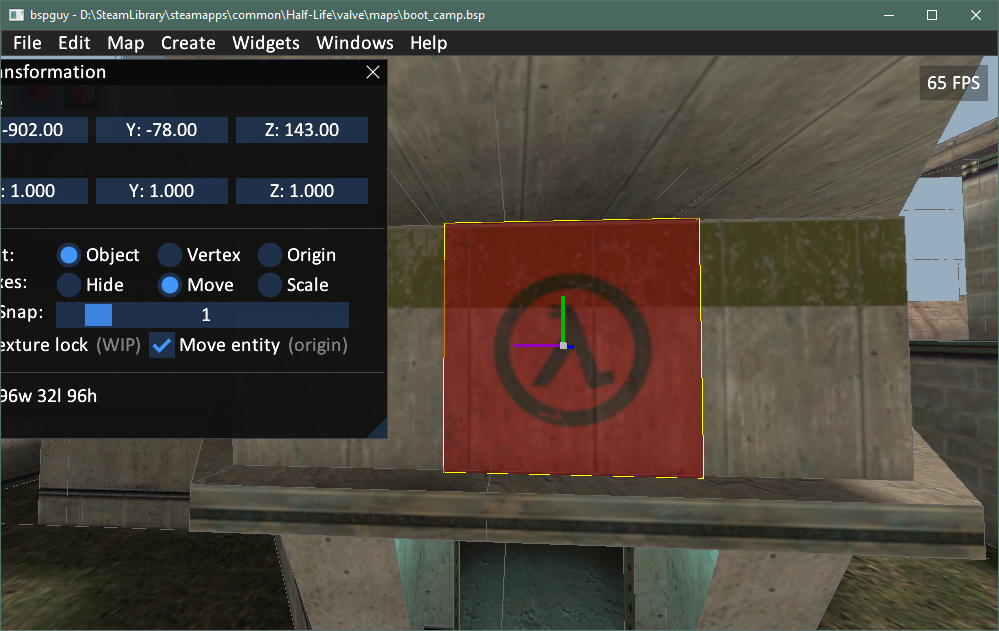
- Right-click on the new brush entity > Transform
- Set
Target: Objectand3D Axes: Scale - Grab the edge handle and drag it to the desired size. Repeat for all directions as required.
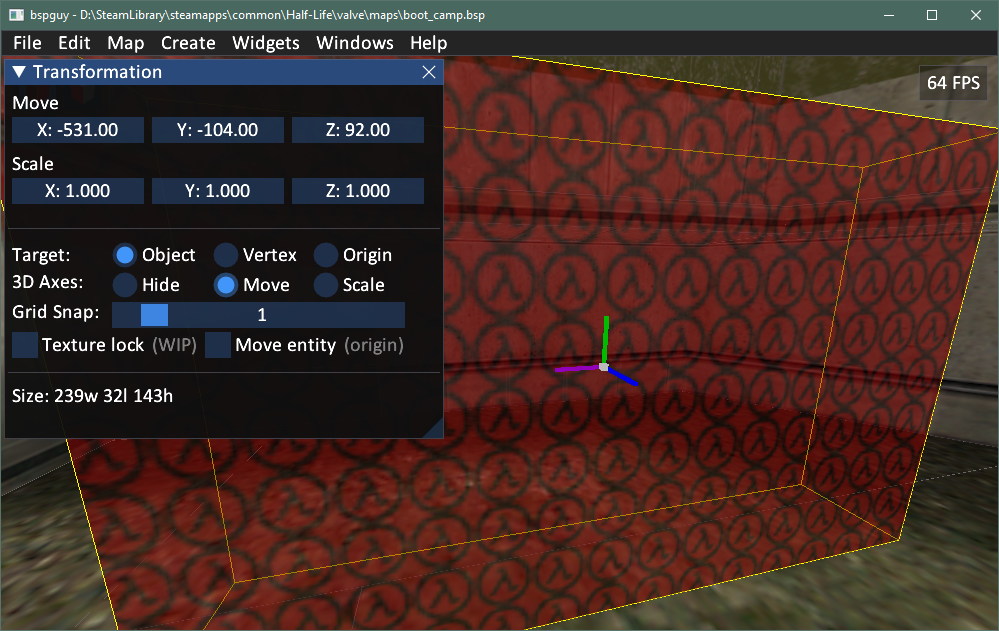
- Reset to
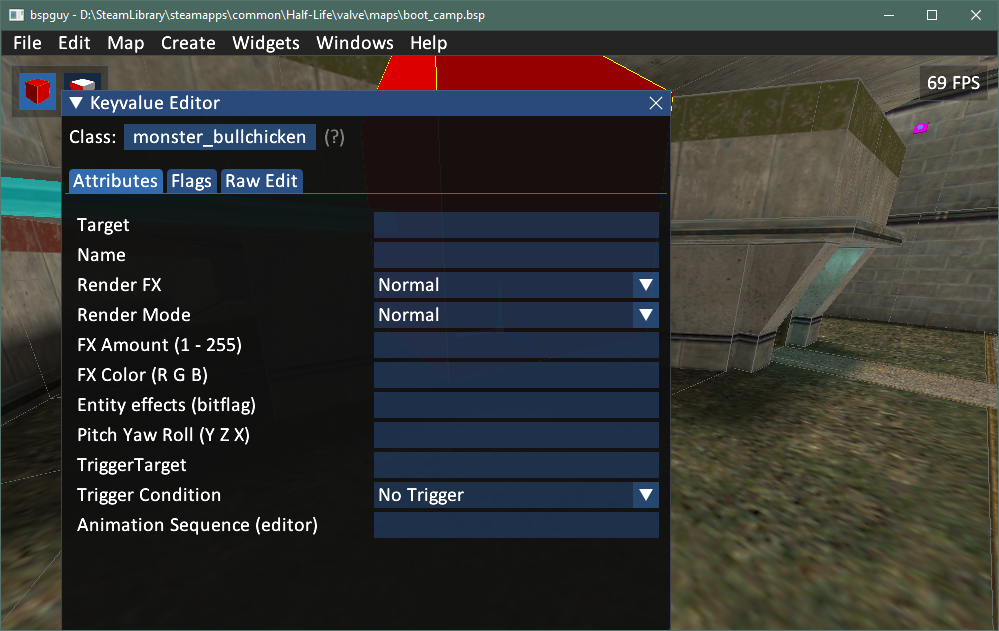
3D Axes: Move. Close Transform window. - Right-click on the new entity > Properties
- Click on class, and in the dropdown menu, select the target entity.
- Edit the entity as you would in Hammer/JACK.
Duplicate entities
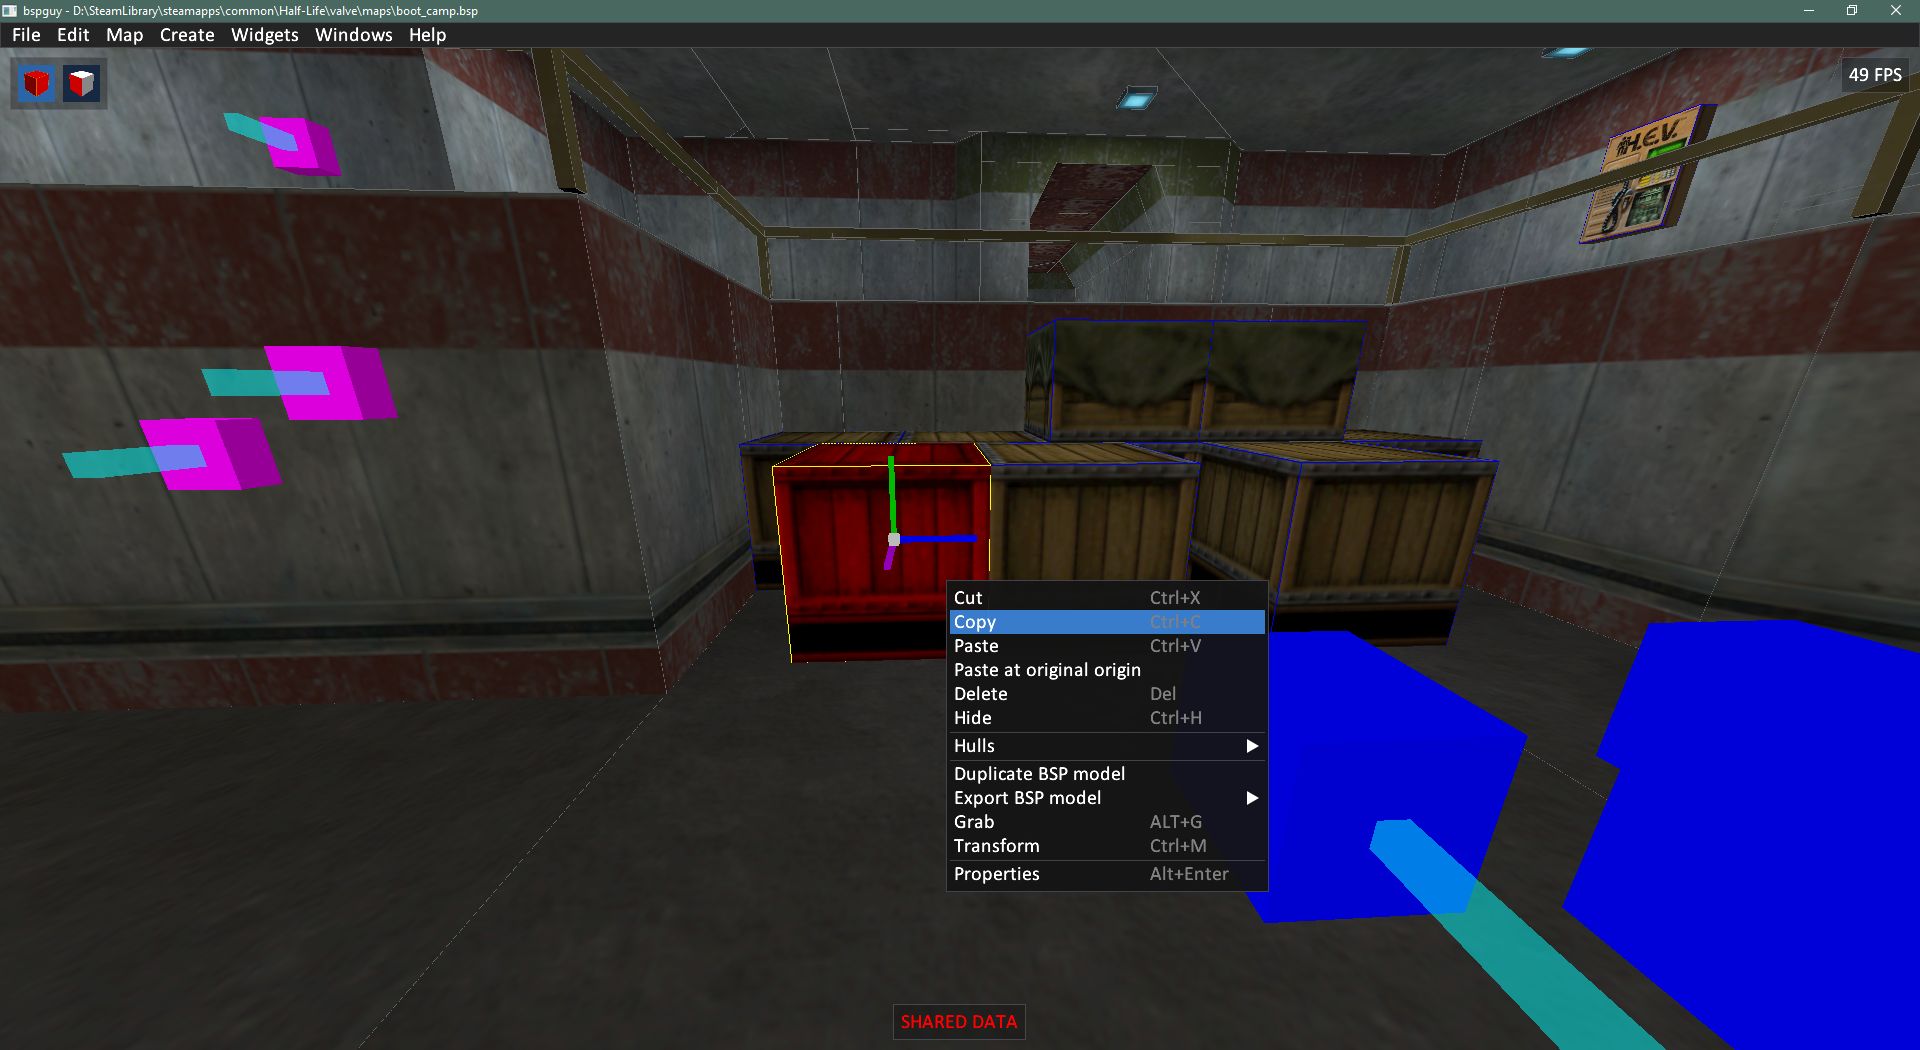
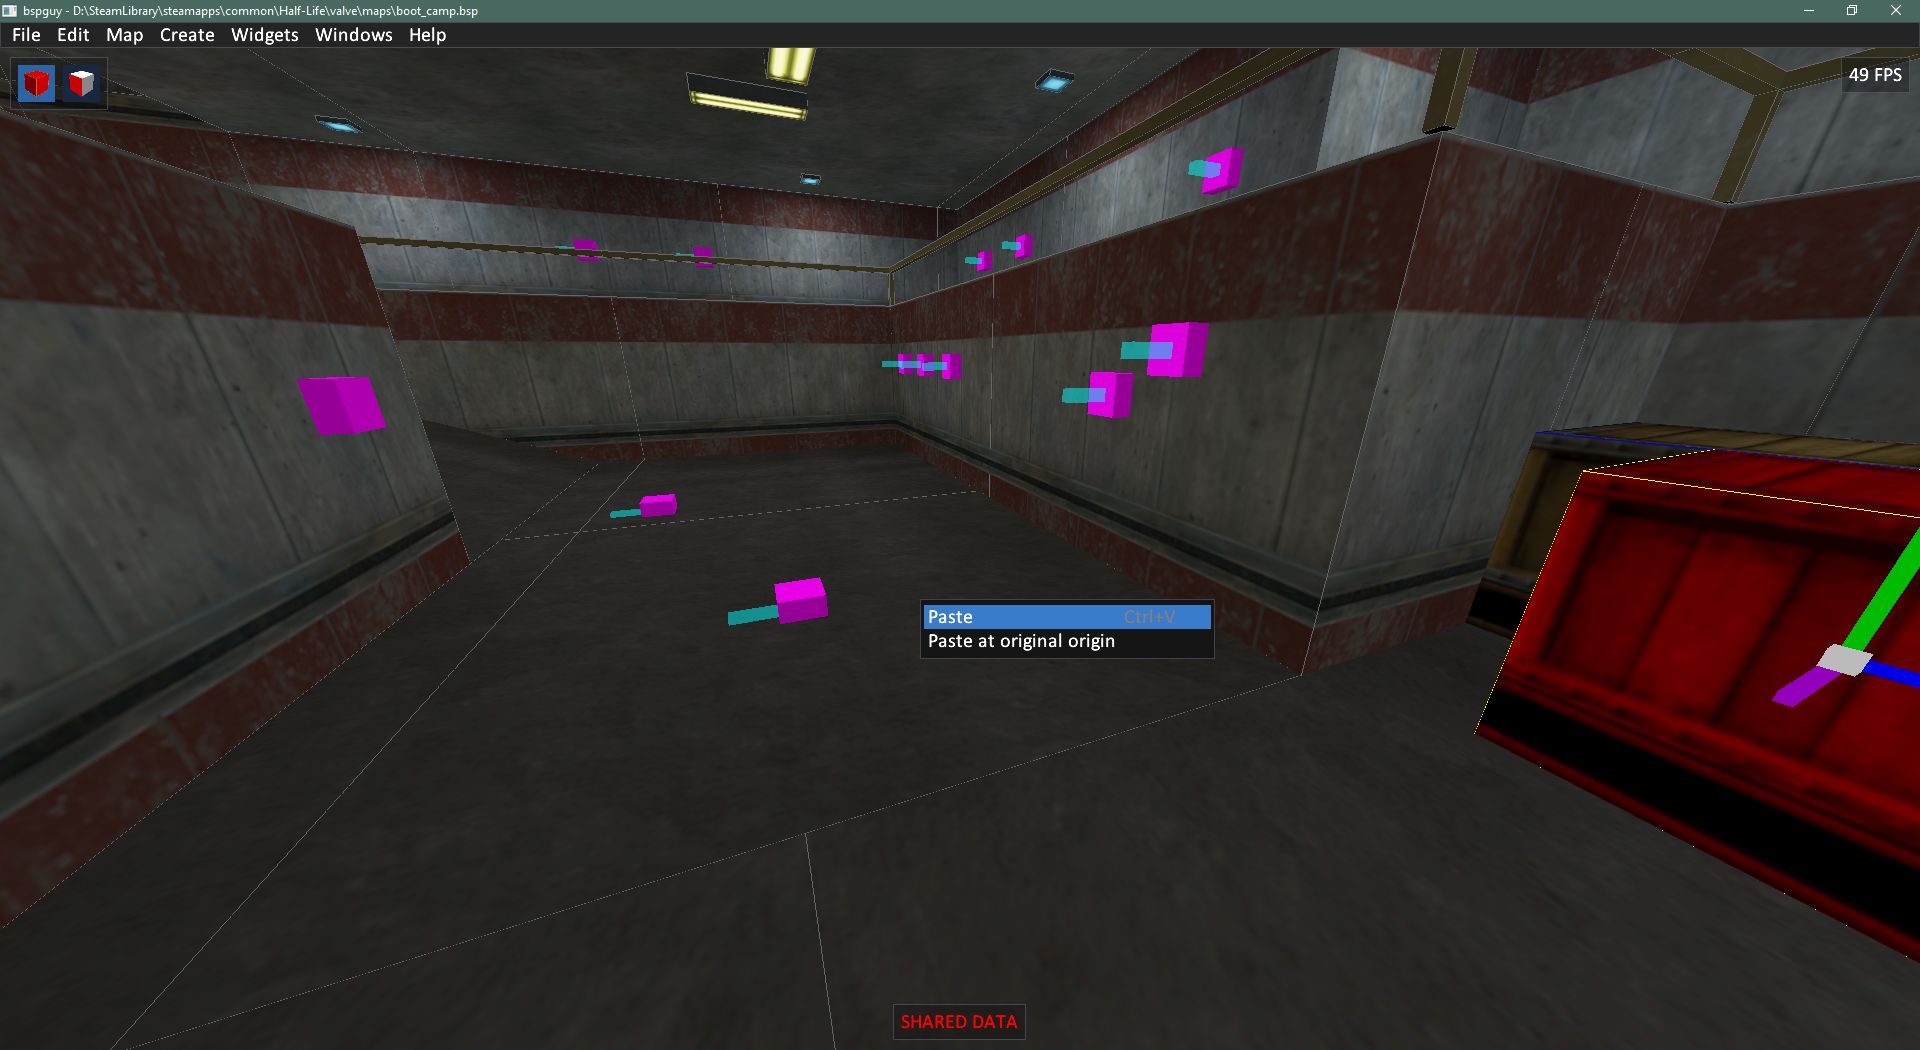
Simply copy and paste them. Both point and solid entities are supported.Duplicated solid entities inherit the original's model. It's the same effect as using
zhlt_usemodel in regular mapping. It also means that decals on one will magically appear on all other copies. To remedy this, you can duplicate the BSP model of solid entities. Duplicating a BSP model adds towards the BSP model count, so don't go wild on it.
This is also useful if the duplicated entity is in a different lighting condition from the original. You can then apply a different lightmap from the original BSP model. However do note that lightmap editing feature can be unstable.
Editing keyvalues
Editing keyvalues is the same as in Hammer or JACK. These notes might be useful:- Be aware that compiler keyvalues e.g.
zhlt_*& light values forlight*entities do nothing.
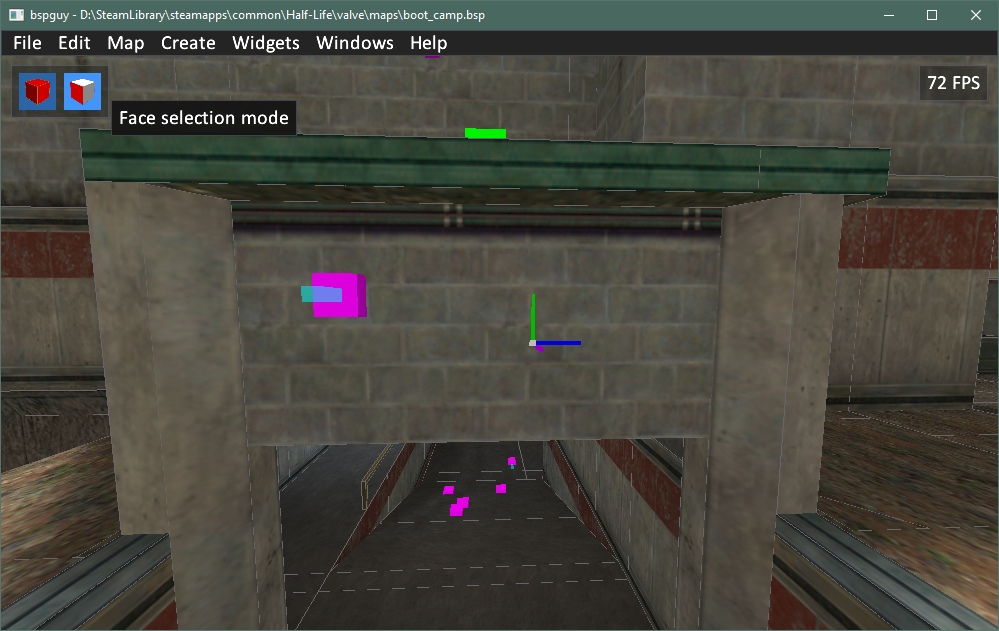
Fixing or changing textures on a face
There are a lot of cases where BSP files are shipped with misaligned textures. You can fix this pretty easily with newbspguy.- Switch to face editing mode by clicking on the second icon on the top right corner.
- Click on a face.
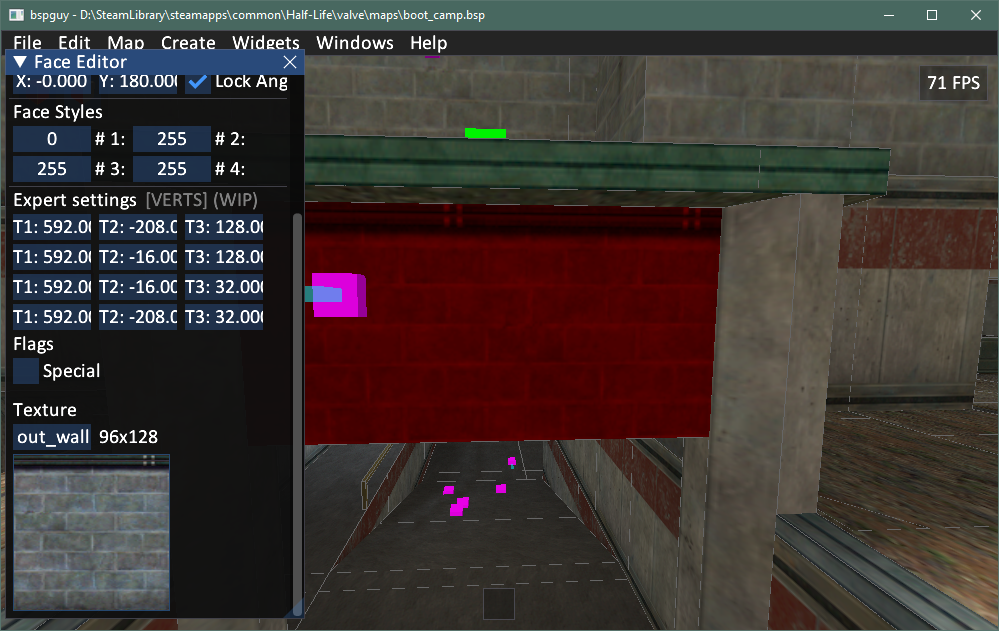
- To change the texture, edit the texture name value. You should only use texture names from WADs that are referenced in
worldspawnand probably have the WAD file open in a separate WAD viewer program for cross-reference. - To reposition the texture, edit the X and/or Y shift values.
- To flip a texture, edit the scale value and change only the sign (i.e. between positive and negative).
- To rotate a texture, edit the angle values while having "Lock angles" checked.
- To skew a texture, turn off "Lock angles" and edit the X/Y angle values.
- Switch back to Object selection mode when you're done (first icon on top left).
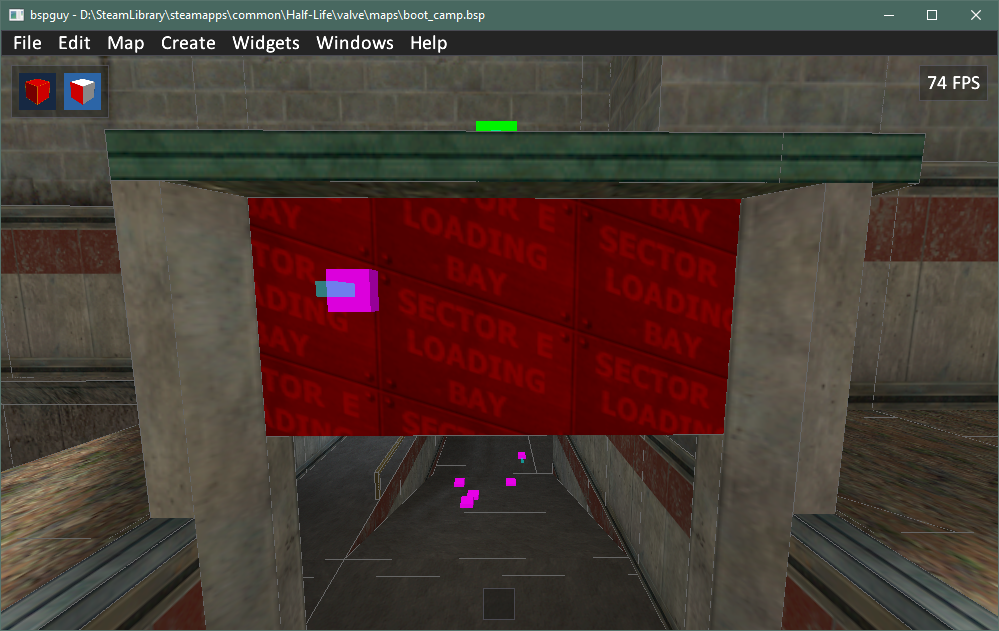
Adding a sign
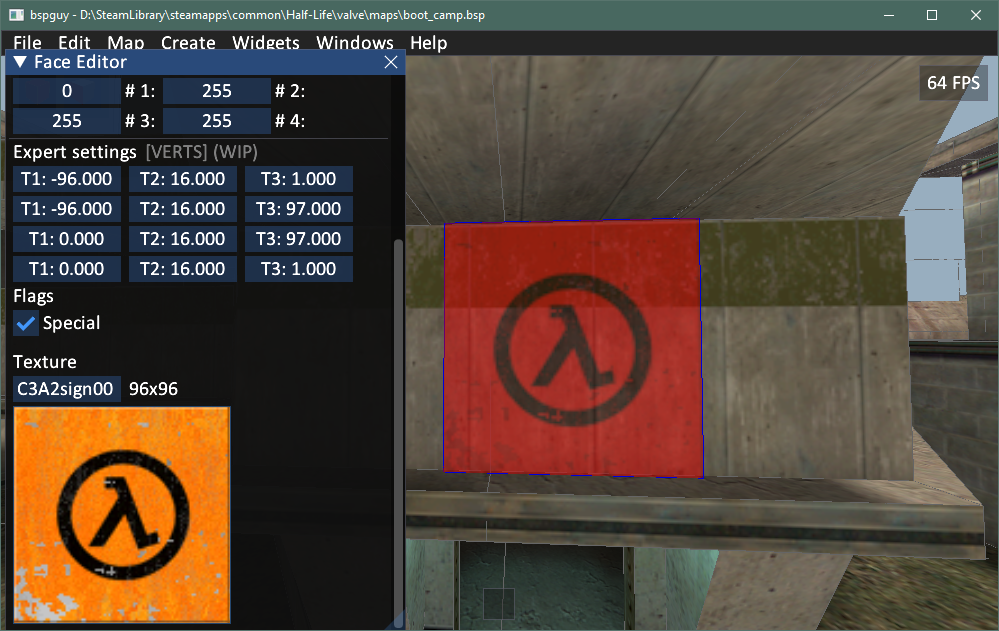
- Create a solid model as shown earlier. Set the size to match the sign's size in pixels, and set the entity to be
func_wallorfunc_illusionary. - Assign the texture to the front face of the entity.
- Shift the texture to fit the face. Oftentimes it'd be easier to scale the model to fit the texture instead, then move it back to the intended position.
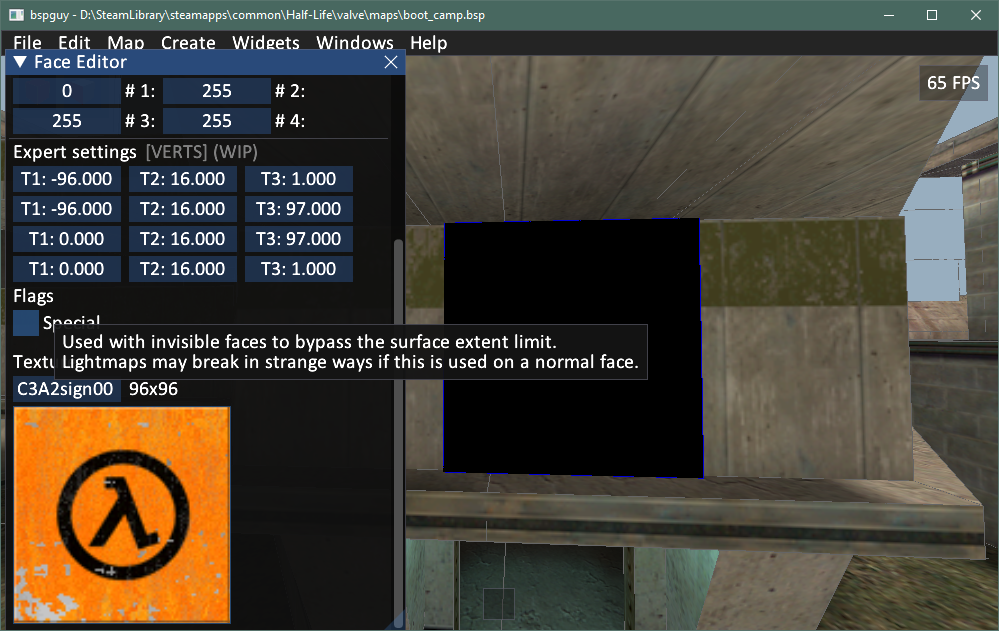
- Uncheck "Special" flag. The face will turn black, because there is no lightmap data on it.
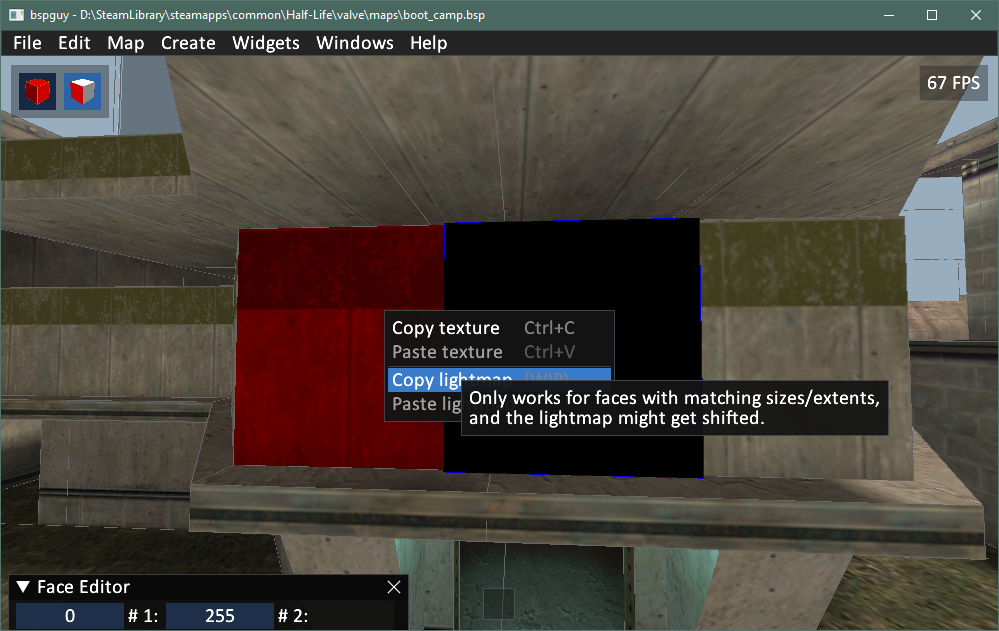
- Select the face of the wall behind the sign. Be sure to pick a face roughly the same size or slightly larger as the sign (preferably the latter) in both dimensions.
- Right click > Copy lightmap.
- Select the sign face. Right click > Paste lightmap.
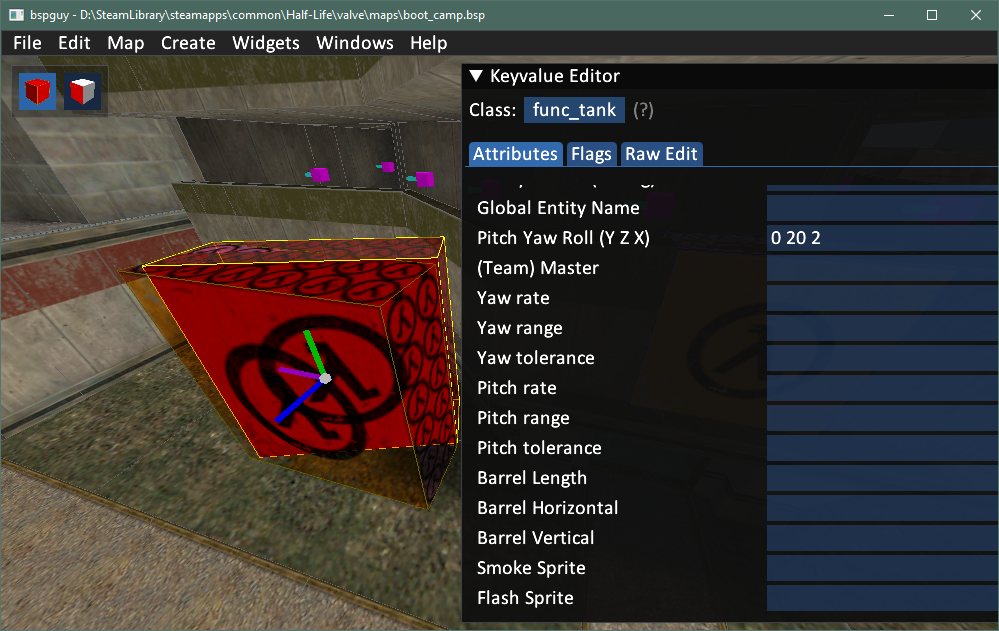
Adding brushes at an angle
You can either start by duplicating existing brush models*, or creating a new one for scratch. For the latter, follow the previous method of applying a texture and lightmap to all faces.Now the issue of turning the solid entity at an angle... The hard way would be to jump into the vertex editing mode and moving the vertices into position, with a lot of math if you want to keep the scale. A simpler way would be to turn the brush into a
func_tank and set its angle and origin**. it'd face the given direction at spawn. The default spawn flags should be sufficient; obviously don't set it to active. A named func_door with Starts open flag could also work but you cannot see the orientation inside newbspguy. * CAVEAT: Most brush entities have its origin at (0 0 0). You need to follow the instructions below to change the origin of rotation.
Common problems and solutions
Invalid FGDs
Newbspguy doesn't support J.A.C.K.s extended FGD. You need to use FGDs compatible with Hammer 3.x.If you don't have one, make a copy and edit the FGDs with a text editor. The offending bits are the "in-editor help texts" usually at the end of a class or attribute entry.
Missing textures
If the loaded map is showing missing textures (purple/black checker pattern)...- Open File > Settings > Asset paths
- Add the path of the mod your map is in. This includes the <mod>_addon and <mod>_downloads
- i.e. if the map is downloaded from a HLDM session and resides in
valve_downloads/maps/, addvalve_downloads/.
- i.e. if the map is downloaded from a HLDM session and resides in
- Click "Apply settings".
In rare cases, there could be a mismatch between the texture entry in the BSP and the texture entry in the WAD it references. This error can't be fixed with newbspguy, but usually the game engine will load the texture just fine in game.
New entities aren't behaving as it should
Level editors (not just [new]bspguy, but JACK as well) can have bugs where it doesn't load the default FGD values when creating new entities. You need to check that the required keyvalues are present in the Raw edit tab of the Properties window. Filling the text boxes in the Properties window, then blanking them, should coerce the program to add the associated keyvalues to the entities.If the Raw edit tab shows the proper keyvalues yet you still have problems with the entities, then try:
- check for misspellings
- check the entity guide of the mod/game for specific known bugs
- recreate your setup in a fresh test map, compile, and test. If it works there you can in turn open that map in newbspguy and copy over the setup back to the target map.
- Categories
- Goldsource Tutorials
- Mapping
- Tutorials
- Article Credits
-
 kimilil
–
Original author
kimilil
–
Original author
10 Comments
You must log in to post a comment. You can login or register a new account.
Worldspawn model vertices can be edited using Face tool, but it not easy, and map crash if do big changes.
Whole map can be exported to .obj with all textures (for example convert part of map to .MDL to bypass BSP limits) but without lightmaps.
Also part of map can be compiled as func_wall and exported to .BSP model with working lightmap and collision to bypass BSP limits.
Also can export .wad from embedded textures. Import textures back to map. Can export files needed for HLRAD.exe for recompile lightmaps. Any bsp solid entity can be exported as .BSP model with working collision and lightmap.
New update has many bugfixes. Please create issue on GitHub if have problems or feature requests
This tutorial definitely needs a part 2 for the more advanced tasks e.g. vertex manipulation, bsp import/export, lightmap editing.
textures can be scaled as need because now lightmap can be recalculated after any changes.
Clipnodes can be edited only for non worldspawn models via Vertex Transformation widget.
As for vertex editing, I just don't recommend it at all too. It's way more cumbersome, and way way harder to get satisfactory result than to get completely broken result. I honestly don't know how a face whose vertices are non-planar would act inside the game. If there's face splitting ability in world faces and easier vertex shifting via handles vs textboxes then it might be feasible, but still not recommended because of the non-planar thing. *
The main takeaway is that just because it's doable with the BSP structure doesn't mean the game engine that's going to parse and run the BSP would like it. If the game engine doesn't like it, don't do it.
I still don't have any draft for a part 2 of this tutorial. 😅
EDIT 1:
* Tested face vertex editing. It messes up lightmaps elsewhere on a map.
aaalso added cull face feature
full VIS editor (but button create new leaf not works because still don't know how to add new leaf, game cant see new leaves)
fps optimization
updated cmd line options