Tutorial: Rain Last edited 5 months ago2024-09-16 02:59:26 UTC
Rain and other Precipitation Techniques
This tutorial outlines what I think is the easiest and best-looking way to make rain for Half-Life and all the mods that don't have built-in rain effects or run on Spirit. Now, for all you clever and experienced mappers, who don't want to follow the whole tutorial, let me say three words: "scrolling", "conveyor" and "additive". If you have absolutely no idea what I'm on about, keep reading.I hope you've all seen Render Mode in the entity properties, and know roughly what it does. If not, read the tutorial on Render Properties.
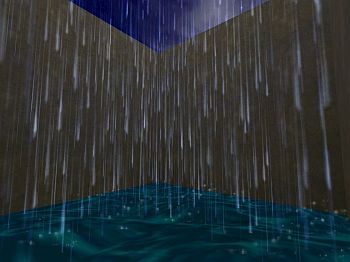
I am going to show you how to use a func_conveyor to make rain, snow, sleet, or whatever you want falling from the sky. I'll assume you're making rain for the rest of this tutorial.
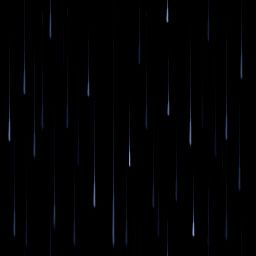
The first thing you need to do is make a texture that looks like raindrops, I have included a small rain.wad file created with Wally but you might like to experiment and make your own, as this is only to show you the effect and can be adjusted to make more realistic rain. Note: The trails behind the drops - when they're rendered in additive mode will slowly fade behind. That's what happens in the additive render mode: black is completely transparent, so you can slowly fade things. That's why it's perfect for this.
Now you understand (I hope) what additive mode does. The next thing I'm going to introduce is scrolling textures. This is, well, just what it says on the box: textures that move in-game. We want these raindrops to move... (how much stationary rain have you seen?).
To make a scrolling texture, just draw the texture, and save it with scroll in front of the name you want to call it (i.e.
scrollsnow.bmp). I have read somewhere that you shouldn't save your new texture as scroll_snow as it doesn't work with the _ underscore but I haven't proven this.When you apply that texture to a brush in-game, it'll do... nothing. That confused me at first, before I realised you have to make the brush a func_conveyor to actually make the texture move.
Right, now let's get started. Fire up Hammer and make a little box map, maybe with a sky brush on top (it'll look a bit odd with rain coming through a steel ceiling, won't it?) and make sure you've set up the new texture in Hammer.
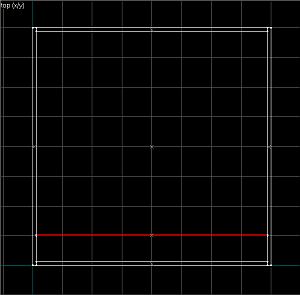
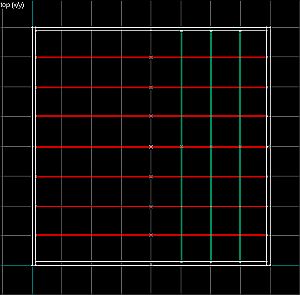
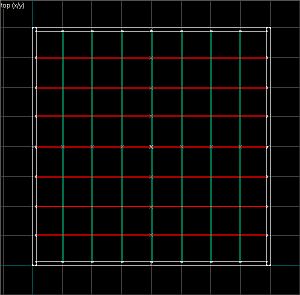
Make a brush spanning the entire width of your lovely little box, and make it one unit long, like so: It also needs to be as deep (ceiling/sky to floor) as you want the rain to be falling. Now, turn that brush into a func_conveyor, check the not solid and no push flags in the entity properties, set up the rendering, and compile it. You should see a sheet of rain falling down from the sky, hopefully down, not sideways. Now all you have to do is copy and paste that brush to make lots of sheets, maybe 64 units apart (try, experiment) for effect: Then you also need to put the brushes going up and down, like this: There you are: now you know the basic technique to making precipitation - go off and experiment. That's why I haven't told you exactly what settings to use, for example on the func_conveyors or the textures - there is an example map included for those of you that get really stuck.
Good luck - if you have any questions, post them in the forums.
If you can't get the texture to flow in the right direction then try aligning the texture with Toggle texture application tool [Shift+A] using the Rotation setting. That is why there are 4 rain textures included in the download zip called rain.wad. It is all about the texture alignment, it has nothing to do with the conveyor angles. The conveyor will run left to right or right to left but not down. You need to orientate the texture to produce the effect.
- Categories
- Tutorials
- Advanced Tutorials
- Goldsource Tutorials
- Mapping
- Article Credits
-
 Seventh-Monkey
–
Original author
- TorQue MoD – Wrote an earlier tutorial on rain and created the original version of the rain texture
-
 Andy
–
Texture alignment info
6 Comments
You must log in to post a comment. You can login or register a new account.

Thanks TorQue[MoD]. Well written tutorial!
I'm using OpenGL to simulate rain and i thought to take this texture and use it.But the problem was that it still have a black back ground! how can i make it transparent texture
thanks for help