RUST: Customizing the lights.rad File Last edited 2 years ago2022-09-29 07:53:54 UTC
Why doesn't my texture lighting work? It was working fine under Worldcraft 2.0!
It's because of a mix-up involving the lights.rad file. The RAD compile tool (named QRAD or HLRAD) reads and parses this file in order to determine which textures to consider as texture lights when it lights your map.When Valve Software released Worldcraft 2.0 with Half-Life, they included a lights.rad file that contained the texture lighting values they used when they created the maps included with the game. Some mappers, unaware of how texture lighting works, ended up getting unwanted texture lighting because they used textures that were referenced in the default lights.rad file. So when Valve released Worldcraft 2.1, they decided to include a (basically) blank lights.rad file so that users could set their own texture lighting values. And when Valve released WC 3.3, they kept the same blank lights.rad file in the distribution.
This means that when you upgraded from version 2.0 to version 2.1 or 3.3, all of the texture lighting values you were relying on from the old lights.rad file got nuked -- and if you didn't read the release notes that came with the upgrade, then you didn't notice anything until you compiled your map.
So how do I fix my texture lighting?
Two ways, the easy way (in which you learn absolutely nothing) and the harder way (which is infinitely more rewarding).First, the easy way: Valve didn't leave us mappers totally up the creek. They included the old lights.rad file as a new file called valve.rad. You can restore the old texture lighting values simply by renaming this file lights.rad. You can also add the parameter
-lights valve.rad to the RAD tool's command line. This tells the RAD tool to read its texture lighting data from valve.rad instead of lights.rad.Next, the harder way: You can insert custom texture lighting values into the lights.rad file yourself. You don't need a special editor for this -- any text editor, even Notepad, will do fine. Open up the lights.rad file. Each line in the file represents a texture that will be used as a texture light:
WHITE 255 255 255 10000
YELLOW 255 255 0 10000- The first item in each line (WHITE) is the name of the texture you want to use as a texture light.
- The next three items (255 255 255) are the red, green, and blue values of the light that will be emitted from this texture. All colors are made up of a red component, a green component, and a blue component. These values range from 0 (black) to 255 (full color). An easy way to determine a light color is to open up a paint program and choose a color you want from the color picker dialog. Then write down the red, green, and blue color values and type them into the lights.rad file.
- The last item (10000) is the brightness of the light. The higher the number, the brighter the light. Unfortunately, there is no tool (yet) that will help you pick the right number here, so you will need to play with this value in order to get the effect you want.
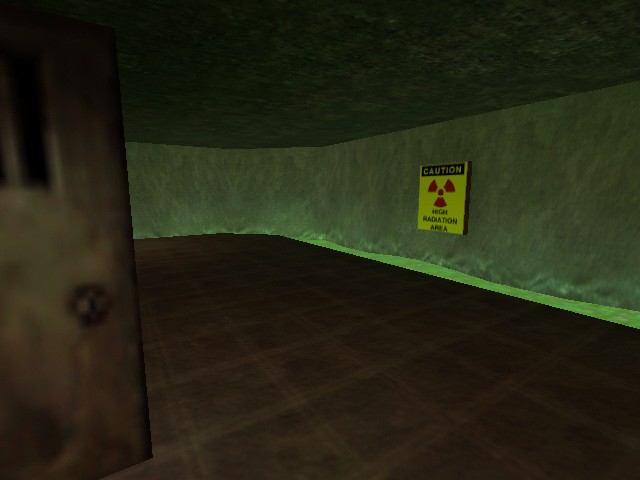
Example: Glowing Green Slime
I am creating a map where I want my Toxic Green Slime ™ to glow a sickly bluish-green throughout my map. So I decide to add the green slime texture to my lights.rad file by adding the line:!TOXICGRN 84 207 48 100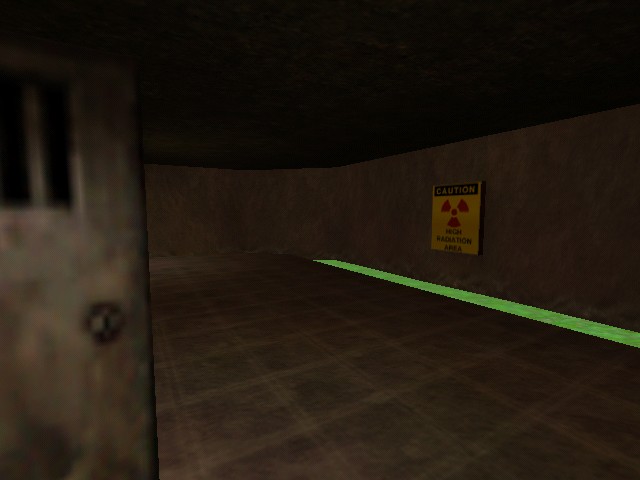
- Article Credits
- Mithodiel – Author
This article was originally published on Gamedesign.net RUST.
The original URL of the article was http://www.gamedesign.net/node/5.
The archived page is available here.
TWHL only publishes archived articles from defunct websites, or with permission.
For more information on TWHL's archiving efforts, please visit the
TWHL Archiving Project page.
Comments
You must log in to post a comment. You can login or register a new account.