Tutorial: In the Beginning Last edited 5 years ago2019-04-22 05:43:59 UTC
You are viewing an older revision of this wiki page. The current revision may be more detailed and up-to-date.
Click here to see the current revision of this page.
Introduction
Ok so you have a copy of Valve Hammer Editor (3.5 beta at this writing) and you're wondering just how to get started? Good question. The tutorial section of Hammer assumes that you have been doing this map making thing for your entire life, or at least that's the way it seems. This should help you with that.If you haven't setup the Game Configuration and Build programs yet, have a look at Tutorial: Setup Guide: Hammer.
There was a wonderful set of beginners tutorials included with WorldCraft 2.1, but for some reason they were not updated when Hammer was released. These In The Beginning tutorials are a recreation of that information, and take into account most of the changes introduced by Valve Hammer 3.5 beta.
There is an important part of the Help Section in Hammer, and that is the Setup Guide. If your new to this sort of program then this may be a little daunting, especially when they talk about integrating programs you've never heard of. Grab these programs: and . It's probably a good idea to get them now and spend a little time getting used to them. The ZHLT tools are much better than the default provided compiling tools, while Wally is one of the most well rounded texture editors around. Follow the Tutorial: Setup Guide: Hammer and the information in the Hammer Help file and once you have Hammer set up, go to the Filemenu and click New.
The Views
If you left the defaults in for the options General, 2D Views and 3D Viewsduring setup then you should be presented with 4 windows: Camera, Top - (x/y), Front - (y/z)and Side - (x/z). I like to have the scroll bars option checked in 2D Views.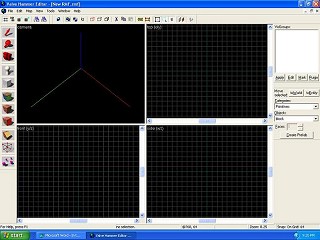 Blank Hammer
Before I start on how to create your first brush, I thought I would take some time explaining the screen you see in front of you. If you want to skip this and go straight to the "Brushes" section, be my guest, but this might just save you from asking a lot of questions.
The 2D Views on your screen have white Grid Lines on them. The Lines represent the largest possible map size that the engine can handle (actually you need to stay within about 128 units of the edge). So when you get around to creating your first brush, try to start on the center. The center is designated by a crossed set of dark green lines.
Beginners Things to Think About
The most common problem for new mappers is that their imagination is bigger than what the engine can handle. The best way to get good at mapping is to think big and start small.To get an understanding of what a map is all about, think of it as a shoe box. Everything inside the box is the map, or what the engine is going to try to render, everything outside the box (including the outer faces of the box) is the Void. No mans land, space, nothingness.
The biggest single problem for new mappers occurs when they build a box. The brushes must mate or touch each other creating an area inside the box that is "airtight" to the outside Void. It is a little like laying bricks when building a new house. The care that goes into the initial build, saves the trouble later of re-doing the whole thing. If there is a hole in your box, there will be a problem when you run it. An error will occur called a LEAK. And that is just what it is! a LEAK. The engine can see from the inside of the box to the outside of the box, and this can lead to other important compiling programs not being run. Apart form bad building technique, the other most common problem is having Entity Types and Brushes in the Void. When placing monsters and entities, always make sure they are inside your "airtight" shoe box.
As you get better at map building, you will find that there are exceptions to these rules... Just stick with this for the time being.
Brushes -- The Crash Course By Means of Hollowing
So to get the ball rolling we need to create a brush. Click on the Block Tool on the left-hand side of the screen, place your cursor on the Top - (x/y) window and click on the intersection of the dark green lines. Hold and drag your cursor diagonally up and to the right about 4 squares (this assumes that you have Snap: On Grid: 64 at the bottom-right) and let go. You now have awhite dotted line that is starting to represent a rectangle.
Let's turn this brush into a solid. Click on the Selection Tool on the left-hand side of the screen and position the cursor over the center of the white outlined brush in any of the 2D views. Right click and select Create Object. You should be the proud owner of a rectangle.
(Ok, so you're wondering what sort of drugs I am on because I find this exciting? Well, I am not telling).
Your rectangle should be visible in the Camera View. If it isn't then place your cursor on that view and hit the Z key. That should give you a cross cursor and all you need to do now is use the W,S,A and D keys to navigate around. To get out of Camera mode just hit the Z key again. While I am on the subject, you can navigate around the 2D views by placing the cursor over them and using the D and C keys to change the Zoom, and the Arrow Keys to move around. Right, this isn't getting us any closer to running around and shooting aliens, so what we need to do now is to make our
rectangle a cube. In the Side - (x/z) 2D View, click on the little cross in the center of your rectangle. That should highlight the rectangle. Now click and hold the top center little white square (handle) on the outline and drag it down or up so that you end up with a square box in that view. You should have a square in all the 2D views.
 Purple Box ;o
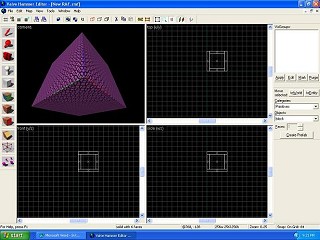 Hollow Purple Box ;o
anything that's not a cube :)). It is best that you get over using Hollow as fast as you can [You can hold Shift and drag selected brushes to duplicate them].
Entities
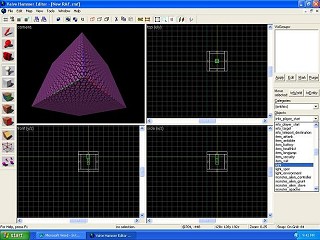
To get inside your square and have a look, click on the Entity Tool, click in the middle of your square, and adjust the little green box so that it is in the middle of the space you have created in all the 2D views. The entity you want is info_player_start so make sure this is selected in the Object Bar. Hold the cursor over the green box, right click and select Create Object [or press Enter]. You should now have a green rectangle in your cube. (If you are using the Hammer 3.5 Beta, you will see Gordon) This is the player start information that the game engine uses to work out where you start.Ok, so we are now nearly ready to compile the map. However you might want to put a light in, because unless you have setup Zoner's Half Life Tools in your compiling options, your map will be dark. Very dark. So click on the Entity Tool again and as you did with the info_player_start and insert a light entity above your player start.
 Hollow Purple Box With Green Box and.. Light? ;o
Compiling? -- In it's brevity
What next... Hit F9 and if you have set up the compile programs correctly you should end up standing in a really revolting pink room. If not then have a look at Tutorial: Compiling Introduced. If that looks Ok, and you still have problems try looking at Tutorial: Setup Guide: Hammer again.Congratulations! More to follow - now that you have an ugly pink room (;o) (that isn't very big), we will explore some of the ways you can make it look good and expand on it.
Part 2: Walls and Halls
- Categories
- Tutorials
- Beginner Tutorials
- Goldsource Tutorials
6 Comments
You must log in to post a comment. You can login or register a new account.
It helped me a lot!
http://www.twhl.co.za/vault.php?map=5424