Tutorial: Making sprites with SpriteMaker Last edited 4 months ago2024-10-19 11:58:31 UTC
Contents
- Using SpriteMaker to make Half-Life and Counter-Strike sprites
- 1. Installing SpriteMaker
- 2. Creating a single sprite
- 3. Creating multiple sprites
- 4. Putting sprite files in the right location
- 5. Creating sprites with different texture formats
- 5.1. Additive sprites
- 5.2. Normal sprites
- 5.3. Index-alpha sprites
- 5.4. Alpha-test sprites
- 6. Creating sprites with different orientations
- 6.1. Parallel
- 6.2. Parallel-upright
- 6.3. Oriented
- 6.4. Parallel-oriented
- 6.5. Upright
- 7. Creating animated sprites
- 7.1. With multiple images
- 7.2. With spritesheets
- 7.3. With gif files
- 8. Conclusion
- 8.1. Summary
- 8.2. Credits
Using SpriteMaker to make Half-Life and Counter-Strike sprites
SpriteMaker is a new tool for making Half-Life and Counter-Strike sprites. It comes bundled with WadMaker. It's designed to make creating and updating sprites easier and faster than with existing tools. It can convert both individual images and directories full of images to sprites with just a single action. Let's take a look:1. Installing SpriteMaker
Start by downloading the latest version of SpriteMaker from here: WadMaker_1.2.1_win64.zip (or go to the latest release page if you're using Linux or a 32-bit Windows). Then extract the zip file somewhere on your computer, for example toC:\HL\Tools, so you'll end up with a C:\HL\Tools\WadMaker_SpriteMaker_1.2.1 directory. The directory name and contents may vary depending on which version you downloaded:

2. Creating a single sprite
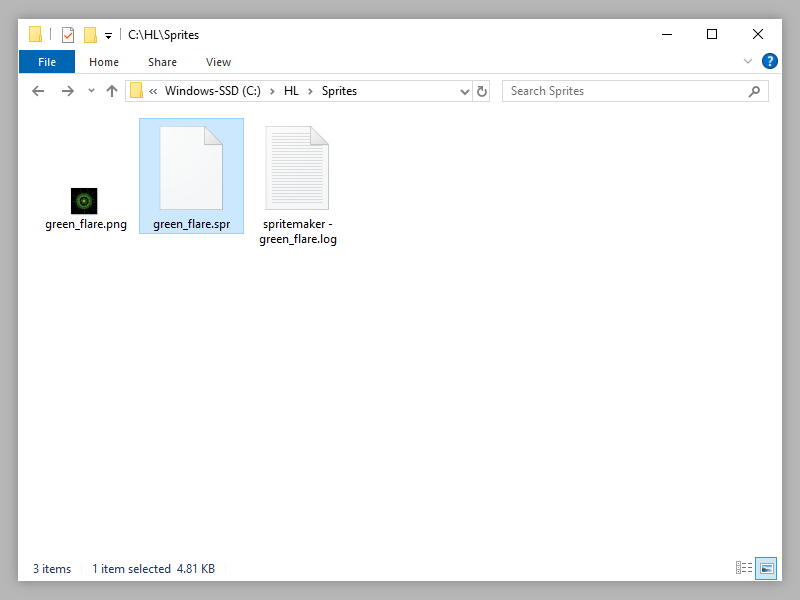
To create a single sprite, drag an image on top ofSpriteMaker.exe. SpriteMaker supports png, jpg, gif, bmp and tga, but also Photoshop and Krita files. If you're using Gimp, Aseprite or another program then you'll need to configure a conversion tool first (see the documentation).
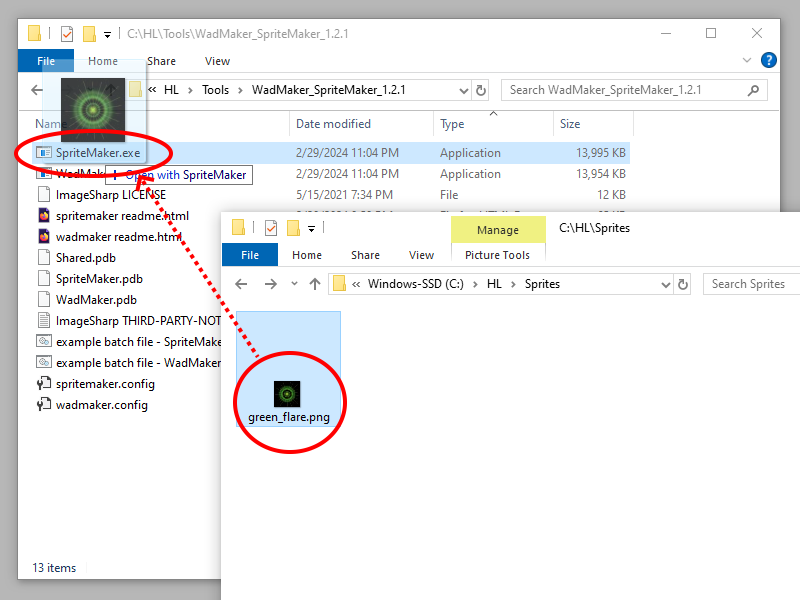
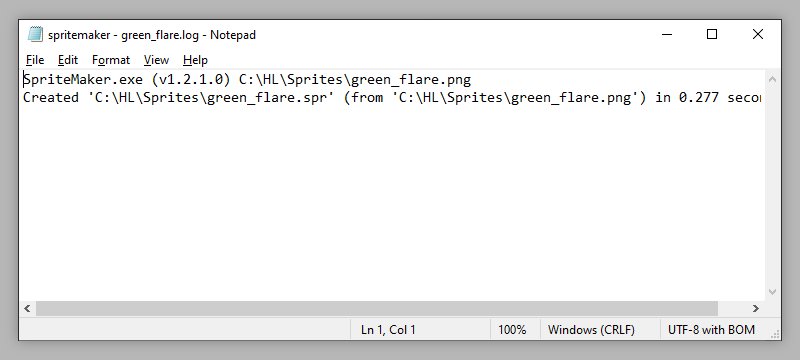
green_flare.spr file will appear next to the input image:
3. Creating multiple sprites
To create multiple sprites at the same time, drag a directory with images onto `SpriteMaker.exe: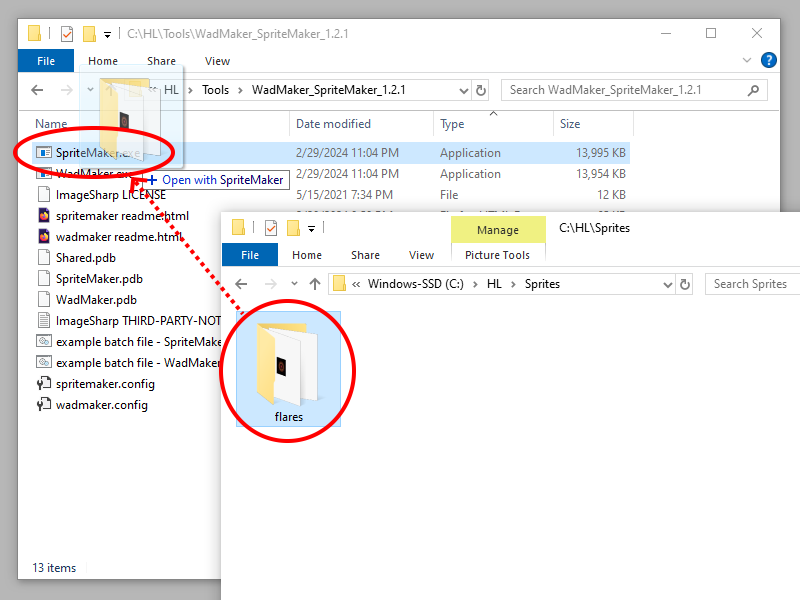
directoryname_sprites directory next to the input directory:
4. Putting sprite files in the right location
To use a sprite, copy it to yourHalf-Life\valve\sprites or Half-Life\cstrike\sprites directory.It's also possible to let SpriteMaker do this for you. Create a batch file (or copy
example batch file - SpriteMaker.bat), change its name to update my sprites.bat, open it with a basic text editor like Notepad, and add the following lines:
"C:\HL\Tools\WadMaker_SpriteMaker_1.2.1\SpriteMaker.exe" "C:\HL\Sprites\my_sprites" "C:\Program Files (x86)\Steam\steamapps\common\Half-Life\valve\sprites\my_sprites"

PAUSEPAUSE line causes the console window to stay open until you press a key, so you don't need to open the log file to see if anything went wrong.Now, instead of dragging the images directory on top of
SpriteMaker.exe and then copying the sprites directory manually, you can double-click this batch file, and it will automatically create or update the sprites in your Half-Life\valve\sprites directory. If some sprites already existed then SpriteMaker is smart enough to only process added, modified or deleted images, so updating usually only takes a few seconds.
5. Creating sprites with different texture formats
Half-Life uses an 8-bit indexed format for its sprites, so each sprite has a limit of 256 colors. With other tools it's often necessary to manually create or adjust palettes, but SpriteMaker knows how to create palettes for all sprite types that Half-Life supports. It also accepts images with transparency, so you don't need to mark transparent areas with a blue color either.Sprites can have different texture formats, so let's take a look at each format:
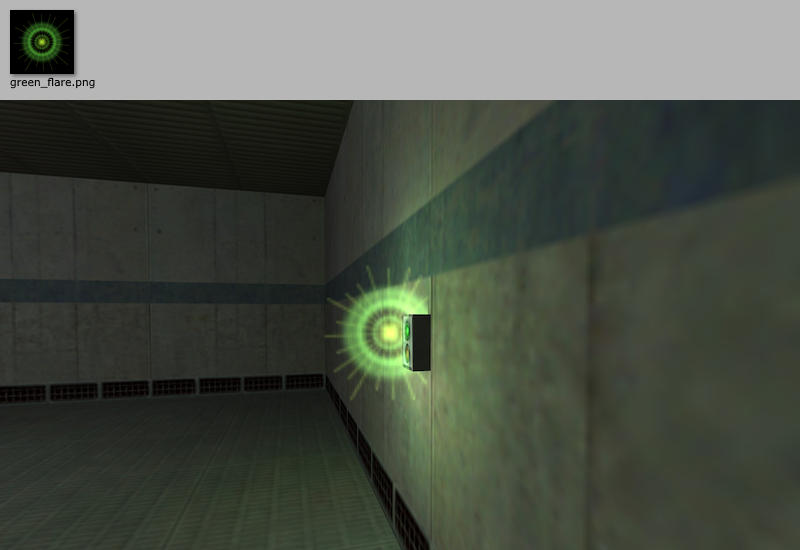
5.1. Additive sprites
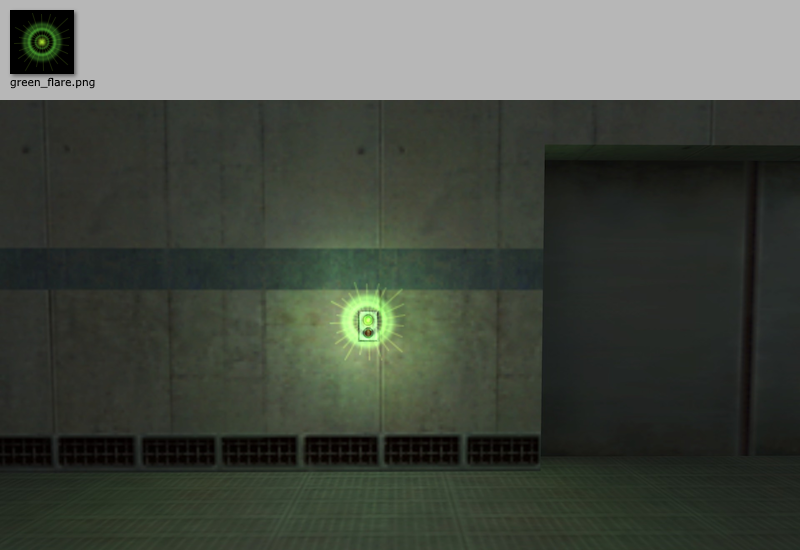
The most common format. Additive sprites are mostly used for light-based effects, because the value of each pixel is 'added' to whatever is behind it, making it brighter. Black pixels won't add anything, so they're invisible, but the brighter a pixel is, the more 'brightness' it will add. Note that this format only works as intended if the render mode of an env_sprite is set to Additive or Glow.This is the default output format for SpriteMaker, but it can also be chosen explicitly by adding
.additive or .a to the input image filename. For example, the following files will all produce an additive sprite named green_flare.spr:
- green_flare.png
- green_flare.a.png
- green_flare.additive.png
5.2. Normal sprites
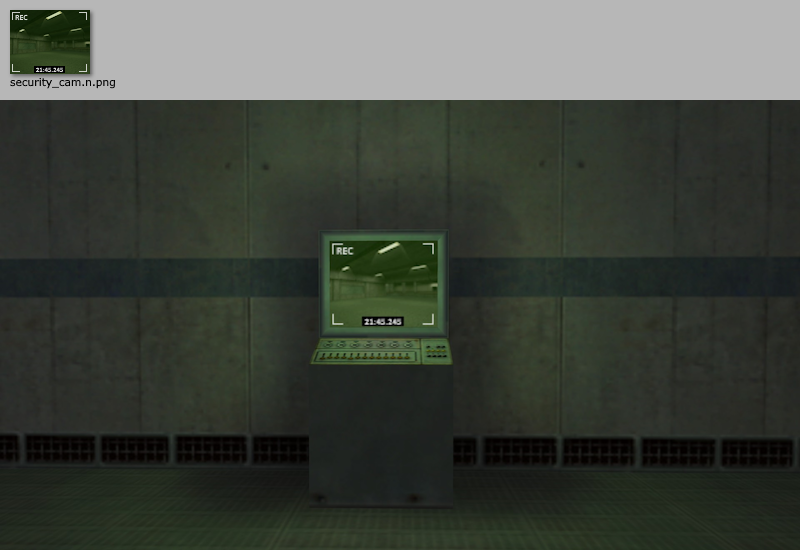
Despite its name, this format behaves almost exactly the same as the additive format. But as the name implies, it's not intended for additive light effects but for 'normal' pictures. This type can be used to create animated TV-screens, among other things.To create normal sprites, add
.normal or .n to the input image filename. For example, the following files will all produce a normal sprite named security_cam.spr:
- security_cam.n.png
- security_cam.normal.png
5.3. Index-alpha sprites
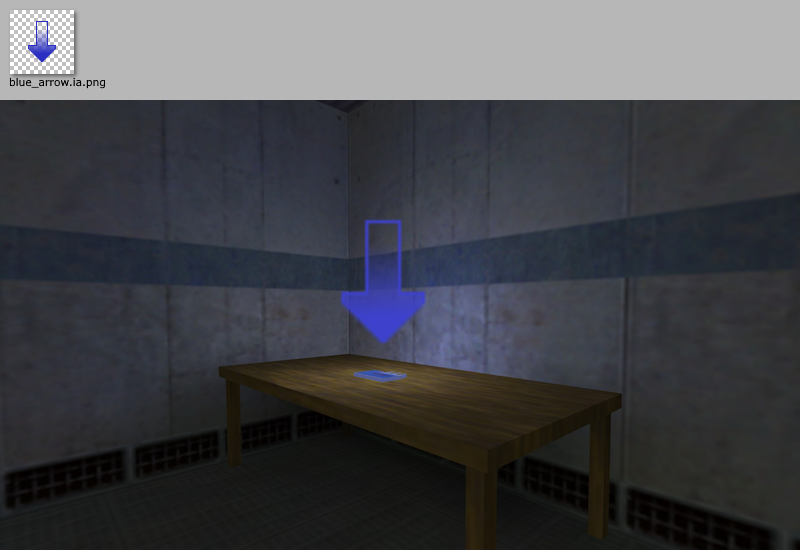
Sprites with this format will have a single color, but 256 levels of transparency, just like decals. SpriteMaker expects images with an alpha channel, and will use the average color of the input image to set the sprite color. Index-alpha sprites do not work well with the Additive and Glow render modes.To create index-alpha sprites, add
.index-alpha or .ia to the input image filename. For example, the following files will all produce an index-alpha sprite named blue_arrow.spr:
- blue_arrow.ia.png
- blue_arrow.index-alpha.png
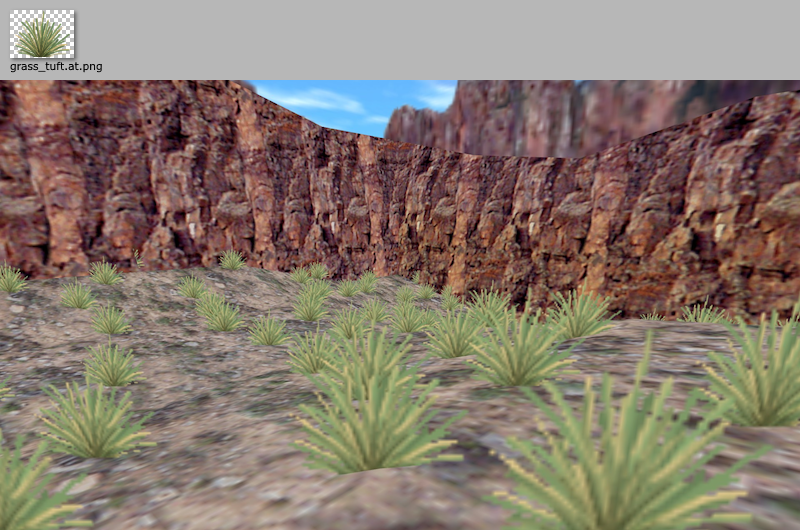
5.4. Alpha-test sprites
Alpha-test sprites can contain transparent areas - the final color in the palette is reserved for transparent pixels. This format can be used for things like grass tufts or rock particles.Most tools require transparent parts to be marked with a specific blue color (RGB: 0 0 255), but SpriteMaker expects images with an alpha channel. By default, any pixel with an alpha value below 127 (any pixel that's more than 50% transparent) will become transparent.
To create alpha-test sprites, add
.alpha-test or .at to the input image filename. For example, the following files will all produce an alpha-test sprite named grass_tuft.spr:
- grass_tuft.at.png
- grass_tuft.alpha-test.png
6. Creating sprites with different orientations
Sprites can also have different orientations:6.1. Parallel
The most common orientation, parallel sprites always face the camera. They will look the same regardless of the angle from which they are seen. This is the default orientation, but it can also be chosen explicitly by adding.parallel or .p to the input image filename. For example, the following files will all produce a parallel sprite named green_flare.spr:
- green_flare.png
- green_flare.p.png
- green_flare.parallel.png
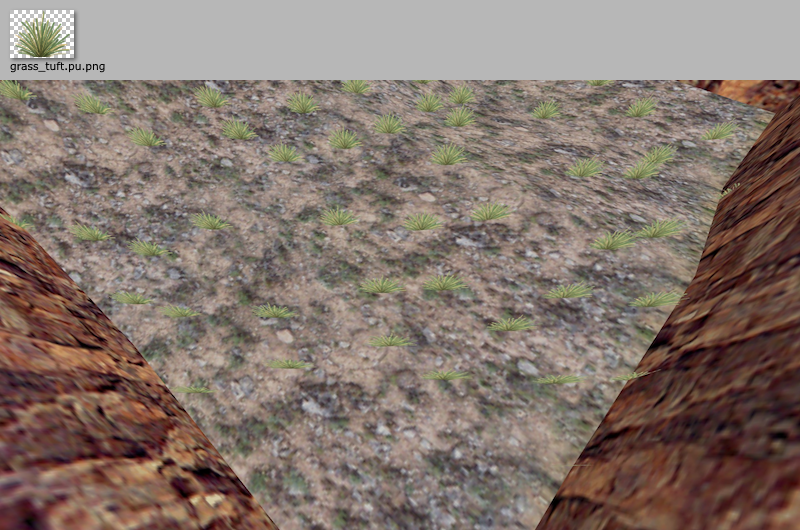
6.2. Parallel-upright
Just like parallel sprites, parallel-upright sprites always face the camera, but they're locked along the z-axis. This is useful for things that should always point upwards, such as fire or grass.To create parallel-upright sprites, add
.parallel-upright or .pu to the input image filename. For example, the following files will all produce a parallel-upright sprite named grass_tuft.spr:
- grass_tuft.pu.png
- grass_tuft.parallel-upright.png
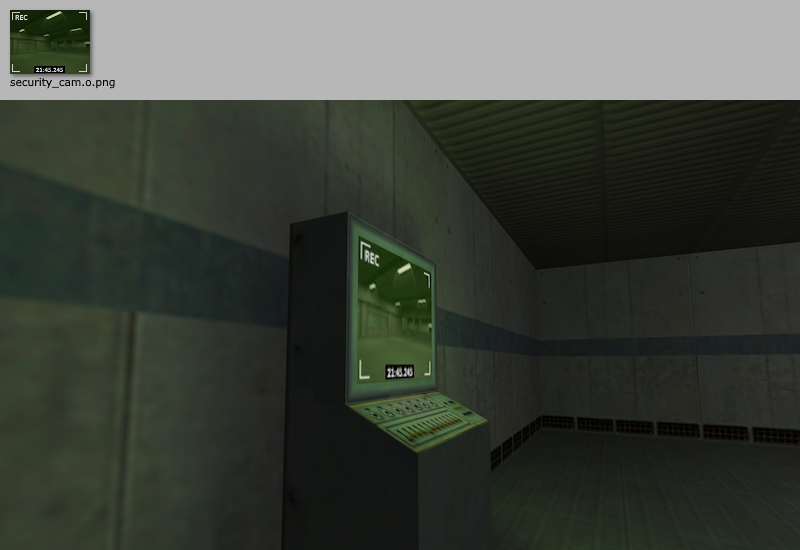
6.3. Oriented
Oriented sprites will have a fixed orientation, which can be set with theangles property of a sprite entity. This can be used to create animated TV-screens or decals, among other things.NOTE: Be aware that Half-Life will swap yaw and roll if roll is set to 0! For example, an
env_sprite with angles set to 10 20 0 is treated as 10 0 20.An easy way to avoid this issue is to set roll to 360. There is also a map processing tool that can do that automatically as part of the map compilation process: MESS.
To create oriented sprites, add
.oriented or .o to the input image filename. For example, the following files will all produce an oriented sprite named security_cam.spr:
- security_cam.o.png
- security_cam.oriented.png
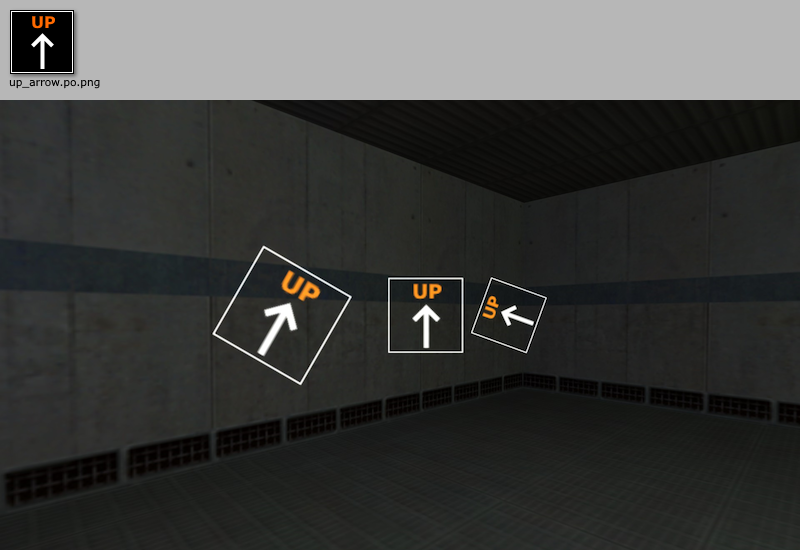
6.4. Parallel-oriented
This orientation is similar to parallel, but the sprite can also be rotated around its center (roll).To create parallel-oriented sprites, add
.parallel-oriented or .po to the input image filename. For example, the following files will all produce a parallel-oriented sprite named up_arrow.spr:
- up_arrow.po.png
- up_arrow.parallel-oriented.png
6.5. Upright
This orientation is pretty much broken and (almost) never used. It's locked along the Z-axis like parallel-upright, but it doesn't always face the camera - sometimes it will even turn away from the camera.To create upright sprites, add
.upright or .u to the input image filename. For example, the following files will all produce an upright sprite named broken.spr:
- broken.u.png
- broken.upright.png
7. Creating animated sprites
Animated sprites are sprites that contain multiple frames. SpriteMaker supports multiple ways to create animated sprites:- Multiple images - one image per frame.
- Spritesheets - images that contain multiple frames.
- Gif files - each gif frame becomes a sprite frame.
- Sprites are updated every 0.1 seconds, so the maximum framerate is 10fps.
- Due to a bug in Half-Life and Counter-Strike, the last frame of an animated sprite is skipped. To work around this, add an extra frame to your animations. This bug has been fixed in Sven Co-Op.
- Frames don't need to have the same size.
7.1. With multiple images
To create an animated sprite from multiple images, give them all the same 'base' filename, followed by a dot and a frame number. The texture format and orientation only need to be specified in the first filename:- countdown.additive.0.png
- countdown.1.png
- countdown.2.png
- ...
SpriteMaker.exe, or drag their parent directory onto SpriteMaker.exe. This will produce a single animated sprite named countdown.spr.
7.2. With spritesheets
If multiple frames have the same size, then they can be put in a single spritesheet image. Add the frame size to the filename to mark it as a spritesheet:bubble.64x64.png. This will produce a sprite named bubble.spr, where each 64x64 block becomes a separate frame.
7.3. With gif files
If the input is a .gif file, all of its frames are converted to sprite frames.8. Conclusion
8.1. Summary
To summary the process:- Create or modify images with your favorite image editor
- Drag an image, or a directory full of images, onto SpriteMaker.exe
- Copy the resulting sprite or sprites directory to your game's sprites directory (or use a batch file to automate this)
8.2. Credits
Thanks to:- Yuraj, for documenting the .spr file format
- The303, for his tutorials and information about the different sprite formats and orientations
- The people at TWHL for their bugreports, feedback and various pieces of information
- Categories
- Tutorials
- Beginner Tutorials
- Goldsource Tutorials
- Article Credits
-
 Captain P
–
Original author
Captain P
–
Original author
Comments
You must log in to post a comment. You can login or register a new account.