Vlatitude: Modeling for Half-Life - Part 3 Last edited 2 years ago2022-09-29 07:56:20 UTC
Greetin's. In this tutorial I will be going through the third main section of the basics of milkshape - materials, or textures. A texture is a image file which is "painted" onto models, as well as solids in level design. Its absolutely necessary before you compile a model to apply a texture to it first, even if only a solid grey colour.. In Half Life, textures must be in indexed colour (NOT RGB) and they must be in .bmp format.
So, open up milkshape, then click on the "materials" tab to the right and you'll see the following: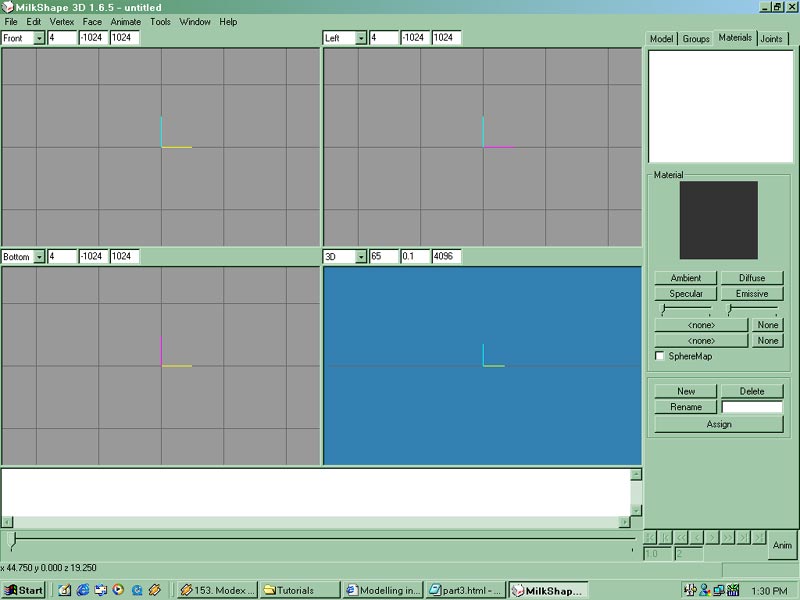 As you can see, I am coding this page in notepad. How 1337 am I? Anyway...As you can see, the materials tab has four buttons - ambient, specular, diffusive and emissive. These control the lighting effects on the model. However, Half-Life doesn't support this, so it is not of importance to us. Just leave the settings alone
  .
.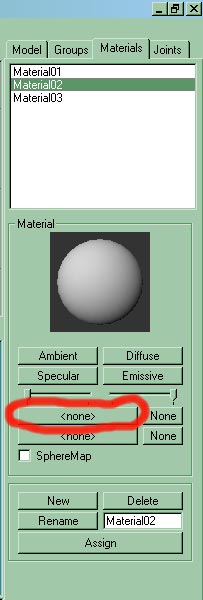 As you can see from the top of the picture to the left, I have created three new materials? How does one do that? Quite simple, believe it or not. Just click on new, and there you go! So, go ahead and create three new materials like I have. As you can see in the grey box, there is now a ball! Click and hold on the ball then move the mouse. It moves! So far its only grey, because there isnt an actual texture applied to it. To find the texture, click on the red circled button. It should open a browser, so find some kind of image file (you do have to have Indexed Format .BMP, but only once you compile it).
Alright, now once youve found an image, select OK. You should now see an image stretched over that ball. By the way, the button to the right of the circled red image clears whatever image maybe in there. There are two "browse to find image" buttons - this is so you can blend textures... Not that useful to us.
Now, you can modify and delete the three materials we have. By selecting one of them in the top selection field, then pressing delete, the material is deleted. If you type a new name into the textbox, then select rename, the material will be renamed, handy for keeping track of things.
The last button is assign. This is how you assign one of the materials to a solid or group of solids. The important thing to remember is that when you click assign, it will assign the material to the group selected, not what faces you have selected. So say you have the material for the clip of a gun, you will need to group all the solids that are a part of the clip. Then you select the group that you have just created. Then go into the materials tab, select the clip material, then click assign. It is important to note that the texture won't be fitted accross the model correctly. You have to go into the Texture Coordinate Editor. In the second series of my modelling tuts, I will go through this process, so be patient, I will get there.
As always, email me any queries you might have on what I have gone through in this tut.
So, open up milkshape, then click on the "materials" tab to the right and you'll see the following:
.Alright, now once youve found an image, select OK. You should now see an image stretched over that ball. By the way, the button to the right of the circled red image clears whatever image maybe in there. There are two "browse to find image" buttons - this is so you can blend textures... Not that useful to us.
Now, you can modify and delete the three materials we have. By selecting one of them in the top selection field, then pressing delete, the material is deleted. If you type a new name into the textbox, then select rename, the material will be renamed, handy for keeping track of things.
The last button is assign. This is how you assign one of the materials to a solid or group of solids. The important thing to remember is that when you click assign, it will assign the material to the group selected, not what faces you have selected. So say you have the material for the clip of a gun, you will need to group all the solids that are a part of the clip. Then you select the group that you have just created. Then go into the materials tab, select the clip material, then click assign. It is important to note that the texture won't be fitted accross the model correctly. You have to go into the Texture Coordinate Editor. In the second series of my modelling tuts, I will go through this process, so be patient, I will get there.
As always, email me any queries you might have on what I have gone through in this tut.
- Article Credits
- BB – Author
This article was originally published on 69th Vlatitude.
The original URL of the article was http://www.vlatitude.com/tutorials.php?tutID=57.
The archived page is available here.
TWHL only publishes archived articles from defunct websites, or with permission.
For more information on TWHL's archiving efforts, please visit the
TWHL Archiving Project page.
Comments
You must log in to post a comment. You can login or register a new account.