RUST: Creating Environment Maps With Terragen Last edited 3 months ago2024-09-10 18:32:10 UTC
Preface:
This tutorial consists of two parts. In Part I, we explain exactly what an environment map otherwise known as a "sky" is, and what it is used for in a Half-Life level. Then in Part II, we discuss how to make an environment map using Terragen 1.Experienced mappers who already understand how a Quake-engine environment map works can skip Part I. The rest of us should start with Part I.
Part I: What Is an Environment Map?
An environment map is used in a Half-Life level to provide the the player with the illusion of being in an outdoor environment. Confining ourselves to the walls of some building would become quite boring after a while, but "rooms" (that is, areas enclosed by brushes) are the only player-space areas that the game engine understands. So, rather than forcing the player to be indoors all of the time, we use special brushes (sky brushes, covered all over with the SKY texture) wherever the player is capable of viewing the sky outdoors. The game engine paints sky brushes with special graphics that provide the illusion of being contained in a 3D outdoor environment. The whole idea is to convince the player that he or she is not simply contained inside some big box.
That said, let's get a bit more technical. An environment map takes the form of a hollow cube. The "outdoors" panorama is then painted on this cube so that it appears to be continuous in every direction, as far as the eye can see. Confused yet? What if I told you that the sky was the projection of a spherical picture on the environment cube? Oh well, no matter. For our purposes, it's not all that important anyway.
Environment Maps In Half-Life
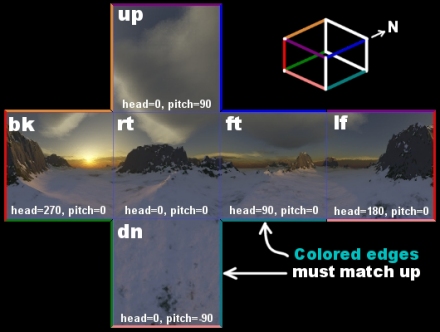
Since the "outdoors" is painted on a cube, this implies that there are six separate graphics that make up the sky, each of them the same size. In Half-Life, each environment map consists of six 256x256 graphics that make up the sky. The images are named skynamert (right), skynameft (front), skynamelf (left), skynamebk (back), skynameup (up), and skynamedn (down), where skyname is the name of the sky that you are creating. You must store your sky graphics in two formats: 8-bit uncompressed BMP (for those without 3D accelerators) and 24-bit compressed TGA (for those with 3D accelerators).Hmmm. Perhaps a picture of an unfolded skybox would help:
Part II: Using Terragen to Make an Environment Map
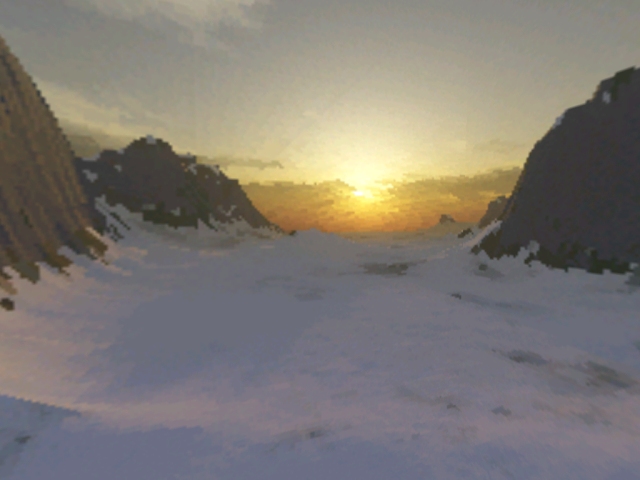
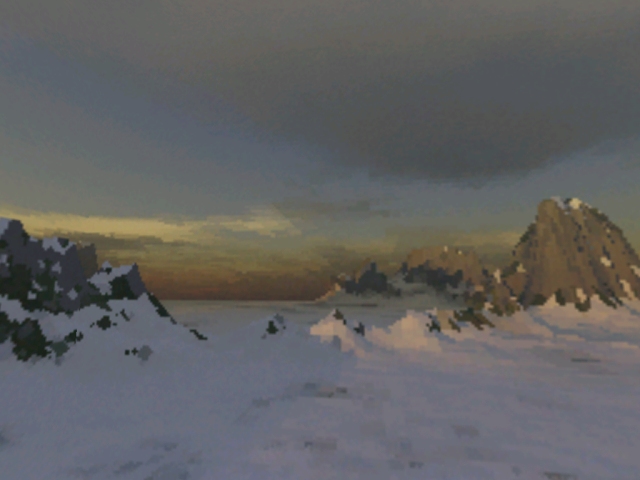
Now that we understand the concept of an environment map, I can explain how to actually go about making one.Matt Fairclough has developed a nifty program called Terragen that generates photo-realistic terrain images. These terrain images can include lighting, fogging, and other atmospheric effects. Of course, there are other programs out there that can do the same thing. (Bryce and 3D Studio MAX come to mind.) The best thing about using Terragen is that it is free (for non-commercial use) and it is fast (at 75% detail, I was able to render the entire sky in about 30 minutes on a P-200 MMX machine with 32MB of RAM). These two qualities make generating environment maps with it easy for amateur mappers (like me).
First, if you don't have Terragen already, then you will need to download Terragen. When this article was first written (21 July 2000), the latest version was 0.8.11. The examples and screen shots assume that you are using this version, however the link is to a slightly more recent version of Terragen 1 - 0.9.43.
Once you have obtained Terragen and installed it, your next step is to generate your sky environment. This tutorial is not designed to explain all of the inner workings of Terragen, so I will have to leave you to generate your own world. The Terragen website used to have a User's Guide which you can access through The Internet Archive. See also Carol Brooksbank's tutorial. Use your imagination -- the possibilities are endless.
Rendering the Environment Map
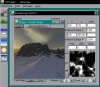
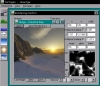
After you create your environment, you are ready to render your sky. The technique for doing this in Terragen is very similar to the technique for doing it in Bryce. You will first select an initial position and orientation for the camera, and then take 90-degree field-of-view snaps of the scene in each of the six cardinal directions (right, front, left, back, up, and down).To set the initial camera position, bring up the Render Controls window. An overhead map of your terrain appears at the bottom right-hand side of the window. Clicking on the map with the left mouse button sets the camera position; clicking on it with the right mouse button sets the camera target (that is, the point that the camera always looks toward). You can also enter numbers manually in the Camera Position fields if you prefer. I usually enter 128 for the camera position X and Y values, which sets the camera in the center of the map. You might want to adjust the Z coordinate for the camera position as well. Then set all three of the Camera Orientation values to 0 and do a render preview. If you are satisfied, then move on to the next step; otherwise, keep adjusting the camera position until you are satisfied.
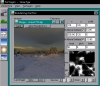
Once you have set the camera position, click on the Camera Settings button and manually set the Zoom to 1. A Zoom value of 1 results in a 90-degree field of view, which is what we need for a Half-Life sky. The other settings are optional, but Zoom must be 1, no more and no less. Once you have set the zoom value, exit the Camera Settings dialog.
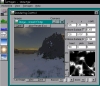
Now, you need to decide what size that you want for the rendered images. Half-Life sky images are 256x256, so you can snap images at that size if you want to. Alternatively, you can snap the images at a larger size (say, 512x512) and resample them down to 256x256 using a paint program such as Paint Shop Pro. Doing this can give you greater graphical detail, but may require additional post-processing to make the graphics seamless. So for now, set the Image Size to 256x256. Also, set the Detail level to maximum for best image quality. (The example shots are done at 75% detail, and it shows in the final result.)
Snapping the Sky Images
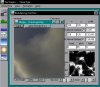
Now we are ready to snap the sky images. Snapping each image involves adjusting the Camera Orientation values in order to point the camera in the proper direction, and pressing the Render Image button to snap the scene. The three Camera Orientation values control the camera as follows:- Head: This value controls the camera heading, or compass direction. This value represents degrees clockwise from "north", and ranges from 0 to 360, where 0 is "north" (straight up) on the terrain map, 90 is "east", and so on.
- Pitch: This value controls the camera pitch, or up-and-down tilt. This value represents some number of degrees above the horizon, and ranges from -90 (straight down) to 90 (straight up). A pitch of 0 makes the camera level.
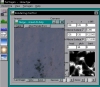
- Bank: This value controls the bank of the camera, or its side-to-side tilt. This value should always be 0, unless you are using the bank to produce special sky effects (which are beyond the scope of this tutorial).
| Image | Direction | File name | Camera orientation |
|---|---|---|---|
 |
Right | skynamert.bmp | Head=0, Pitch=0, Bank=0 |
 |
Front | skynameft.bmp | Head=90, Pitch=0, Bank=0 |
 |
Left | skynamelf.bmp | Head=180, Pitch=0, Bank=0 |
 |
Back | skynamebk.bmp | Head=270, Pitch=0, Bank=0 |
 |
Up | skynameup.bmp | Head=0, Pitch=90, Bank=0 |
 |
Down | skynamedn.bmp | Head=0, Pitch=-90, Bank=0 |
Testing the Sky in Half-Life
Once you have converted your sky into the proper formats, place them in thehalf-life/valve/gfx/env subdirectory (where half-life here is the directory where you installed Half-Life). Then load it up in the game. You can create a test map by creating a room with the SKY texture, a CLIP brush for the player to stand on, and a player start. This allows you to view the entire sky unobstructed by other map geometry. Remember to make the map use your custom skybox by opening Map Properties and entering the name of your skybox in Environment Map.
- Article Credits
- Mithodiel – Original author
-
 Oskar Potatis
–
Updates because of dead links and changes to the Terragen website
Oskar Potatis
–
Updates because of dead links and changes to the Terragen website
This article was originally published on Gamedesign.net RUST.
The original URL of the article was http://www.gamedesign.net/node/9.
The archived page is available here.
TWHL only publishes archived articles from defunct websites, or with permission.
For more information on TWHL's archiving efforts, please visit the
TWHL Archiving Project page.
Comments
You must log in to post a comment. You can login or register a new account.