VERC: The Bendy Door Last edited 5 years ago2019-05-13 13:20:30 UTC
You are viewing an older revision of this wiki page. The current revision may be more detailed and up-to-date.
Click here to see the current revision of this page.
Introduction
There was a scene (er, well it was like a scene) in Half-Life where an alien busts through a door. He didn't just bust through the door though. He pounded against it a few times first. Each time he pounded, the door would bulge out a little bit where, presumably, the alien's blows landed. It was a really cool effect and it's something that you can easily add to your own level.How is it done?
The technique is actually pretty simple. The door is composed of three groups of (one of more) objects.- The normal door
- The door bulges
- The broken door
Example
The example below takes you through this process in more detail. You will be creating a door that gets shot open by a group of grunts.The first thing you do is create the control entities. In the picture below, the control entities are the two blue entities to the left of the door.
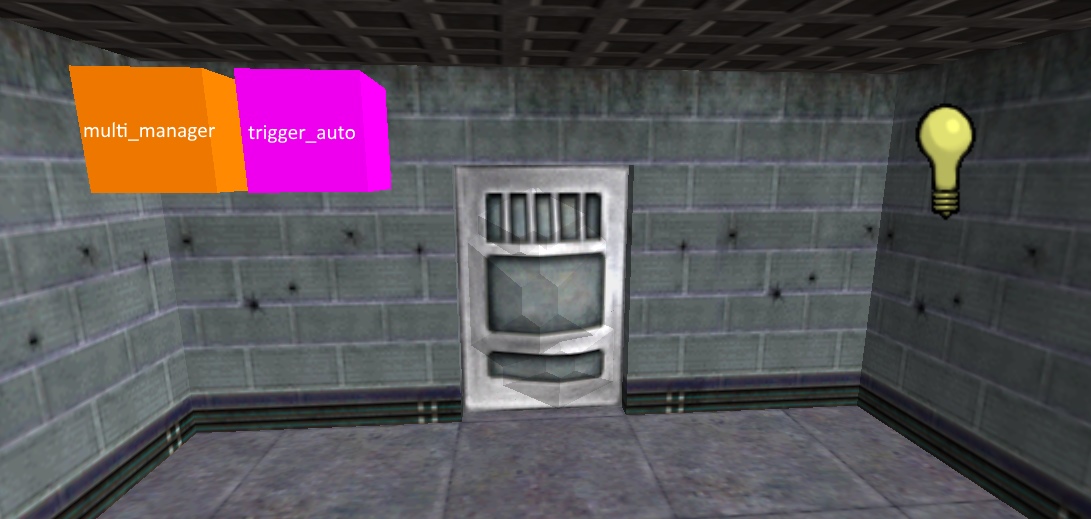
- Target ( target ) - "autostart"
- Delay before trigger ( delay ) - "0.5"
- Name ( targetname ) - "autostart"
- bulge1 (5) - toggles the first bulge on
- sound1 (5) - plays a gun shot sound
- bulge2 (6.5) - toggles the second bulge on
- sound1 (6.5) - plays a gun shot sound
- bulge3 (7) - toggles the third bulge on
- sound1 (7) - plays a gun shot sound
- door1 (8) - hides the "normal" door
- bulge1 (8) - turns the first bulge off
- bulge2 (8) - turns the second bulge off
- bulge3 (8) - turns the third bulge off
- door2 (8) - makes the "broken" door visible
- explosion1 (8) - triggers explosion and debris
The above two entities automatically run through the door bending events with no interaction from the player. If you wanted the player to activate these events by walking through a trigger, you'd use a trigger_once entity instead.
Now , as shown in the above picture, create the door. Select the door object and press
Ctrl+T to turn it into a func_wall_toggle entity. In the func_wall_toggle properties, set the Name ( targetname ) to "door1".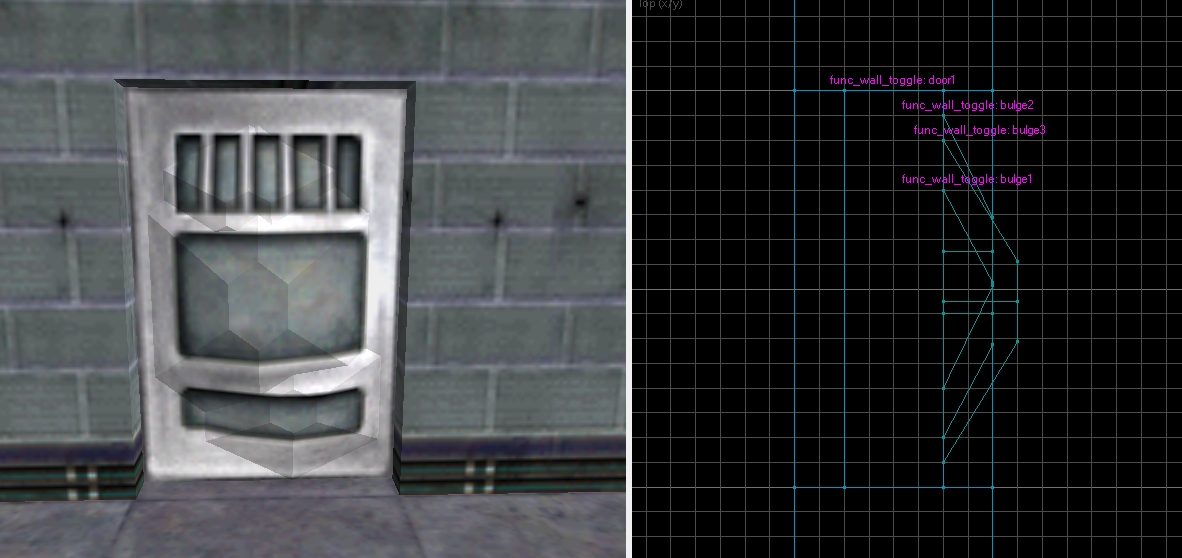
It's not shown in this picture, but also create an ambient_generic entity on the side of the door opposite the bulges. This sound will get played each time a bulge is created to simulate the gunfire. In it's properties, set the following values:
- Name ( targetname ) - "sound1"
- WAV Name ( message ) - "ambience/biggun3.wav"
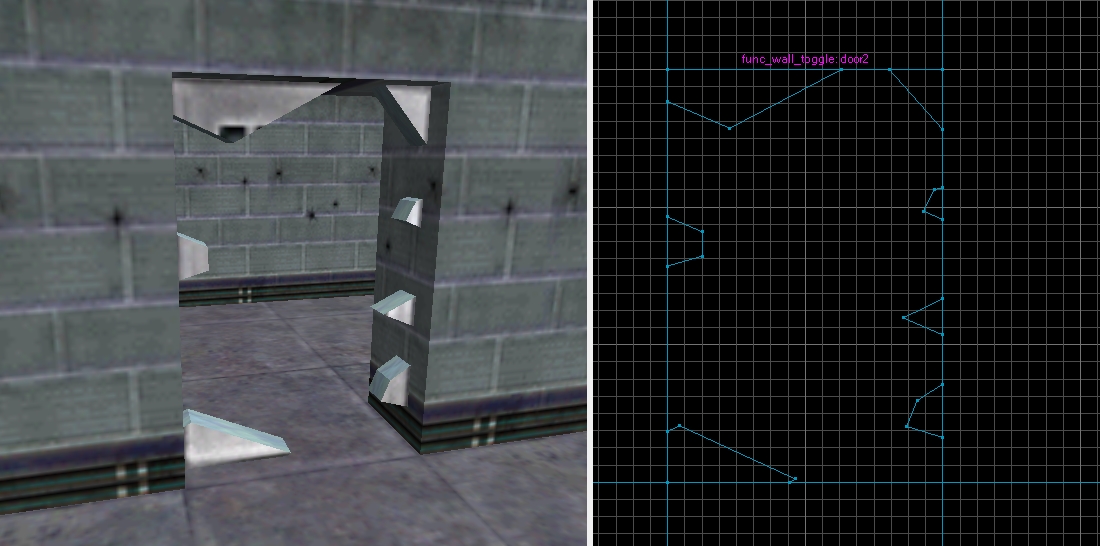
Select all of the broken door pieces and press Ctrl+T to turn them into a func_wall_toggle entity. In the entity properties, set the Name ( targetname ) to "door2". In the flag properties, enable the "Starts Invisible" flag.
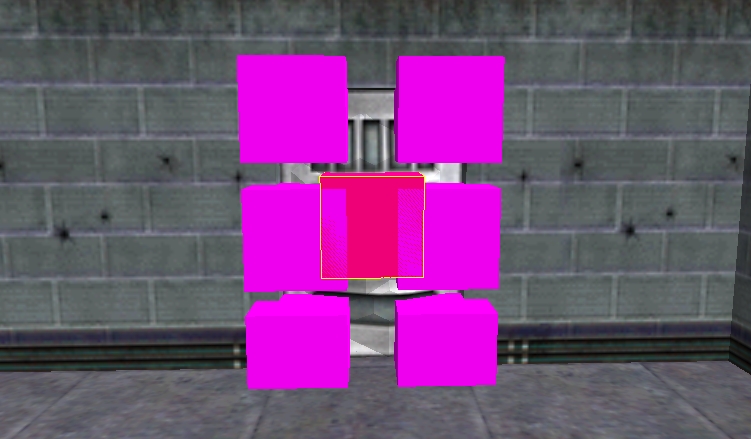
- Name ( targetname ) - "explosion1"
- Model Name ( shootmodel ) - "models/metalplategibs.mdl"
- Material Sound ( shootsounds ) - Metal ("")
The middle of the six is an env_explosion entity. Set it's Name ( targetname ) to "explosion1". In the example map, I've also enabled the "No Damage" flag, but this is a matter of preference.
Last, throw some grunts behind the door. When the door sequence ends (with the gaping hole), they'll attack the player on sight, so be prepared.
Resources
Below is a list of entities related to this tutorial. For a more concrete illustration, check out the example map linked below.Comments
You must log in to post a comment. You can login or register a new account.