Tutorial: Retina Scanners and Other NPC-Only Locked Doors Last edited 1 year ago2023-12-19 14:26:22 UTC
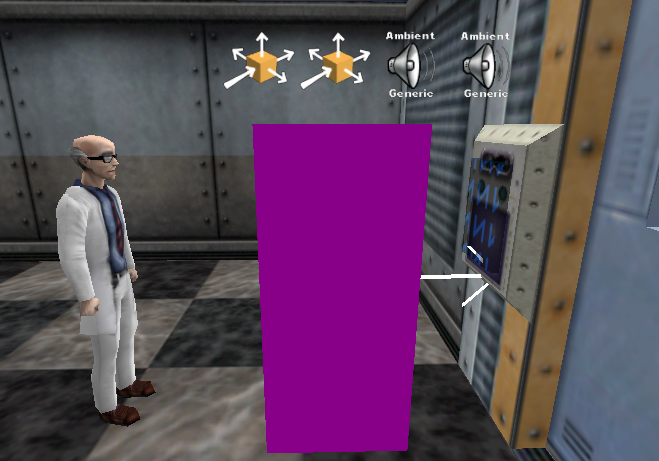
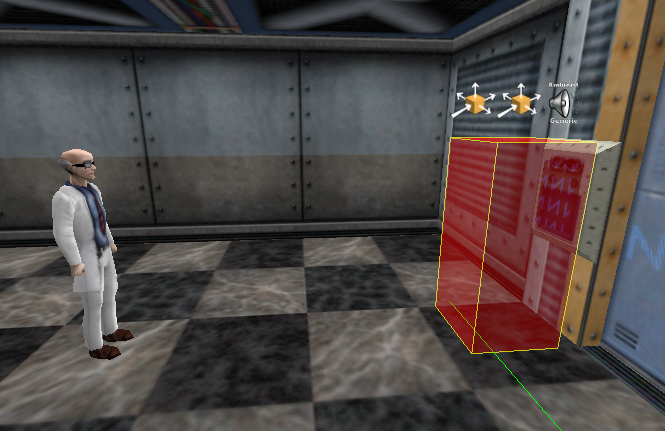
Throughout the singleplayer campaigns of Half-Life and its expansions you encounter locked doors that can only be opened by leading a friendly NPC up to a retina scanner or keypad. In this guide we will make our own.
But it's actually a trick.
The key element is actually a scripted_sequence that grabs a NPC that gets within a certain radius, waits for them to walk up to it and perform a retina scan or button pressing sequence, and then fires its target that ultimately unlocks and/or opens the door.
Most of the time the "button" you see is just a func_wall that gets toggled by a multi_manager, along with any sounds or other effects. A real func_button exists, but it's invisible and fires its own multi_manager to toggle the func_wall and play some "access denied" sound or sentence.
Make sure to set the Don't move spawnflag (1). For the keyvalues use these values: Create an ambient_generic and set the Small Radius (2), Start Silent (16) and Not Toggled (32) spawnflags. Use these keyvalues: Finally we'll create a multi_manager with these keyvalues added with SmartEdit off: This is the button the player will be interacting with. All it does is toggle the retina scanner's texture on and off again after two seconds before sounding an "access denied" sentence.
Create a scripted_sequence with the No Interruptions (32) spawnflag set and give it these keyvalues: Make sure the Yaw (the compass in the top-right in the entity properties, alternatively the second value in Pitch Yaw Roll (angles)) is pointing towards the retina scanner.
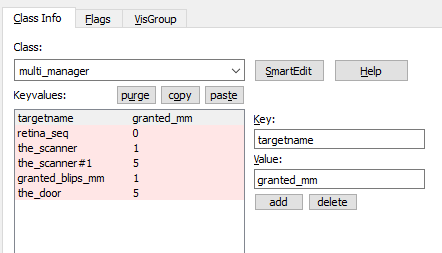
Add another ambient_generic with the Small Radius (2), Start Silent (16) and Not Toggled (32) spawnflags and for the keyvalues use these: To wrap this all up create a multi_manager with these keyvalues added with SmartEdit off:
Leave the scientist's keyvalues and spawnflags as-is and place him some distance away from the scripted_sequence (more than 100 units away).
The door should have these keyvalues: Adjust other keyvalue such as Move Sound, Speed and Pitch Yaw Roll to your liking.
The door(s) will start out locked and the retina scanner will let the player know they have no access. Having the scientist follow you near enough to the retina scanner will make him start walking up to it and perform his retina scanning sequence. However, nothing happens until after the sequence finishes. The door(s) opens nonetheless after the scanner flashes for a couple of seconds and a granted sound is made.
This is because scripted_sequences don't fire their targets until after the Action Animation finishes. If we want to time the retina scanner flashing and any sounds or other effects along with the retina scanning sequence, that needs to be called before the scripted_sequence starts.
Keep the No Interruptions spawnflag on both and give them these keyvalues: Then we need to change our granted_mm to have these keyvalues:
Add a new ambient_generic with the spawnflags Small Radius (2), Start Silent (16) and Not Toggled (32) and these keyvalues: Now we need a multi_manager to play these blips in succession and at an increasing rate: The first 4 play at a rate of once per 0.3 seconds, the next 7 at 0.2, and the remaining at a rate of 0.1, before finally playing our granted sound.
How Do They Work
A beginner mapper might make the naïve assumption these work by using a NPC-only button. That's understandable. It looks and sounds like a button to the player interacting with it.But it's actually a trick.
The key element is actually a scripted_sequence that grabs a NPC that gets within a certain radius, waits for them to walk up to it and perform a retina scan or button pressing sequence, and then fires its target that ultimately unlocks and/or opens the door.
Most of the time the "button" you see is just a func_wall that gets toggled by a multi_manager, along with any sounds or other effects. A real func_button exists, but it's invisible and fires its own multi_manager to toggle the func_wall and play some "access denied" sound or sentence.
A Basic Setup
The Scanner
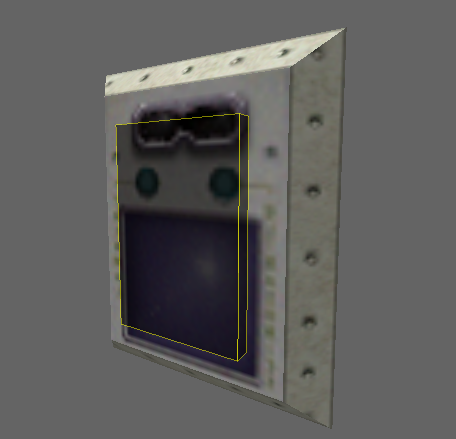
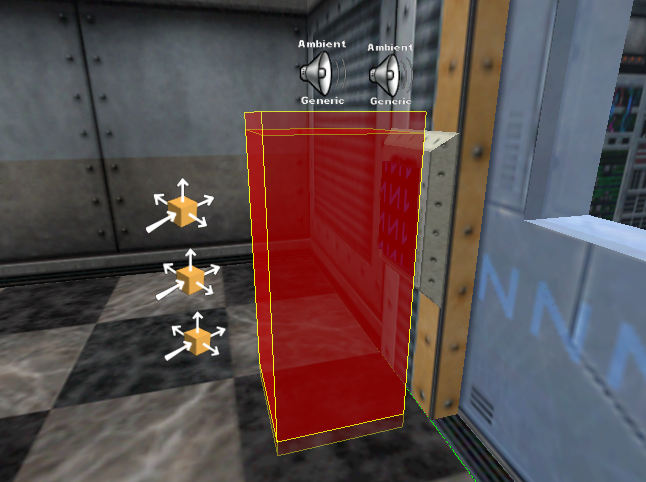
For a very simple retina scanner, start by creating the scanner's brush, either by using a prefab or building it from scratch (the retina scanners from Half-Life uses the textures+AGENERIC_113 for the faceplate and C1A1_TRIM2 for the borders) and tie it to func_wall and give it a targetname of the_scanner.
The Button
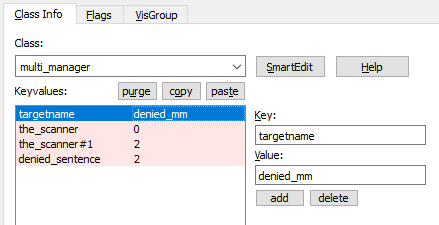
Now create a thin (e.g. 2 units thick) func_button covered entirely inNULL texture and place it in front of the retina scanner.Make sure to set the Don't move spawnflag (1). For the keyvalues use these values: Create an ambient_generic and set the Small Radius (2), Start Silent (16) and Not Toggled (32) spawnflags. Use these keyvalues: Finally we'll create a multi_manager with these keyvalues added with SmartEdit off: This is the button the player will be interacting with. All it does is toggle the retina scanner's texture on and off again after two seconds before sounding an "access denied" sentence.
The Sequence
Now onto the actual magic of the setup.Create a scripted_sequence with the No Interruptions (32) spawnflag set and give it these keyvalues: Make sure the Yaw (the compass in the top-right in the entity properties, alternatively the second value in Pitch Yaw Roll (angles)) is pointing towards the retina scanner.
Add another ambient_generic with the Small Radius (2), Start Silent (16) and Not Toggled (32) spawnflags and for the keyvalues use these: To wrap this all up create a multi_manager with these keyvalues added with SmartEdit off:
The Subjects
Now we need a monster_scientist and a func_door.Leave the scientist's keyvalues and spawnflags as-is and place him some distance away from the scripted_sequence (more than 100 units away).
The door should have these keyvalues: Adjust other keyvalue such as Move Sound, Speed and Pitch Yaw Roll to your liking.
Try It Out!
Go ahead and compile this and run it in-game.The door(s) will start out locked and the retina scanner will let the player know they have no access. Having the scientist follow you near enough to the retina scanner will make him start walking up to it and perform his retina scanning sequence. However, nothing happens until after the sequence finishes. The door(s) opens nonetheless after the scanner flashes for a couple of seconds and a granted sound is made.
This is because scripted_sequences don't fire their targets until after the Action Animation finishes. If we want to time the retina scanner flashing and any sounds or other effects along with the retina scanning sequence, that needs to be called before the scripted_sequence starts.
Making It More Complex
Chained scripted_sequences
To fire something just as the retina scanning scripted_sequence starts we can split our scripted_sequence into two:- The first one to make the scientist walk up to it when he's within the search radius and fire our multi_manager
- A second one to play the retina scanning sequence
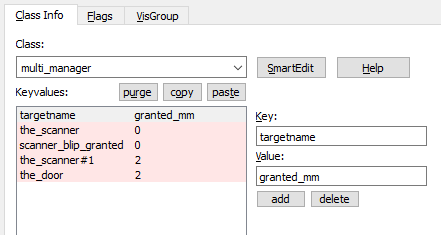
Keep the No Interruptions spawnflag on both and give them these keyvalues: Then we need to change our granted_mm to have these keyvalues:
The Blips
To make it more similar to retina scanners from the singleplayer campaign we can have it make a rapid series of "blip" noises.Add a new ambient_generic with the spawnflags Small Radius (2), Start Silent (16) and Not Toggled (32) and these keyvalues: Now we need a multi_manager to play these blips in succession and at an increasing rate: The first 4 play at a rate of once per 0.3 seconds, the next 7 at 0.2, and the remaining at a rate of 0.1, before finally playing our granted sound.
Try It Out Again!
Compile and run the map again. You should now have the retina scanner flashing and playing blips while the scientist is performing the scanning sequence, similar to the singleplayer campaigns.Example maps
- Article Credits
-
 Erty
–
Original author
2 Comments
Henry852
Commented 2 weeks ago2025-02-07 03:43:26 UTC
Comment #106633
This worked perfectly, thanks
Henry852
Commented 2 weeks ago2025-02-08 00:56:39 UTC
Comment #106634
btw, if someone wants the npc do the retinal thing even if the enemy is there activate the override AI
You must log in to post a comment. You can login or register a new account.

