VERC: Using Skys in Half-Life Last edited 2 years ago2022-09-29 07:55:47 UTC
Introduction
There seems to be alot of confusion over how to implement skys in a level. The concept is much more simple than most people think, and perhaps this is what leads to confusion.Setup
Below is a picture taken from the Worldcraft 3D view. The blue brushes are SKY brushes (that is to say, they are brushes covered on all sides with the texture named SKY). The should be positioned, as above, wherever you want to see the sky.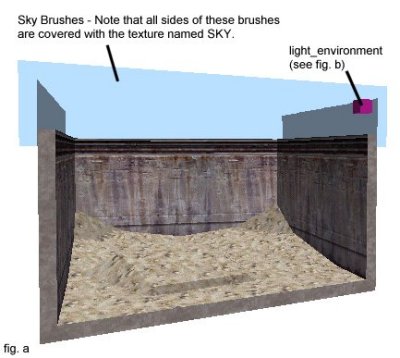
In the upper-right corner of the fig. a picture, you will notice a little purple box. This is the light_environment entity. It controls the sky's lighting properties (as seen in fig. b).
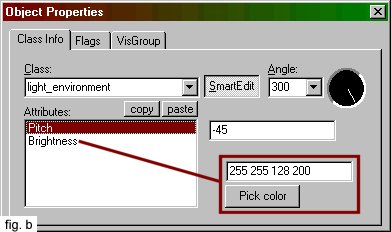
This is a heck of a lot easier than placing a bunch of light entities if you're trying to make realistic outdoor lighting.
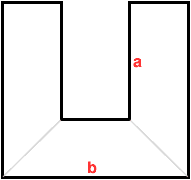
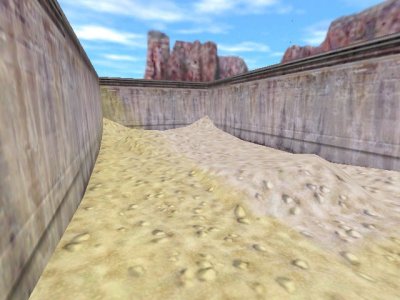
The most important thing to keep in mind with the light_environment is that its properties will only be applied to brushes that have the SKY texture on all sides. Also, a light_environment entity will only affect the sky in vis areas visible to it. This is a little hard to explain, but look at the picture below.
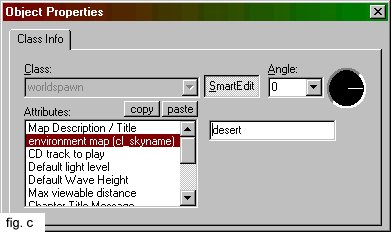
One of the last things to think about (or maybe the first, whatever) is which sky you're actually going to use. By default, there are 19 skys available for your use. Names and pictures are outlined in the Half-Life Skys article.
Resources
Below is a list of entities related to this tutorial. For a more concrete illustration, check out the example map linked below.- Categories
- Archived Articles
- VERC Archive
- VERC - Half-Life
- VERC - mapping
- Tutorials
- Mapping
- Examples Required
- Article Credits
- Chris 'autolycus' Bokitch – Author
This article was originally published on Valve Editing Resource Collective (VERC).
The original URL of the article was http://collective.valve-erc.com/index.php?doc=1045516038-73612700.
The archived page is available here.
TWHL only publishes archived articles from defunct websites, or with permission.
For more information on TWHL's archiving efforts, please visit the
TWHL Archiving Project page.
Comments
You must log in to post a comment. You can login or register a new account.