Introduction
You can approach making grass differently. But sometimes you end up wondering: what is the preferred and cleanest way of doing a thing? Well, here's my tiny and opinionated take on that subject. Let's start from a really basic way of making grass with brushes, iterate on it to enhance the setup, and, on the way, also try and make our good old New Mexico desert landscape look just a little bit more green.
I will not be covering sprite-based grass in here, mostly just due to personal preference, as I find sprites clunky for this. There are far worse flaws with this kind of grass, though. For example, each
env_sprite in your map at the very least adds to the visible entity limit, and maybe a couple other limits too, and sprites also lack any lighting on them. You don't want to see your grass glow in the dark!
If you disagree with the way of making grass shown here or know a better one, please let me and others know! Techniques often come down to personal preference, so it's easy to get stuck doing something the harder way and never notice it, unless someone points it out to you.
I'm also assuming you're skilled enough to do basic and some of the advanced stuff, like making brushes, brush entities, applying textures, and using the Clipping Tool and the Vertex Manipulation tool. If not, there should be articles on the wiki that teach it. You should check them out.
We will make use of two wonderful tool textures introduced by community-built compilers:
NULL and
CONTENTWATER. These come in their own wad, too, however their looks don't matter, - only their names do, - so you can make your own if you're feeling creative. Make sure you have the latest version of Vluzacn's Half-Life Tools set up and
zhlt.wad loaded into your editor, and that everything works as intended.
I will also be primarily using J.A.C.K. for this, and will refer to and use some of its features. Do not worry if you're not a J.A.C.K. user, however, because the end result should be easily reproducible in other editors too.
The Basic Piece
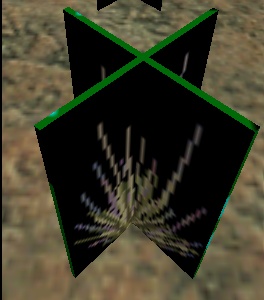
The basic building block for our thickets of grass will be a cross-shaped pair of planes, at least initially. We could use a more complex shape than that, but I don't think it's necessary. It's up to you. But in this tutorial we should be fine with a cross.
First Iteration
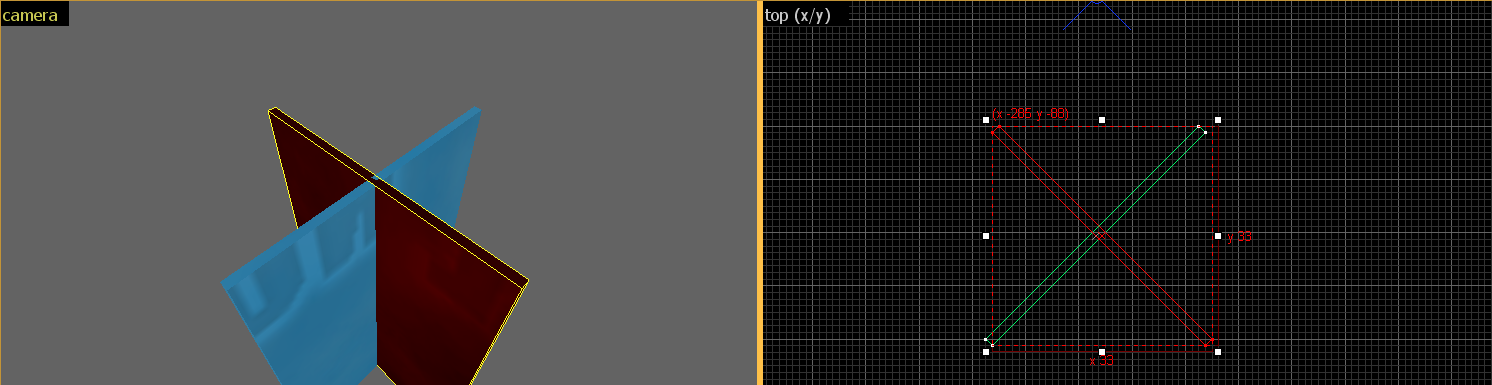
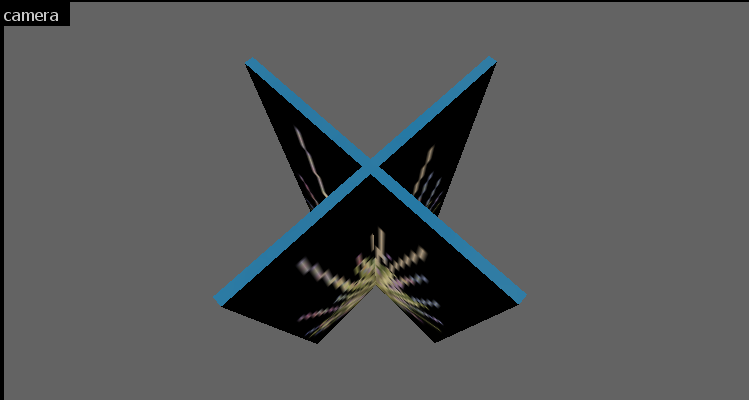
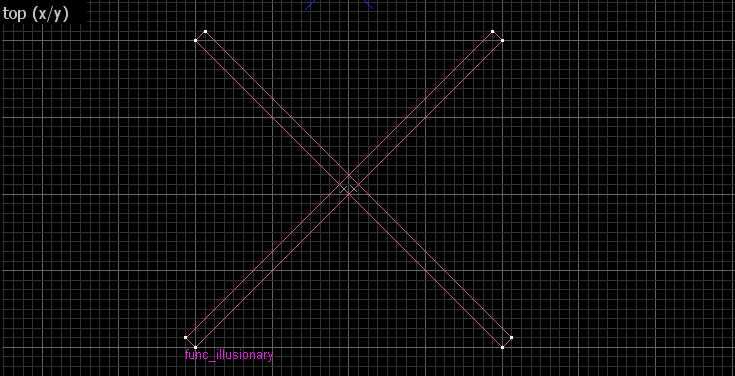
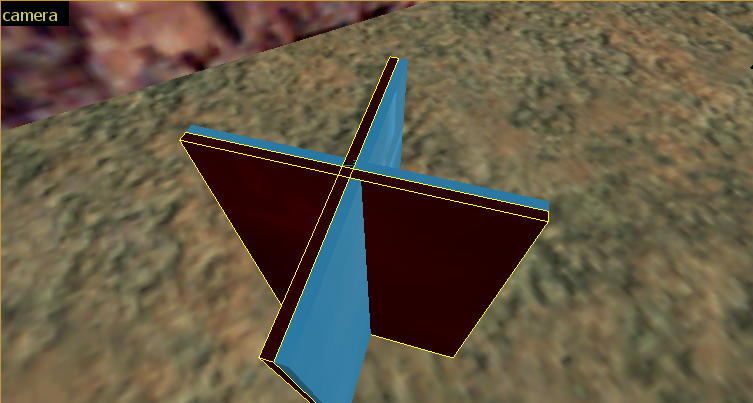
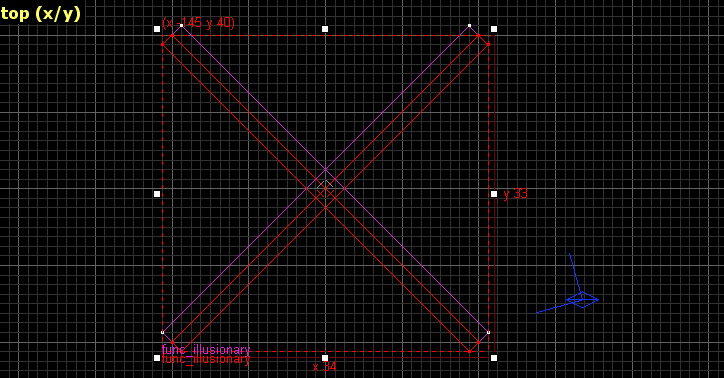
We'll start off simple: make a pair of brushes and cover them with
NULL, then arrange them in the shape of a cross. In relation to the top view, you may keep one of the pieces vertical and the other horizontal. I, however, chose to have both of them diagonal. It shouldn't affect anything important anyway.
I will use
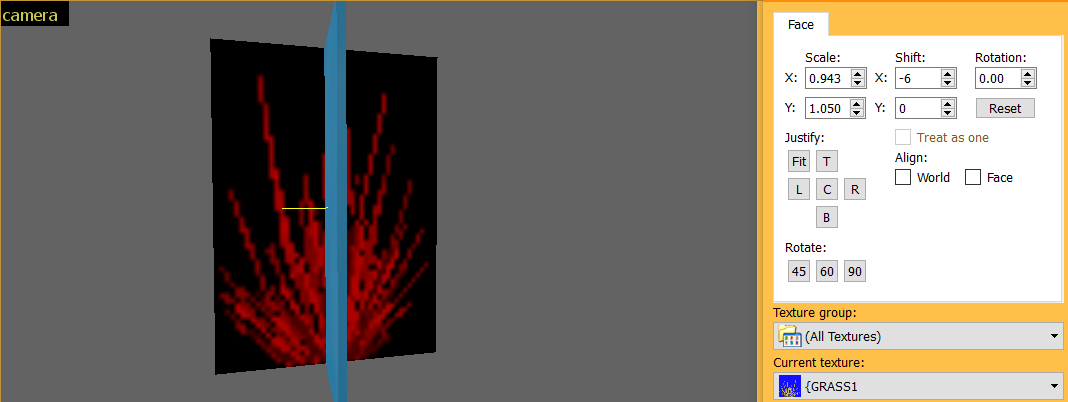
{GRASS1 as the grass texture through pretty much the whole tutorial. Choose whichever one you like and align it onto one of the faces, like this:
The vertical texture scale shown on the picture above is intentionally that large. The reason for it is linear filtering - a rendering feature that smooths out pixels.
A side effect of it can be observed on certain kinds of textures, like grass, railings, light cones (fades/gradient textures), and so on, as well as on a few other kinds of textures: the pixels near the top of the surface will leak into the bottom and vice versa. Same thing also occurs horizontally.
To fix this, it is a good idea to stretch the texture just a tiny bit further, so that the leaking pixels go away beyond the face borders. Although easy to forget about, it looks really ugly, so be sure to check if you should apply this fix if you find yourself working with a texture that is sensitive to this.
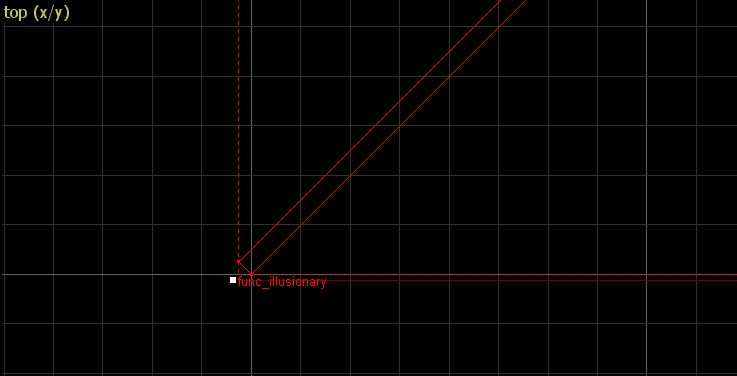
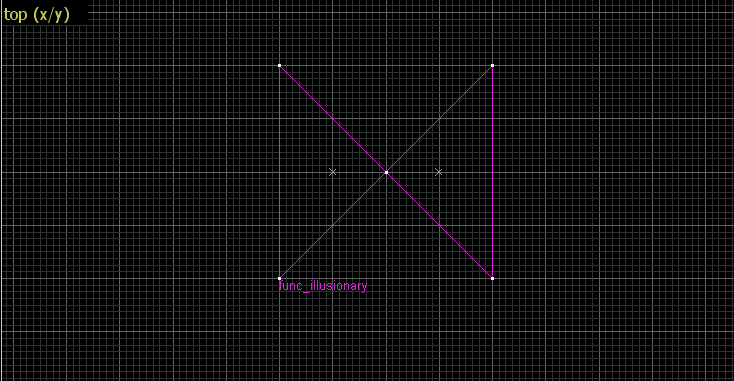
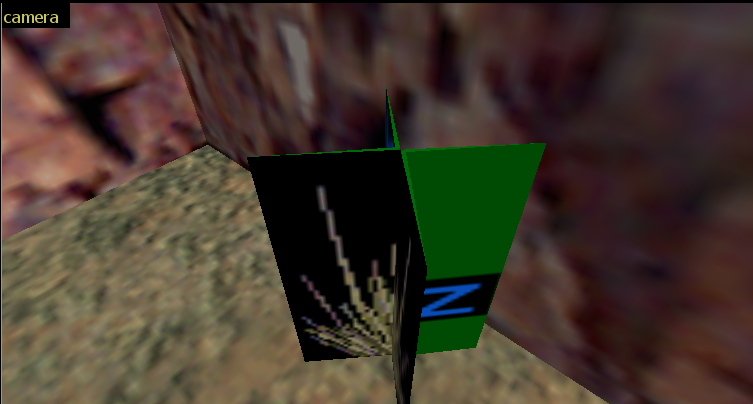
Now the only thing left to do is the usual entity paperwork. Select and tie both brushes to
func_illusionary and set
Render Mode to
Solid and
FX Amount to
255.
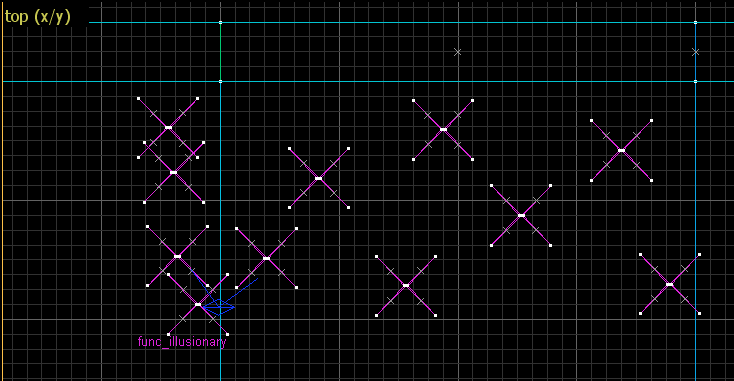
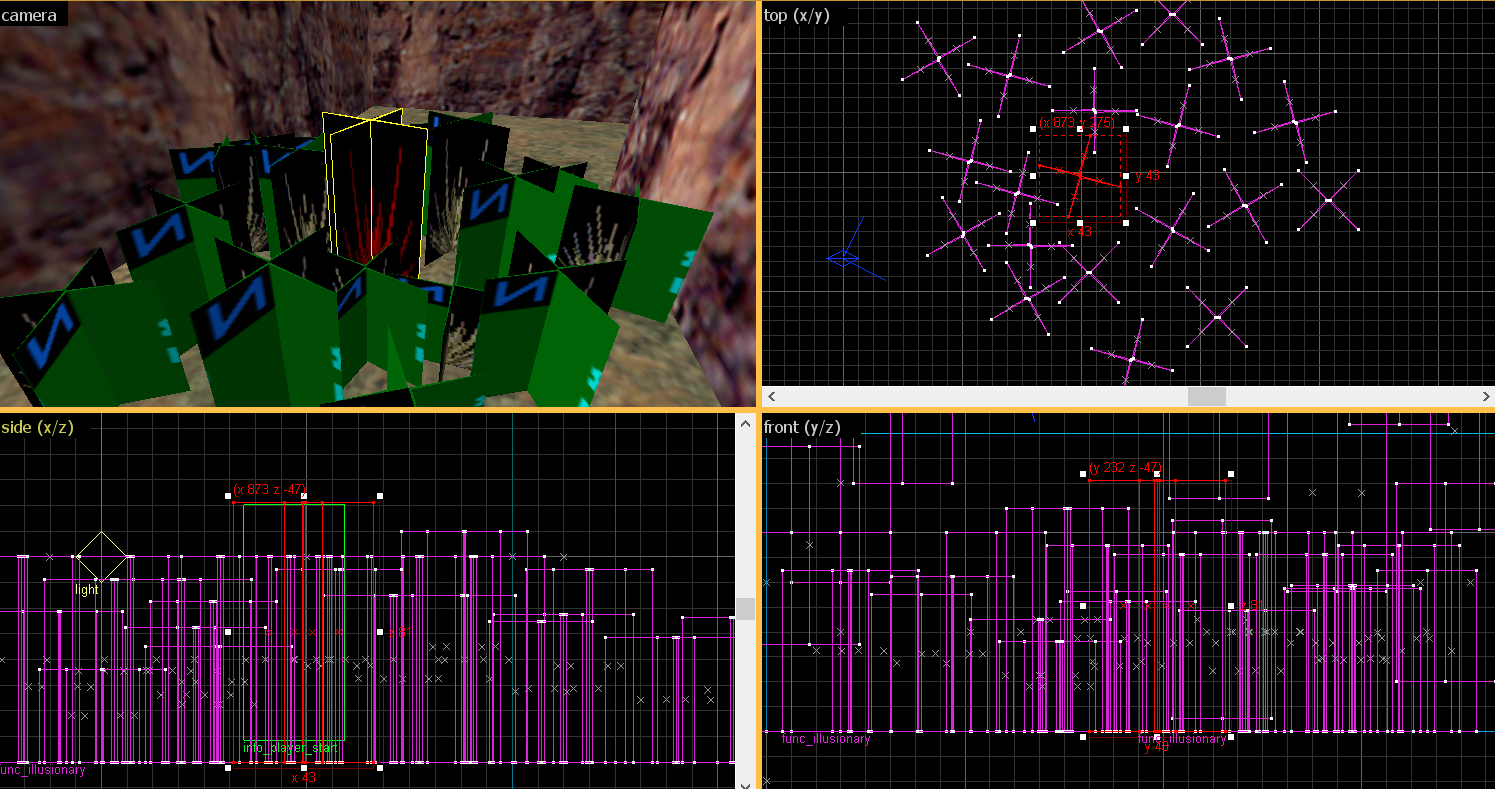
Here's what we should end up with in the 3D and top views:
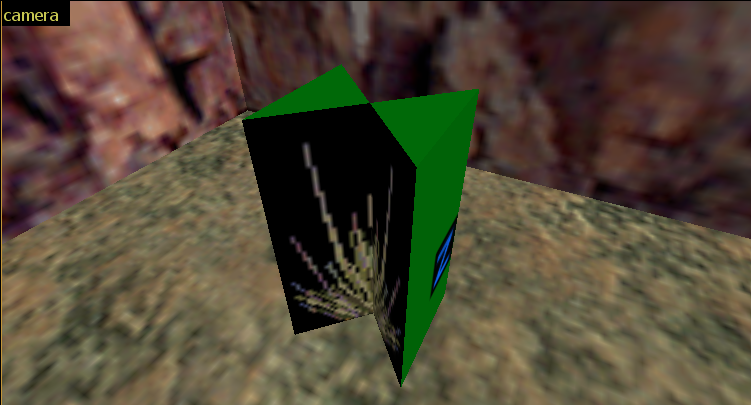
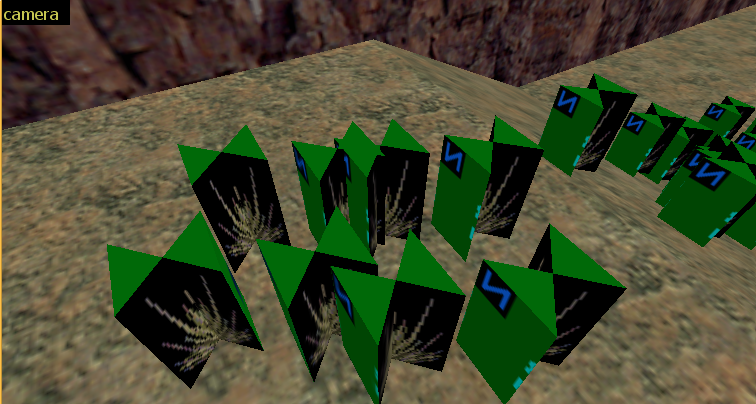
Let's put it into a map of some kind, compile it and take a look:
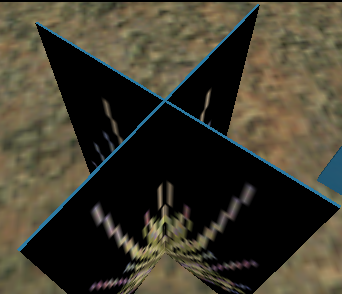
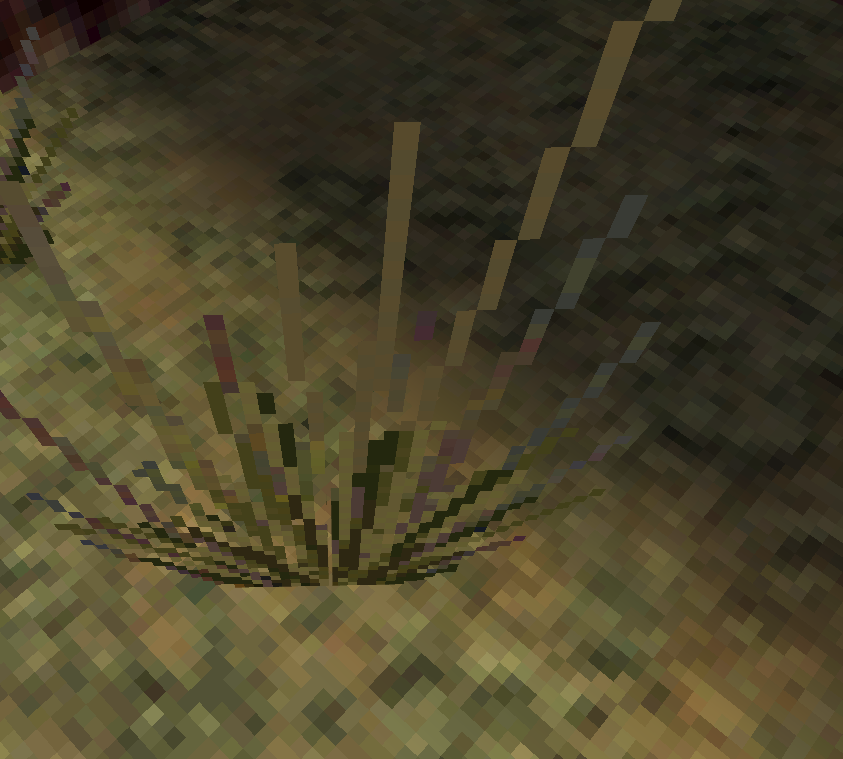
Here we go! We've got a little nice piece of grass up and ready to be scattered across your maps. You may already be pleased enough with this, and in case you are - it's totally fine. That applies to the rest of the iterations too.
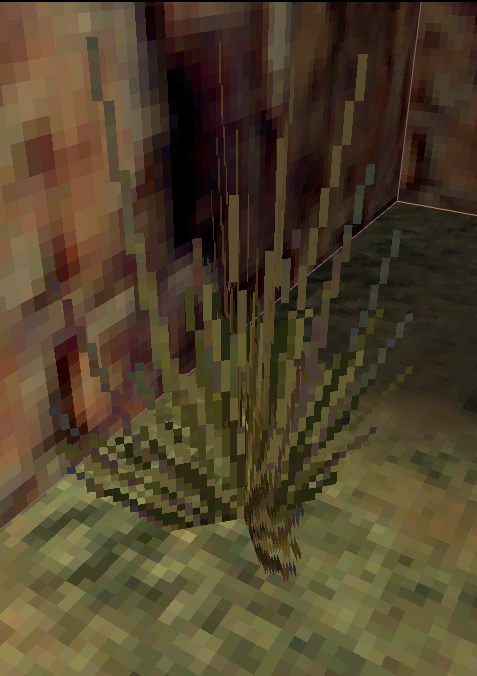
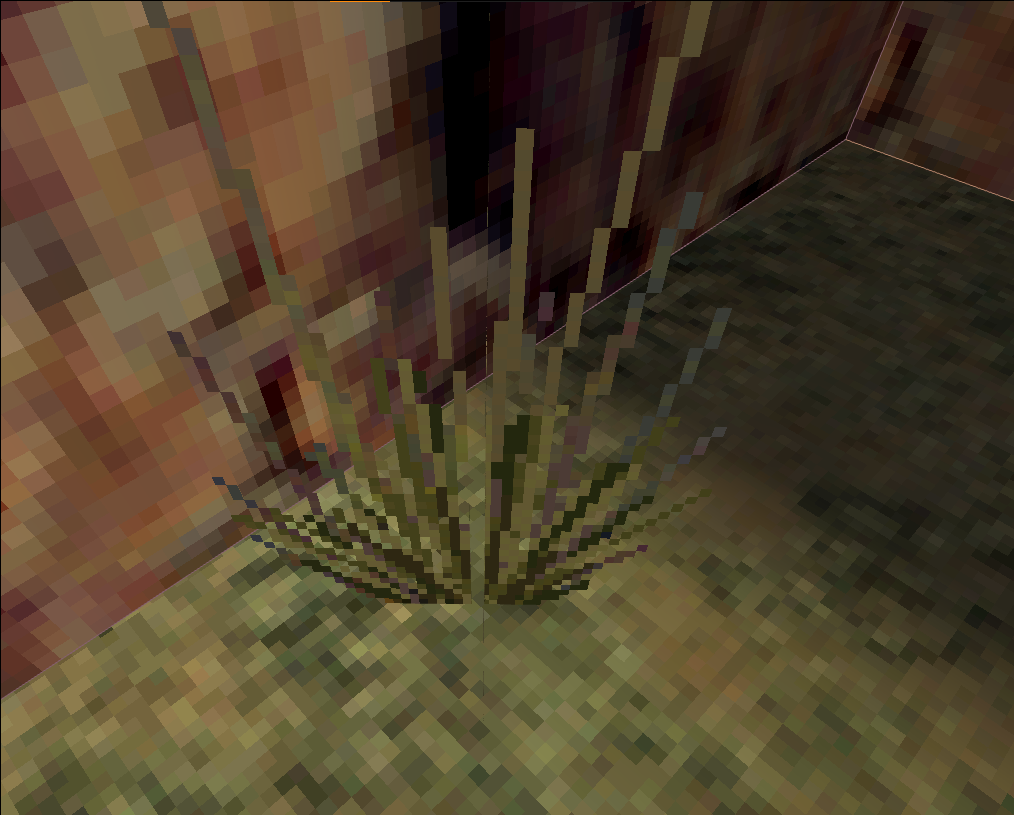
...Wait a minute, turns out there's a weird little gap in there:
Outright unacceptable. If such little things in your maps tend to bug and annoy you as much as they do bug and annoy me, follow along so we can work on trying to fix that issue!
Second Iteration
You can notice how thick each of the brushes is. And all that space in-between is covered with
NULL, which is why there's a gap! The first thing that comes to mind is making each brush in the pair extremely thin:
As you may know already, Half-Life maps don't like non-whole coordinates. Vertices with coordinates like
0.5 or
16.347 can sometimes cause all sorts of issues, including but not limited to faces disappearing and compilers complaining about "brushes outside world".
However, if you're careful, it is sometimes useful to use the power of real numbers to your advantage. J.A.C.K. does not support going below grid size 1, but the Vertex Manipulation tool can help circumvent that. It has a useful feature labeled "Scale Vertices", which can be found by selecting one or more vertices and right-clicking on one of them, or simply by pressing
Alt+E.
By moving the little blue circle which pops up when scaling is in progress, you can change the origin point. The factor that you specify in the small menu will affect the distance between the origin point and all selected vertices, and will even let you go lower than 1 unit! Be sure to lock the axes you don't need movement along by marking the corresponding checkboxes. And try not to go too small - doing that will increase the chance of errors cropping up.
Also, a fun fact you may have not known:
func_detail is practically immune to non-whole coordinate errors! Use that to your advantage.
Let's look at the compiled version:
There's still a gap, although a smaller one, but nonetheless noticeable. It also introduces a small but non-zero risk of compile errors and doesn't look very clean on the 2D views, which may get annoying when there's a lot going on there.
Third Iteration
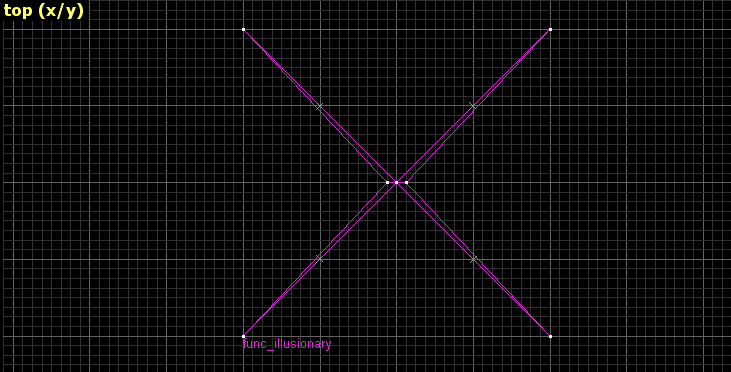
We can avoid less-than-one-unit-thick brushes by remaking our design this way:
We've done the following steps here:
- Replaced the grass texture on one of the sides of each brush in the pair with NULL.
- Cloned the pair and rotated it by
180 degrees.
- Positioned the clone in such a way that its grass-textured faces are touching and fully covering the grass-textured faces of the original pair.
- Made sure that the two pairs are two separate func_illusionary entities with the same properties.
You may have questions as to why we need to make sure that the two pairs shown above are separate entities. That is due to certain side effects of brush entity merging - a technique that we're intentionally avoiding here.
Brush entity merging is combining several brush entities with the same classname and properties into one single big entity. It is very helpful when you need to conserve spare model slots in your map, which you have a limited number of. It can also be useful sometimes as an alternative to in-editor groups.
The problem with that is, brushes within that entity will now cull each other, which does not happen if those brushes are separate entities. That means that a face overlapping another face will cause both the overlapped and the overlapping part to be removed by the compiler. That is not desirable in some cases, like ours, for example. That is why we keep the pairs separate entities. We will actually make use of this technique later, though.
Compiled version:
Hey, there are still gaps, but only on two of the sides! We've also just wasted two models in our budget instead of one. To get fully rid of the gaps this way, we'd have to make all four brushes separate entities. We could also go back to the first iteration and make those two brushes separate entities too. It still would add up to the model limit more than we need, though.
Fourth Iteration
We still haven't used one more tool in our arsenal - the
CONTENTWATER tool texture.
It won't yet directly solve our current issues, but it's an in-between step on the way to something greater.
Let's take our first iteration and make the brushes separate entities to avoid gaps. Now, we'll also replace all
NULL with
CONTENTWATER, and even apply it instead of the grass texture on one of the sides of each brush in the pair. That's fine,
CONTENTWATER will mirror the grass texture on the other end for us:
It still wastes two model slots, but hey, now there's no gap and also less brushes! But we won't stop on this one just yet.
Fifth Iteration
You know what? Let's just throw the existing design out the window. What if we arrange our brushes like this:
Wow. We should've started this way, this is really good. At least that's how I felt like when I recalled, if I'm not wrong, the brilliant
Admer456 showing this way of arranging grass brushes. This actually solves all of our problems! Well, almost all of them.
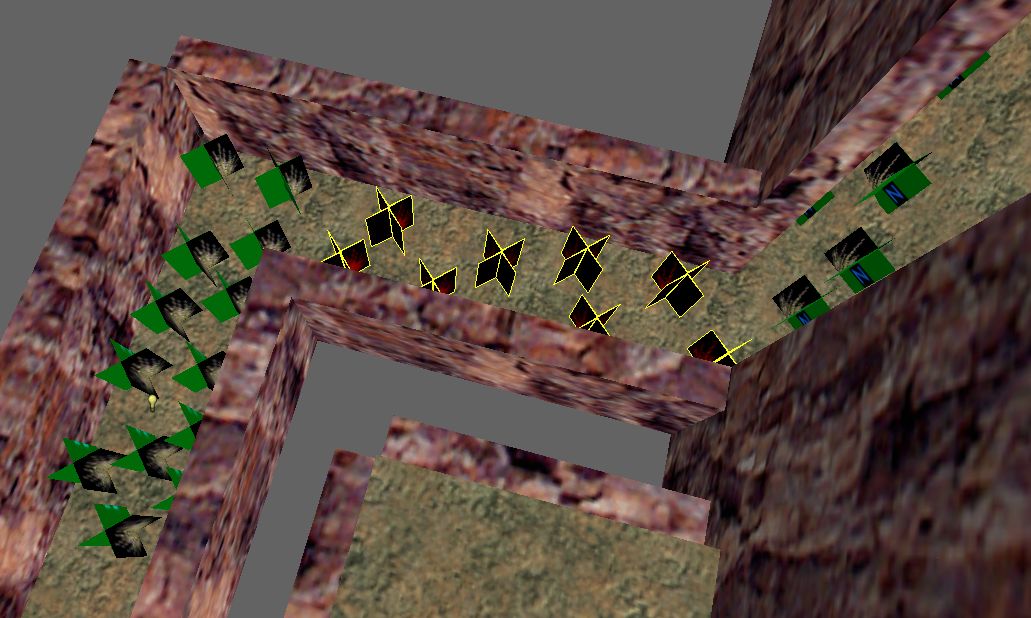
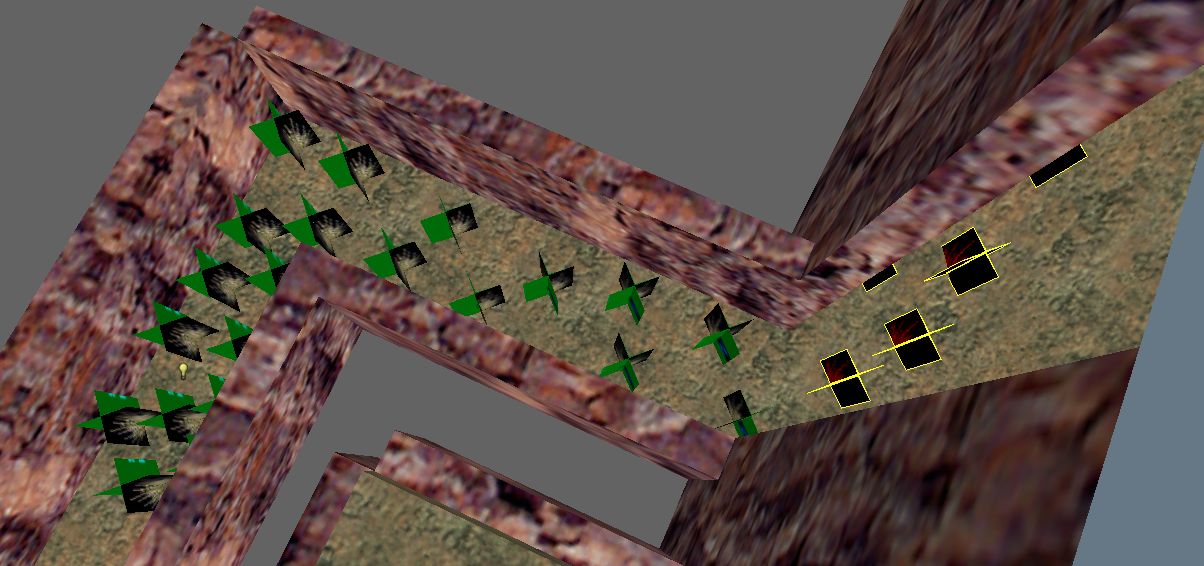
Of course, usually there isn't just one single piece of grass in a map. There are lots of them, and sometimes they may be clustered close together. Usually you also want to merge all those pieces into a single entity to save on models. Yeah, this is where this design has a chance of showing its flaw:
Uh oh. Yeah, a bit unfriendly when it comes to merging - look at those gaps. Looks like we'll have to adjust our design just one more time.
Sixth Iteration
It's nothing hard. All we have to do to make this issue occur far less is by making the big
CONTENTWATER'y pieces take up less space, and here's how:
What we did is cut it horizontally in the middle (in relation to the top view), then moved the resulting middle vertices very close to the center. It isn't ideal, but it's practically enough.
The middle vertices on the picture up there are one unit away from the center. But why not less? I asked this same question, and then proceeded to move them even closer to the center, going below one unit.
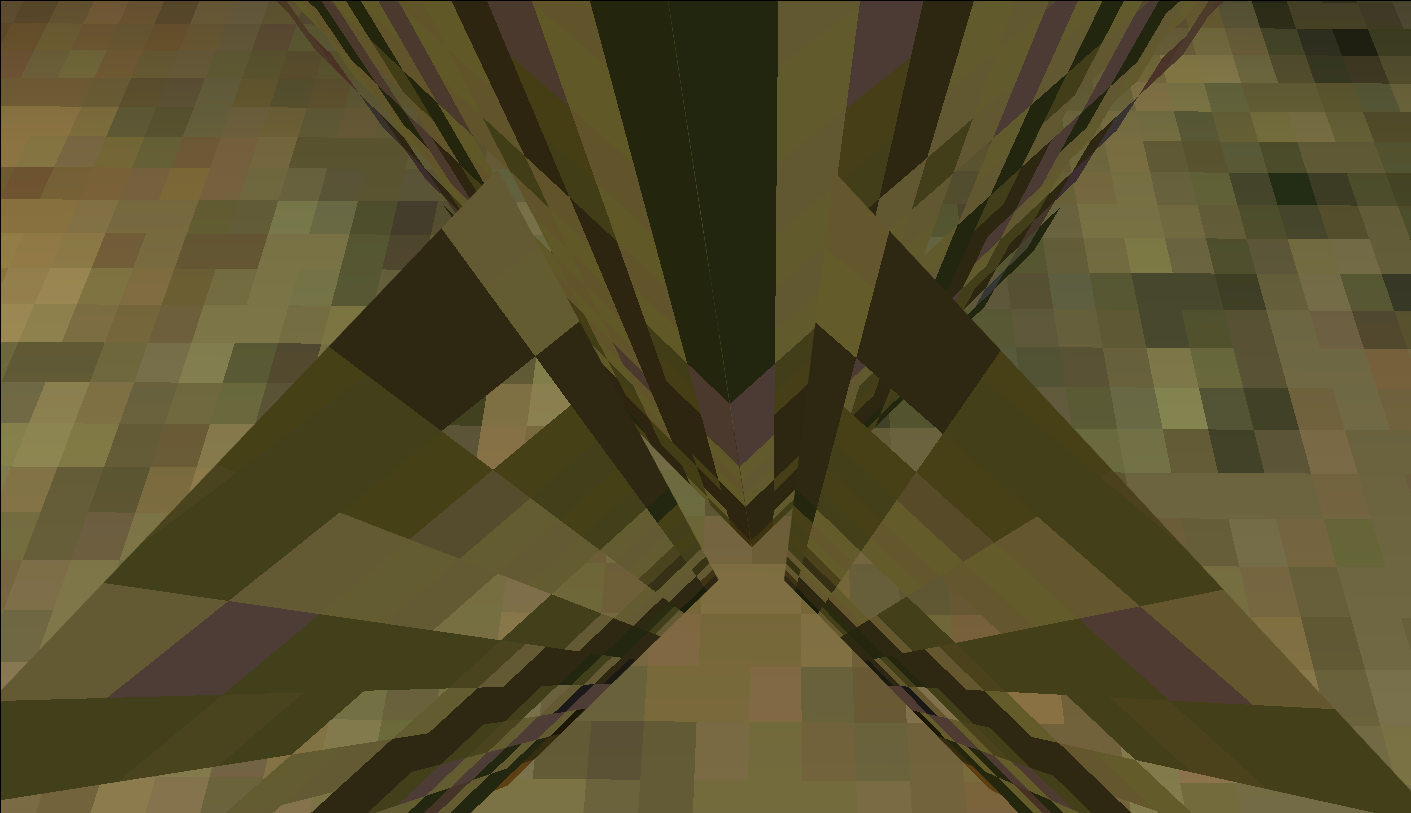
You can observe what I got on the screenshot on the right. It was taken with
gl_wireframe 2, and you can spot just how many cuts the grass on the right has. That caused further problems, too: RAD now took seven seconds instead of being almost instantaneous, and my framerate decided it'd had enough, giving me approximately a striking 15 frames per second.
See, this is what I meant by "including but not limited to" in the previous sub-unit shrinking panel. The moment I changed all sixth-iteration grass back to having the middle vertices be exactly one unit away from the center, it all went back to normal. Anything can happen when you go below one-unit grid, but at least there seems to be some method to the madness. So yeah, be careful with that!
Let's take a look:
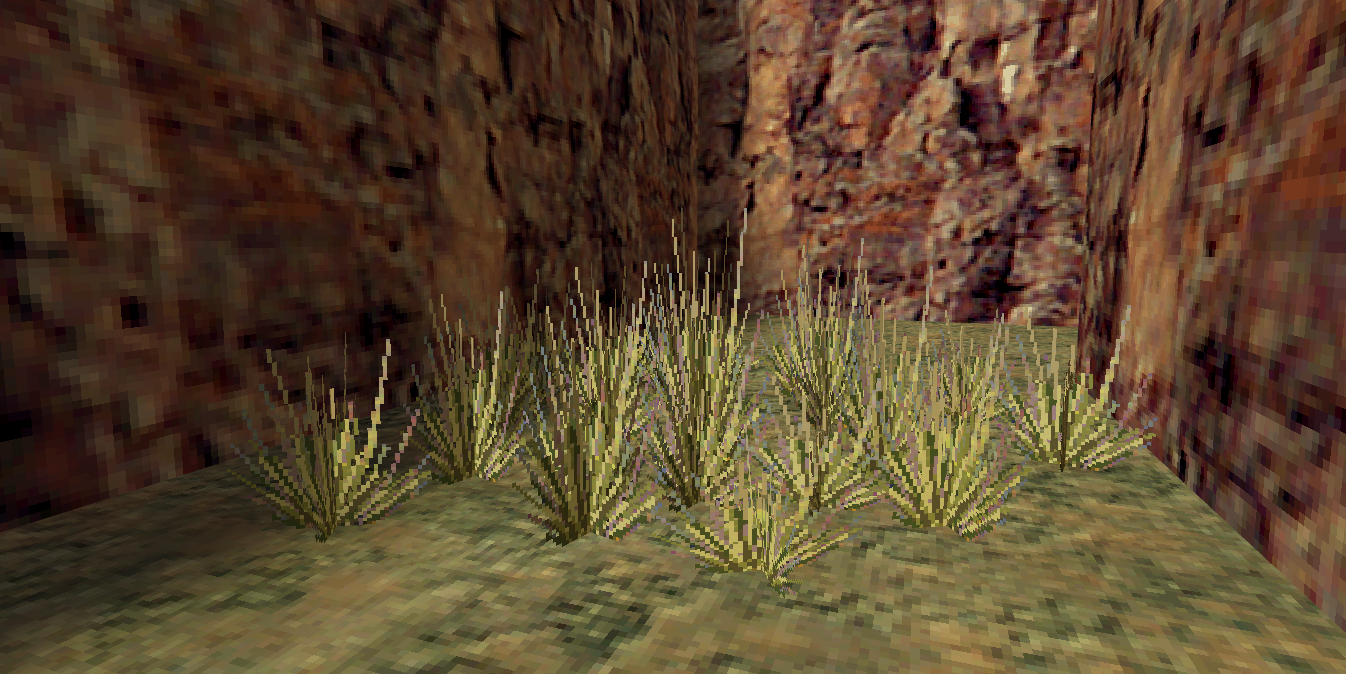
Yup. Not an issue now.
Well, don't know about you, but I'm satisfied at this point. It's as close to perfect as it gets. So let's move on to how we're going to grassify our map.
Mass Grassifiaction
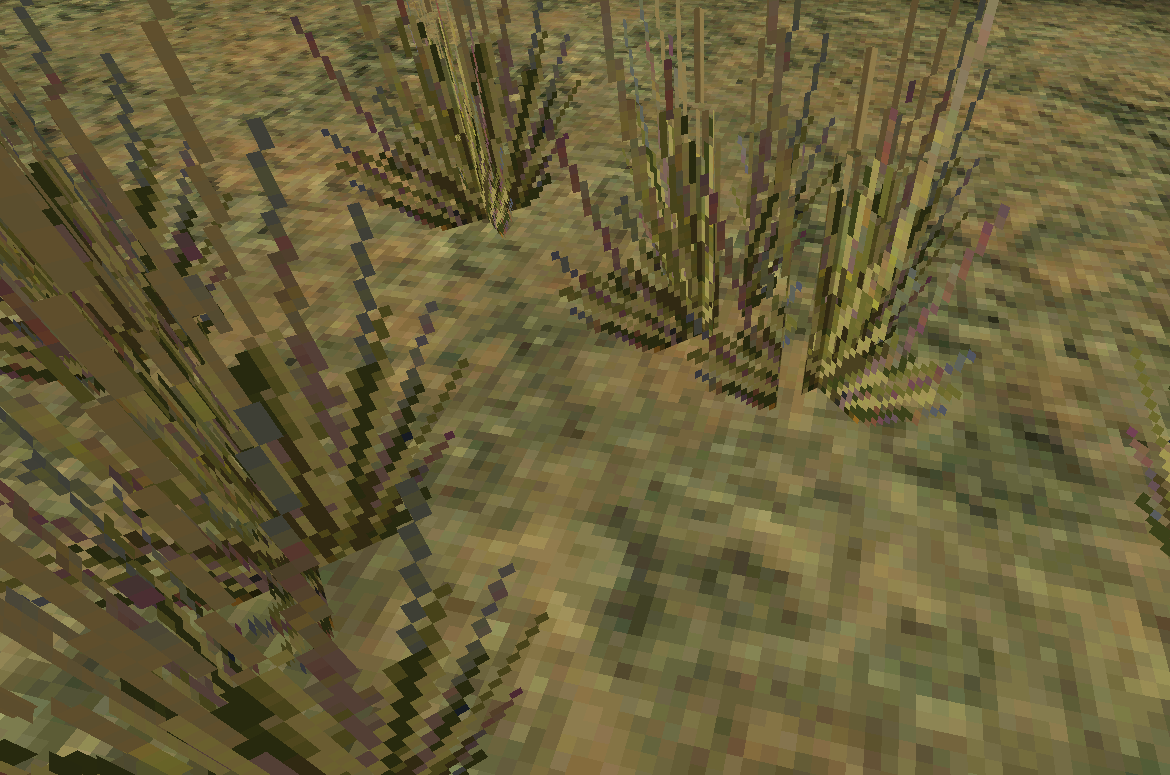
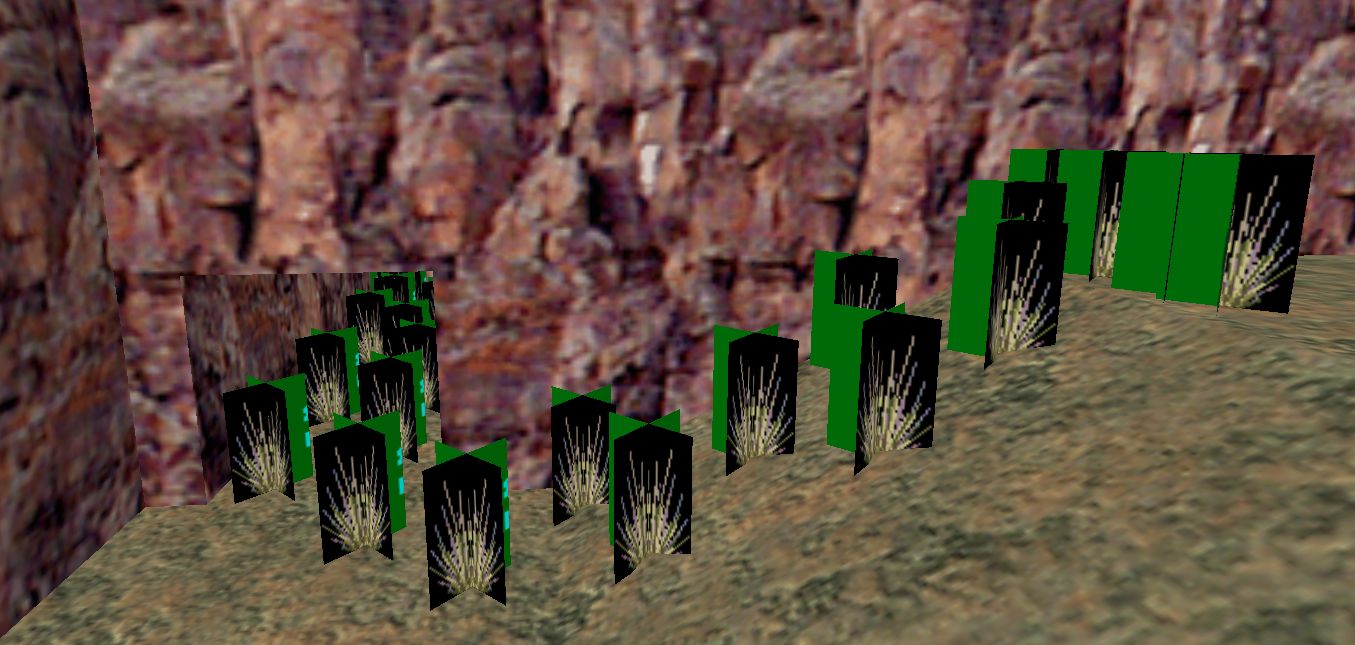
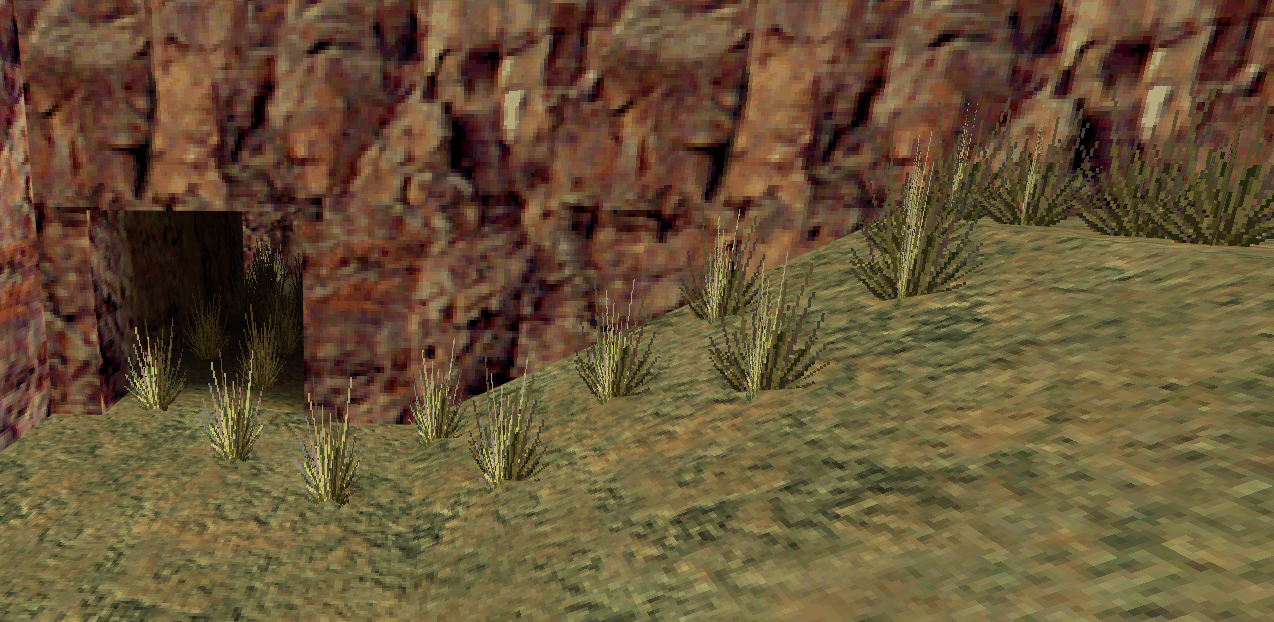
I've thrown around some grass and even made a small cave (if you can call it that) to demonstrate what we'll run into shortly:
Merging vs. Visibility
Note that each individual piece of grass has been tied to one single
func_illusionary entity. Again, brush entity merging. We don't have infinite models, and each individual brush entity, except for
func_detail of course, counts as a separate model.
We could've leveraged
zhlt_usemodel, which is covered in
this beautiful article written by the amazing
Hezus along with other optimization techniques, but that'd copy the lighting too. It's probably a viable approach in some cases though, as long as you're ready to take care of the lighting problem. But we won't use that here.
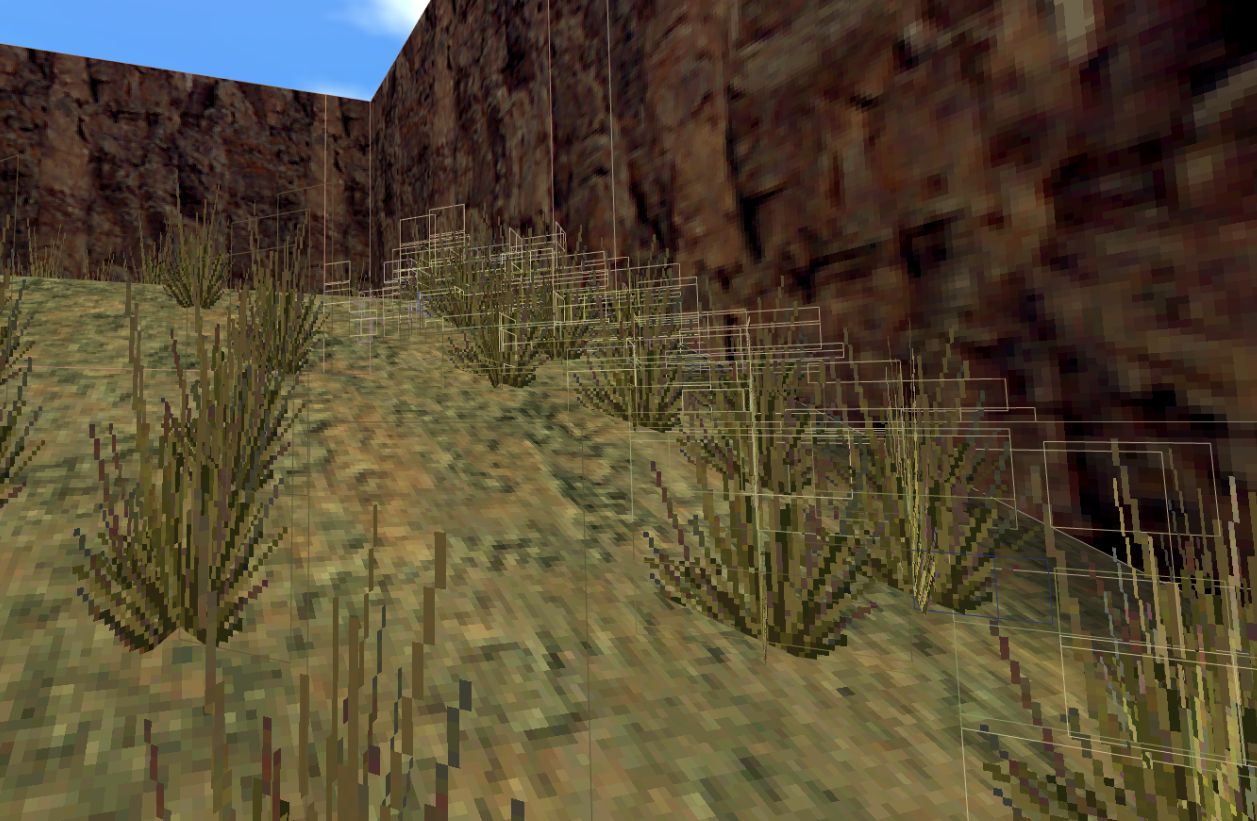
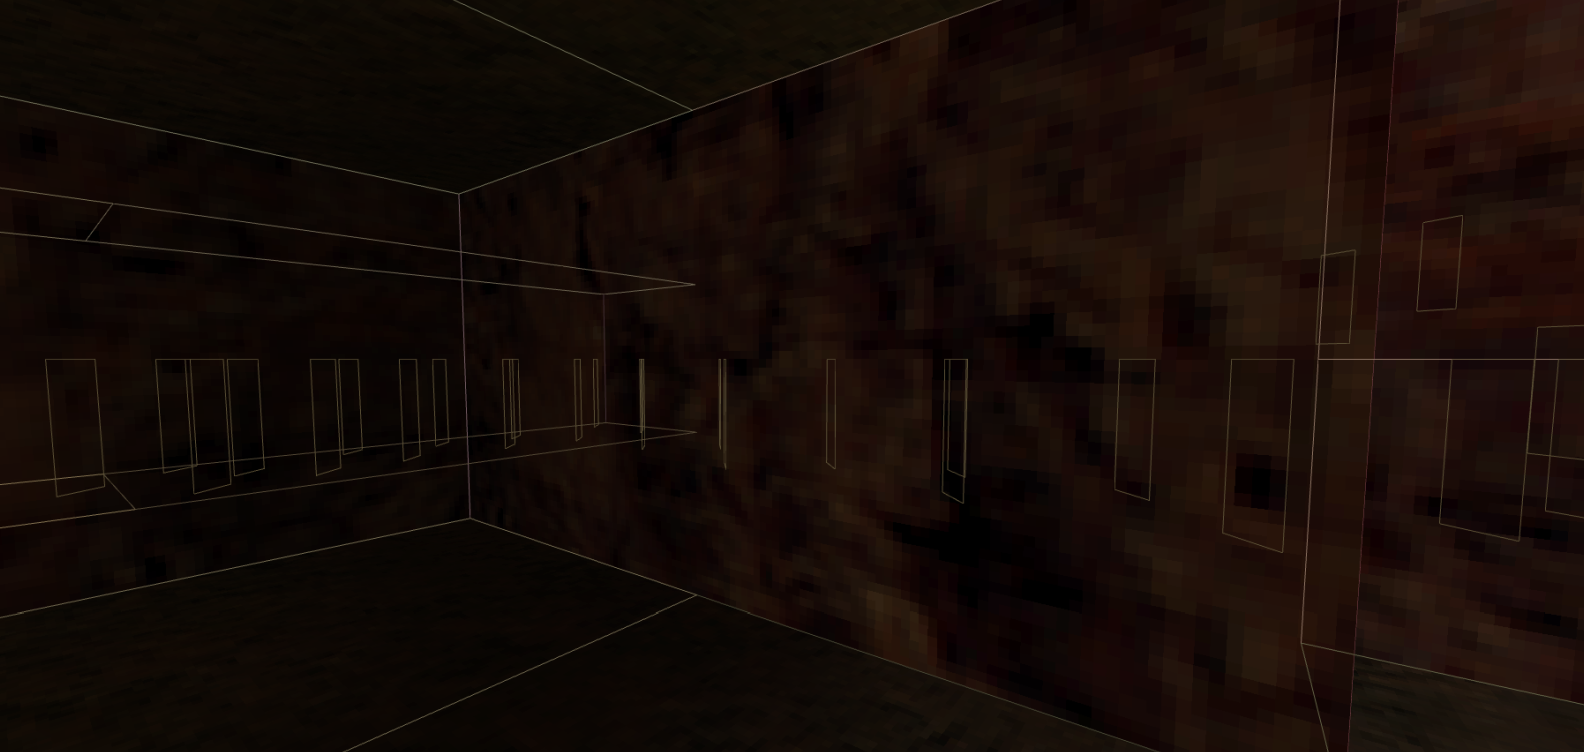
There's one
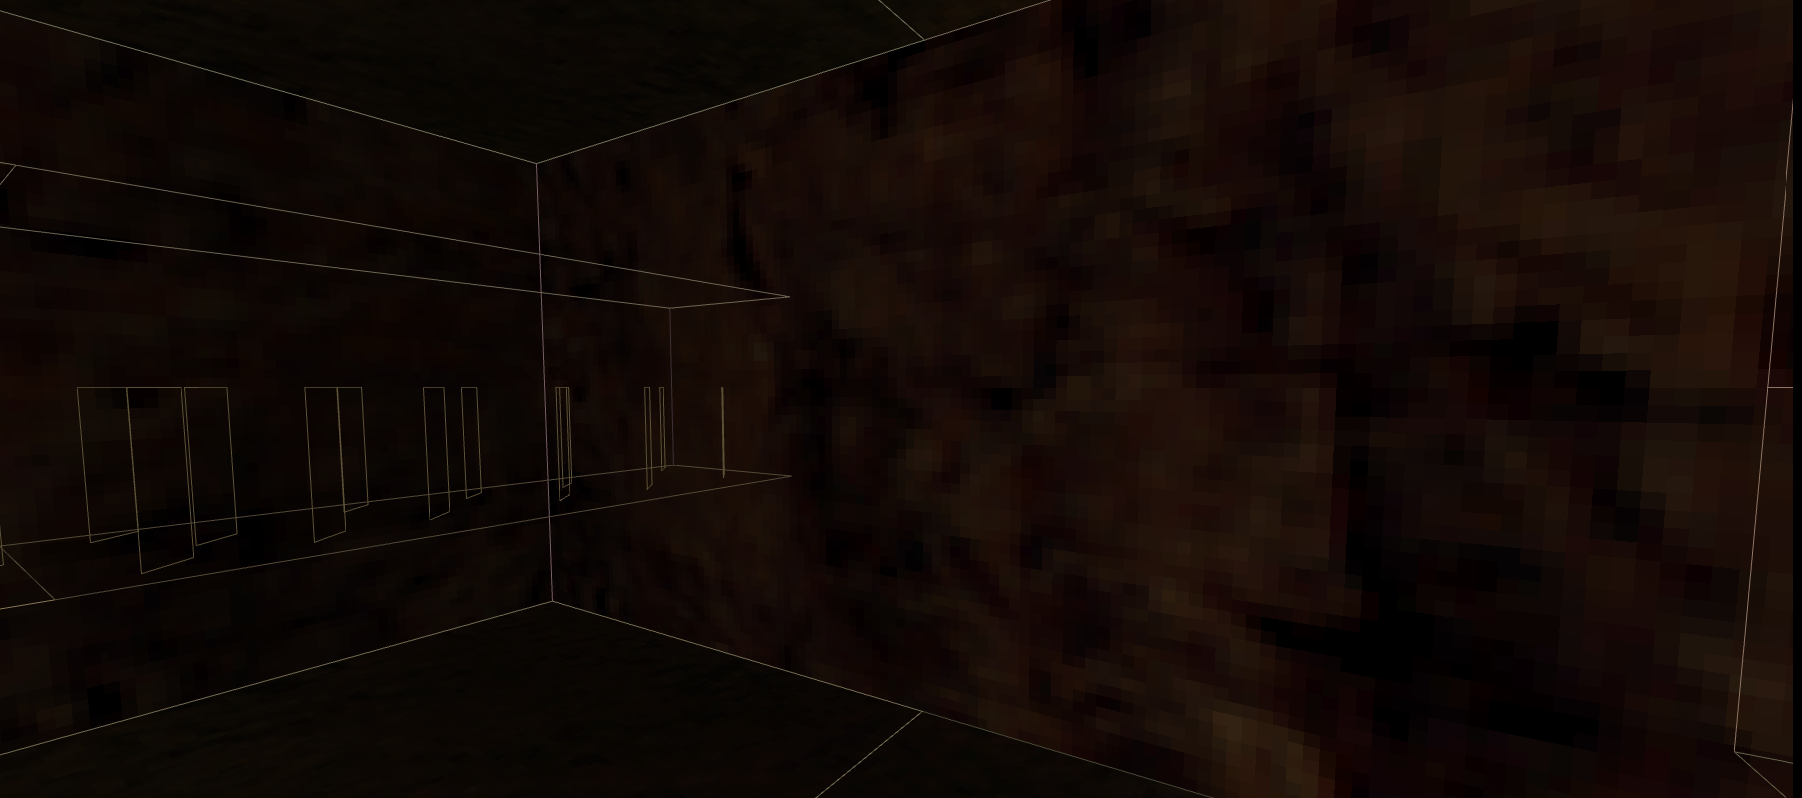
tiny issue, however. Let's follow through the cave and into a small observation room with no windows that I've made. We'll open up our console and type
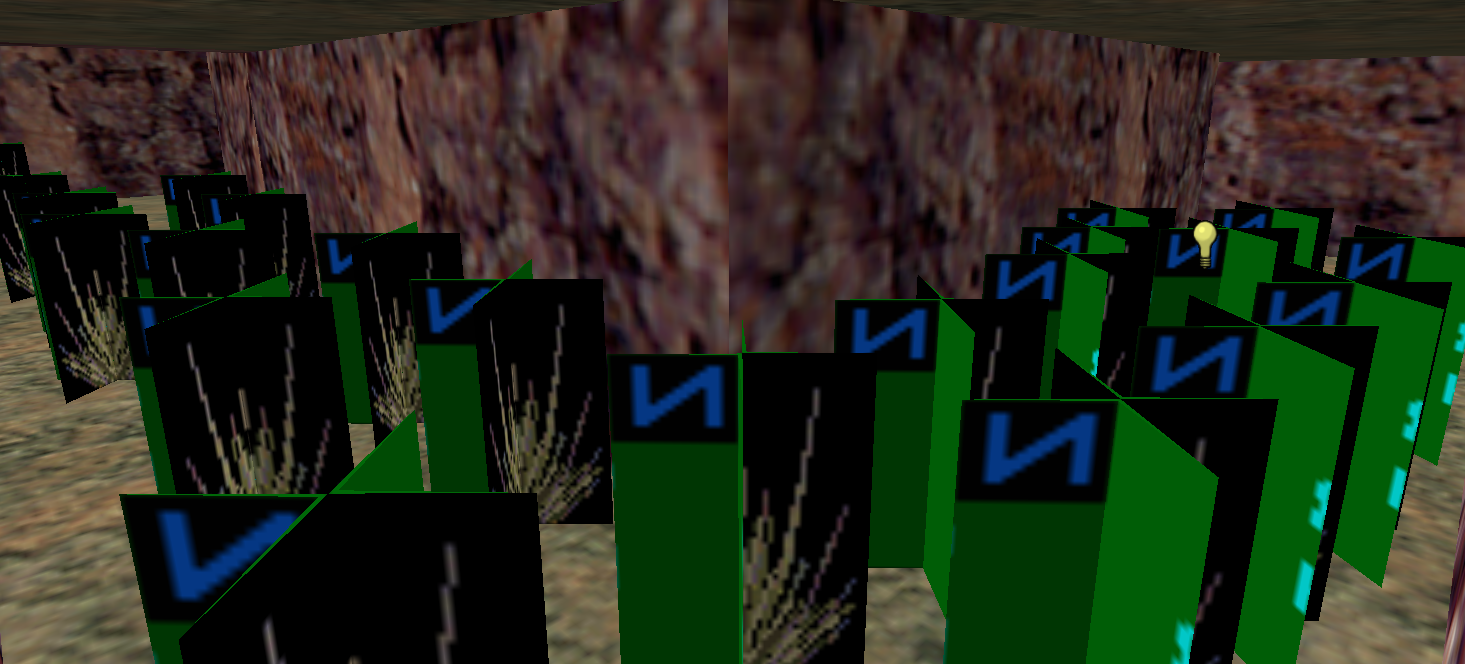
gl_wireframe 2 in it. Here's what we're going to see:
Oh no. See those little rectangles? That's our grass. See those same rectangles in the right part of the picture? Yeah, that's also our grass, but it's in a room that we cannot see! Or, rather, it shouldn't be rendering given our current location, but it is. That is a side effect of entity merging. If you don't like rectangles, here's another way to show it:
If any part of a brush entity is in a room that is visible, then the brush entity will also be visible in its entirety. Tie all the grass in your map to a single
func_illusionary and it will
always be rendered. If there's a lot of grass, that will negatively impact performance, and it won't do so slightly. The solution we'll use here for this problem is separating your big merged
func_illusionary into a few smaller ones based on visibility.
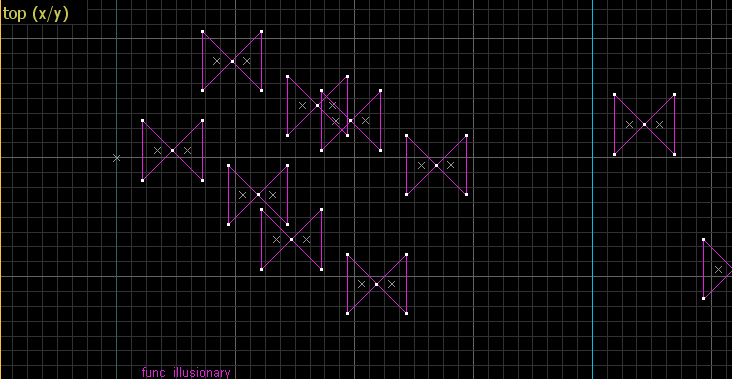
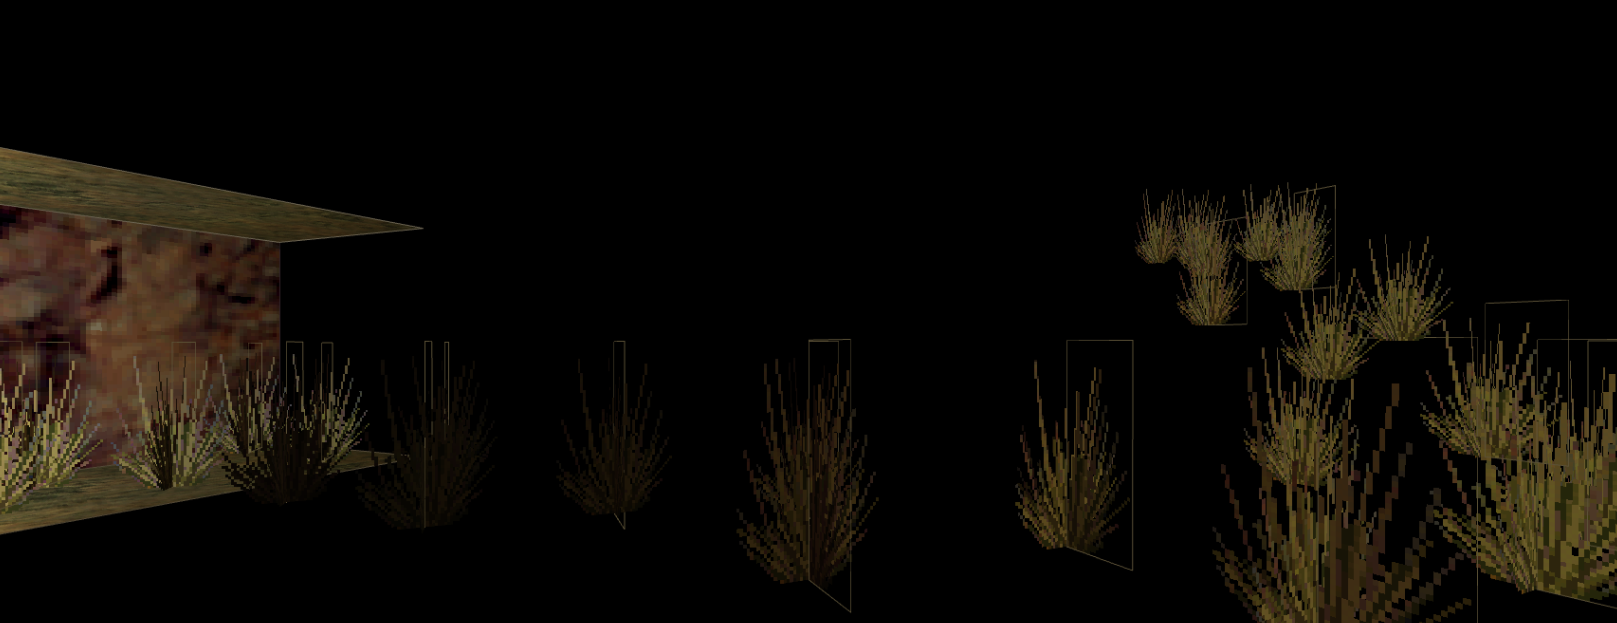
Here are screenshots of the results of doing so:
Each selected set of brushes is one individual
func_illusionary. Separating the original big
func_illusionary into three entities should help our map's visibility. Let's see:
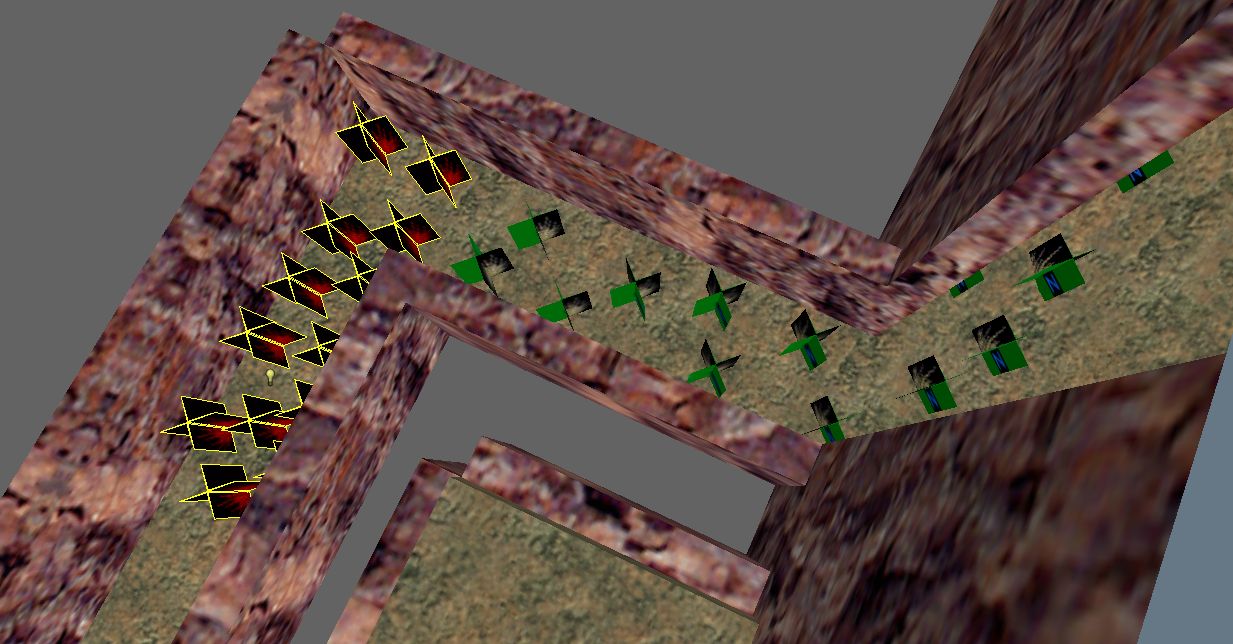
Much better! But everything has a cost. Here's a comparison of model counts given by the
BSP charts:
 Single entity
 Three entities
Sadly there's little we can do about it, so you've just got to strike a balance here. Well, we're done with the tricky part, time to have some fun.
Every Shrub Is Different
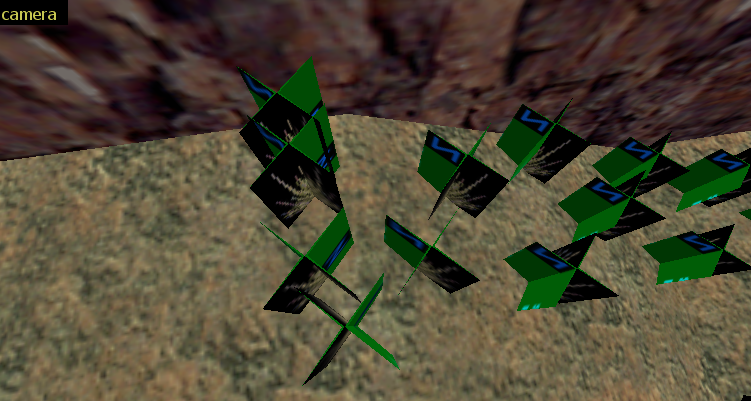
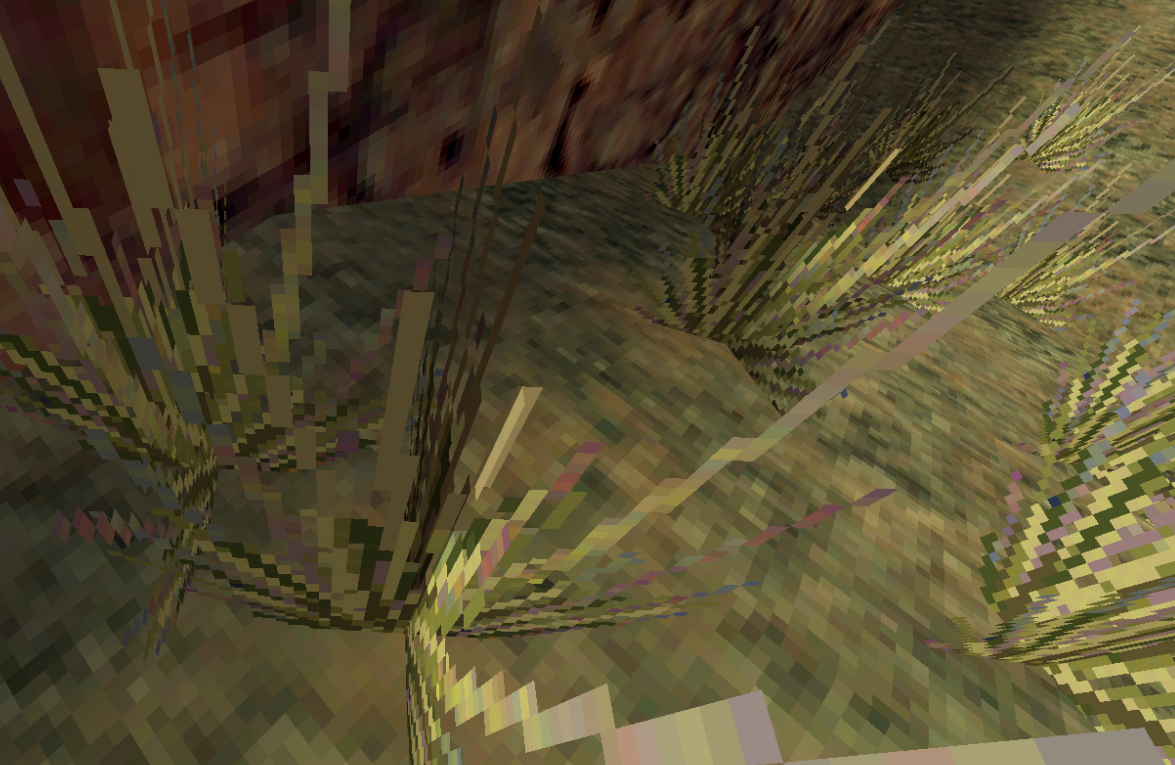
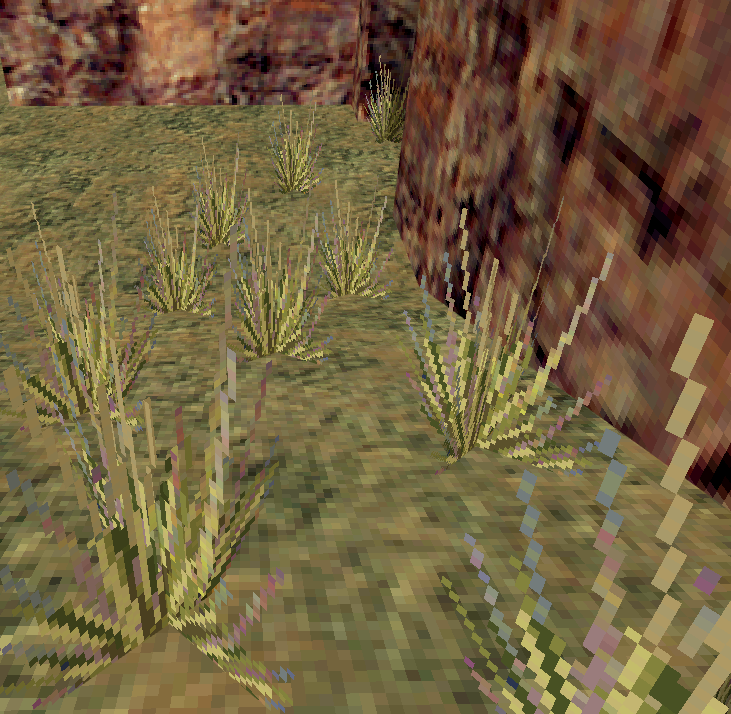
When grassifying your map, it's important to remember that repetitive patterns can get very annoying. Here's our grass right now:
Yeah... That's rather off-putting. Now, we don't want to make our grassy valley look uncanny, so we've got to do something about that. Well, actually, all you really have to do is two things: rotate and stretch.
So let's do some rotating and stretching, shall we?
And here's what we end up with in-game:
Yeah, it's all just manual labor. To make things a little easier, there's this nifty button in J.A.C.K.:
 Scale Lock
It will stretch the textures on your brushes as you stretch the brushes. Easy. But saves a lot of time and makes your
Shift and
A keys last a little longer.
Now, for the more technical ones among you, there's a tool called
MESS by the magnificent
Captain P that can be massive help in automatically turning sunny deserts into lush green jungles. Or into rocky sunny deserts. Depends on how you use it.
Essentially, it's a macro preprocessor. A MESS macro is much like an entity setup, that expands into a real entity setup. It can have parameters, too! It works as another compile tool that runs before
CSG and outputs not a
.bsp, but a
.map. The resulting
.map file has all the MESS macros expanded, leaving only actual, real brushwork and entities that will go into the compiled
.bsp file.
Among the many ways you can use MESS, it's also possible to make a bunch of pieces of grass serving as templates, then tell it to scatter their copies randomly within an area. It's pretty cool!
Wrapping up
Well. That's all there is to grass. At least as far as I know - I wouldn't mind to be proven wrong! By the way, you can get the map used for screenshotting all this from here:
Loading embedded content: Vault Item #6767
Now, go make some grass.
 Windawz
–
Original author
Windawz
–
Original author
Although I'm myself practically retired from mapping by now, and wasn't a big practitioner of mapping automation through tools like MESS, I found the tool remarkable and unique in what it does during my brief period of trying it out. In fact, I think that new mappers should absolutely try adding MESS to their compile process and utilizing the macros that it makes possible to engineer - it has great potential to reduce a lot of annoying and unnecessary work.
Brush entity merging is a really annoying technique to use manually: to reduce the amount of limits taken up by your map's entities this way, you have to sacrifice "readability" of your map source file. For example, it's rather time-consuming to take a single piece from merged entities and perform any individual operation on it. Your tool finally providing an abstraction over the technique gives me the hope that it can go as far as make this optimization zero-cost in terms of mapper's time spent, and this is extremely important - nothing kills the wish to map like the amount of brush paperwork that you have to do at times.
I'm excited to see where MESS will go in the future and would love to hear of any further improvements and new features!
EDIT:
Looking at the feature description, although this is a rather small detail that can be avoided if you use the feature carefully, I wonder how it determines the resulting "principal" or "primary" entity to merge all of the provided entities into. I think there should be a way to explicitly specify which one entity will serve as such.
It can make the map more refactoring-friendly: when you change things, some keyvalues may go out of sync with your changes and intent, and you may end up with bugs that you may not immediately notice.
As for the future of MESS, the big step with v1.2 is that instead of macro entities and a scripting language that is geared towards technical users, there is now a set of template entities and automation scripts that anyone can use. I intend to add and improve template entities when new things come up, such as Erty's func_illusionary + hlt_noclip 1 discovery. But I've also got ideas for new features, such as a geometry API that lets you generate brushes, and support for reading textures and models. Think of automatically covering brushes with thin extruded overlays with additive textures, or generating clip-brushes for prop models, or maybe even generating models from entities. Other ideas are things like issuing a warning if a func_ entity with a transparent texture doesn't have the right render mode or FX amount, or if a map transition uses an uppercase map name. Oh well, we'll see.